Introduction
Every time I publish something about Azure Local, the same question comes back in the comments, on LinkedIn or in a customer meeting: what machine do I need to run this?
I already wrote the answer to the other half of that question. The Azure Local Demolab article covers the software side in detail: the AzSHCI scripts, nested virtualization, the domain controller, the node and the Azure registration. What it does not cover is the boring part underneath, the physical machine that has to keep all of that running while you experiment.
This article is about that part. It is written as the guide I wish I had found before spending money, so it mixes two things:
- A practical view of what the hardware has to deliver and which platform makes sense for which budget.
- My own path through the problem. I went through several laptops before I accepted that a work laptop is not a lab and I ended up buying a second-hand server from a German classifieds site.
If you only want the shopping advice, jump to Choosing a Dedicated Lab Platform. If you enjoy reading about somebody else spending a weekend cleaning dust out of a 2019 motherboard, start here and keep going.
What an Azure Local Lab Demands From Hardware
The Demolab article lists the baseline requirements:
- A machine with a TPM chip
- A processor capable of running Hyper-V, with nested virtualization support
- 32 GB of RAM as an absolute minimum for basic testing
- 64 GB of RAM or more as the recommended amount
Those numbers are honest for what the Demolab does, which is a domain controller VM plus a single Azure Local node VM acting as a hypervisor itself. On 32 GB you can get the cluster registered in Azure and click through the portal. It works.
The problem starts the moment you want to do something with that cluster. Every interesting workload on top of Azure Local adds another layer of nesting and another chunk of memory:
- Arc VMs are the cheapest addition, but they still come out of the same memory pool.
- AKS enabled by Azure Arc needs a control plane node and at least one worker node and each of those is a VM inside the VM.
- SQL Managed Instance enabled by Azure Arc sits on top of AKS Arc and expects resources of its own.
- LLM workloads, which is where I ended up in the LLM on AKS article, are the fastest way to find the limits of your machine.
So “64 GB” is the wrong number to fix on. The requirement is however much RAM your most ambitious project needs and that number only grows. This is the single most important thing to understand before you buy anything: for an Azure Local lab, memory capacity beats clock speed and expandability beats both.
The second lesson is less technical. A lab that lives on the laptop you work with is a lab you will switch off. That matters more than any spec sheet.
The Laptop Years
For a long time my lab was a folder of scripts and a Hyper-V role on whatever laptop I was working with at the time.
For the last three years that turned into a standing conversation with every employer I worked for. At each hardware refresh I asked for the same thing and it was never the fastest CPU or the nicest screen. It was RAM. If you take one negotiating tip from this article, that is the one: the specification that decides whether you can run a lab on your work machine is memory, so make it the thing you argue for.
Three laptops later, this is how it went.
Laptop one: 32 GB at Medialine
The first machine could run the lab, but only barely. Everything was tight and nothing was comfortable.
Even so, it was far from useless. It was enough to reproduce customer errors, which is worth a lot on its own and it was enough to write and test management automation for the Azure Local hosts themselves. What I could not do was put anything meaningful on top of the cluster once it was running.
Laptop two: 64 GB at Devoteam
This is the one where the lab became productive. With 64 GB I could finally cover the workloads that matter: AKS, AVD and the rest of the stack that sits on an Azure Local instance rather than next to it.
I got a lot of use out of that machine and most of it happened outside working hours, building and testing pipelines for Azure Local. It was also the first laptop where I could run the lab and work at the same time, as long as I did not commit the memory completely.
The limits were still there, they had just moved:
- In meetings, especially with Teams running, the machine became uncomfortable to use.
- I could never push the lab to its full potential. Memory was no longer the only constraint, since the CPU cores I dedicated to the lab were cores the rest of the system did not have.
Laptop three: 32 GB at adesso
My current work laptop went back down to 32 GB and this time it does not matter, because the lab no longer lives on it. By then I had already bought hardware dedicated to the job, which is exactly what the rest of this article is about.
What the laptop years were worth
I do not want this to read as a complaint, because those years were good ones.
The best part was that the lab came with me everywhere. Train, hotel, customer site, sofa. That portability is something the server in my basement will never give me and I still miss it.
It is also where I learned how Azure Local works underneath. When the whole environment lives inside your own Hyper-V, you can experiment without fear of breaking anything, because you can always repair it, redeploy it from scratch or roll back to a snapshot. That freedom to poke at things is the fastest way to learn a platform and it is the strongest argument for starting on the machine you already own before spending a single euro.
The laptops did share one unmistakable trait. As soon as the lab started, the fans sounded like jet turbines and most of the time it was not a good idea to keep the machine on your lap.
So the honest summary is this: a laptop is an excellent place to learn Azure Local and a difficult place to live with Azure Local. The cracks that eventually pushed me to buy hardware were always the same four:
- Memory was the wall every time. It decided what I could stack on top of the node VM, long before the CPU or the disk had anything to say.
- The lab competed with actual work. A running nested cluster eats the resources you need for Teams, the browser and the twenty other things a consulting day involves.
- Nothing could stay running. Closing the lid, rebooting after updates or travelling meant tearing everything down and rebuilding it. Long running tests were not possible, which quietly rules out anything about lifecycle, updates or day 2 operations.
- Thermals and noise. A laptop pushed to its limit for hours is loud and hot and it ages faster for it.
Once the lab stopped being a one afternoon exercise and became the backbone of what I publish here, it needed its own machine.
Choosing a Dedicated Lab Platform
Before buying anything, I spent about two months comparing options. These are the three realistic paths, with what I found on the German market at the end of 2025.
Option 1: Keep using your laptop or workstation
Good for: learning the Demolab, single node scenarios, occasional testing. Budget: zero if you already own it, or a RAM upgrade if your machine allows one. Where it breaks: anything that needs to stay running and anything stacked on top of the Azure Local node.
Before you spend money, check whether your current machine can take more memory. Going from 32 GB to 64 GB in a laptop that supports it is by far the cheapest upgrade in this whole article.
Option 2: A mini PC or NUC
Good for: a quiet, small, always on lab in a normal apartment. Budget: the sweet spot on paper, the disappointment in practice.
This was my preferred option for a long time. It is silent, it is small, it draws very little power and it does not look like industrial equipment in your living room. My target was more than 8 cores and around 96 GB of RAM, which is what I estimated I needed to run the node VM plus AKS Arc plus something interesting on top.
I could not find anything under 800 EUR that met it. The models that reach 96 GB or 128 GB of RAM are the newer and more expensive ones and the affordable models cap out exactly where an Azure Local lab starts to get interesting. If 64 GB is enough for you, a mini PC is a very good answer. If you need more, the price curve turns against you fast.
Option 3: A second-hand server
Good for: maximum RAM and expandability per euro. Budget: surprisingly low for the machine and then the accessories add up. Where it hurts: noise, size, power draw and the fact that you become the support department.
Enterprise hardware from around 2017 to 2019 is retired constantly and sold cheaply. It is heavy, it is loud, it uses more electricity and it has no warranty. In exchange, you get server grade memory capacity, ECC RAM, more PCIe lanes and drive bays than you will use and a platform you can keep upgrading component by component.
That is the option I went for and the rest of this article is how it went.
The Server I Found
On November 19, 2025 I saw a listing on Kleinanzeigen, the German second-hand marketplace, titled “Server Thomas Krenn Supermicro Intel Xeon”. It was priced at 350 EUR, local pickup only, close to where I live. Naturally, after checking with my wife, the real boss at home, I could not let the opportunity pass.
The technical description was:
- Supermicro X11 motherboard
- Intel Xeon Silver 4110 CPU
- 2 x 32 GB DDR4 RAM
- 6 x 240 GB Samsung SSD disks
- 2 x 2 TB Hitachi SAS disks
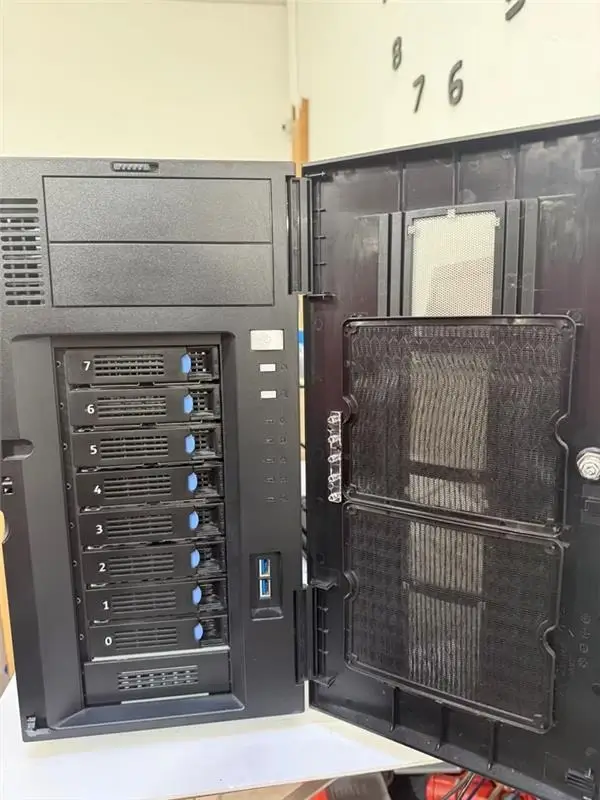
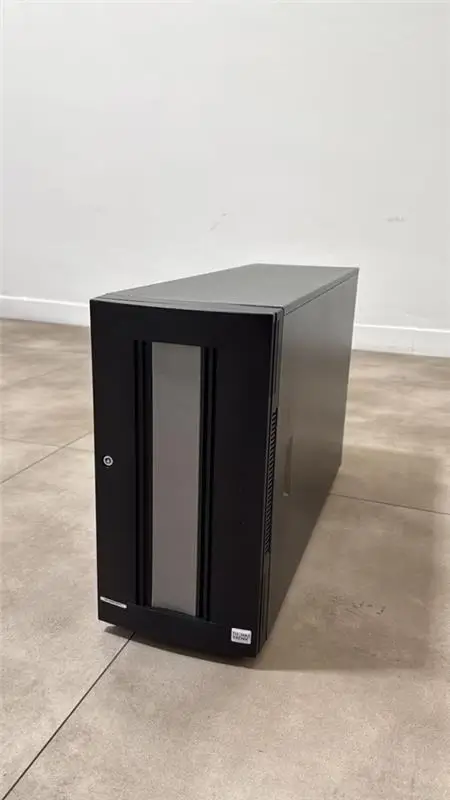
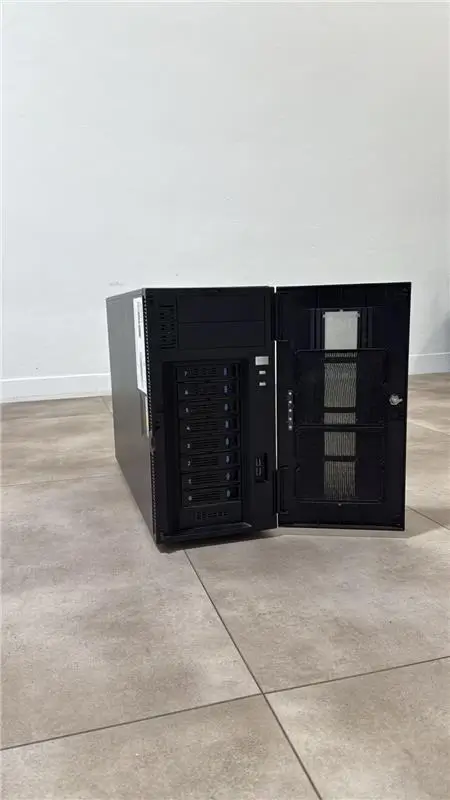
The listing said the server worked without issues, which I tested with the seller when I picked it up. Do this. Second-hand sales like this one carry no warranty and no return option, so the five minutes you spend watching it boot at the seller’s place are the only quality assurance you get. After negotiating a bit I paid 320 EUR.
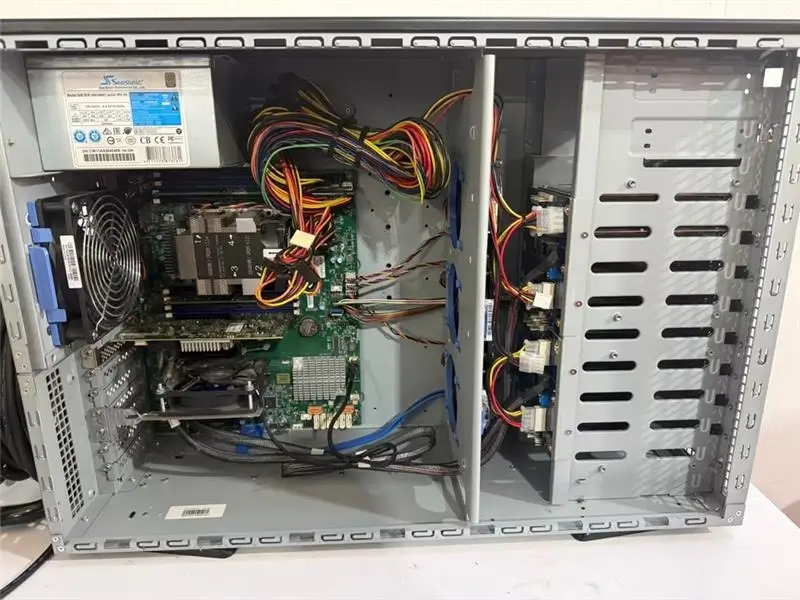
Once the server was home, the first thing I did was take it apart to see which components it had. Listings are usually written from memory, not from an inventory, so the real configuration was:
- Motherboard: Supermicro X11SPL-F
- CPU: Intel Xeon Silver 4110, 8 cores, 16 threads, 2.1 GHz base, 3.0 GHz turbo and 85 W TDP
- RAM: 64 GB DDR4 2400 LRDIMM ECC, 2 x 32 GB ATP Thomas Krenn modules
- RAID controller: Adaptec ASR 8805 PCIe 3
- Chassis: Chenbro SR11266
- PSU: Seasonic SPP 650RT
- Cooling: five fans along the chassis for front airflow plus an LGA3647 CPU cooler
Then came the first lesson that no spec sheet warns you about. When I tried to connect it for the first time, I realized it only offers VGA for video output. The IPMI interface was not configured with DHCP and I did not feel like resetting it. So, with four monitors at home, guess which connector I did not have? Correct, VGA. I had to wait a couple of days for a VGA to HDMI adapter before I could see anything at all.
If you buy an older server, order that adapter with the machine. While waiting, I used the time to read the motherboard manual and blow the dust off the board, which had not been opened in years.
Adding a TPM Module
Azure Local requires a TPM 2.0 chip and that requirement does not disappear just because you run it nested. If you plan to follow the Demolab, check whether your board has a TPM header and whether a module is installed in it, because on second-hand server boards it very often is not.
Mine was not, so I bought a cheap module from Amazon. It arrived before the VGA adapter and installing it was simple, with very little room for mistakes. The header is keyed, so it only fits one way.
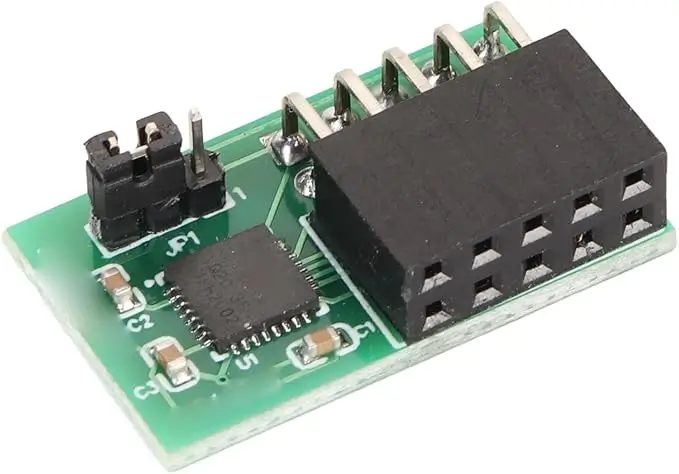
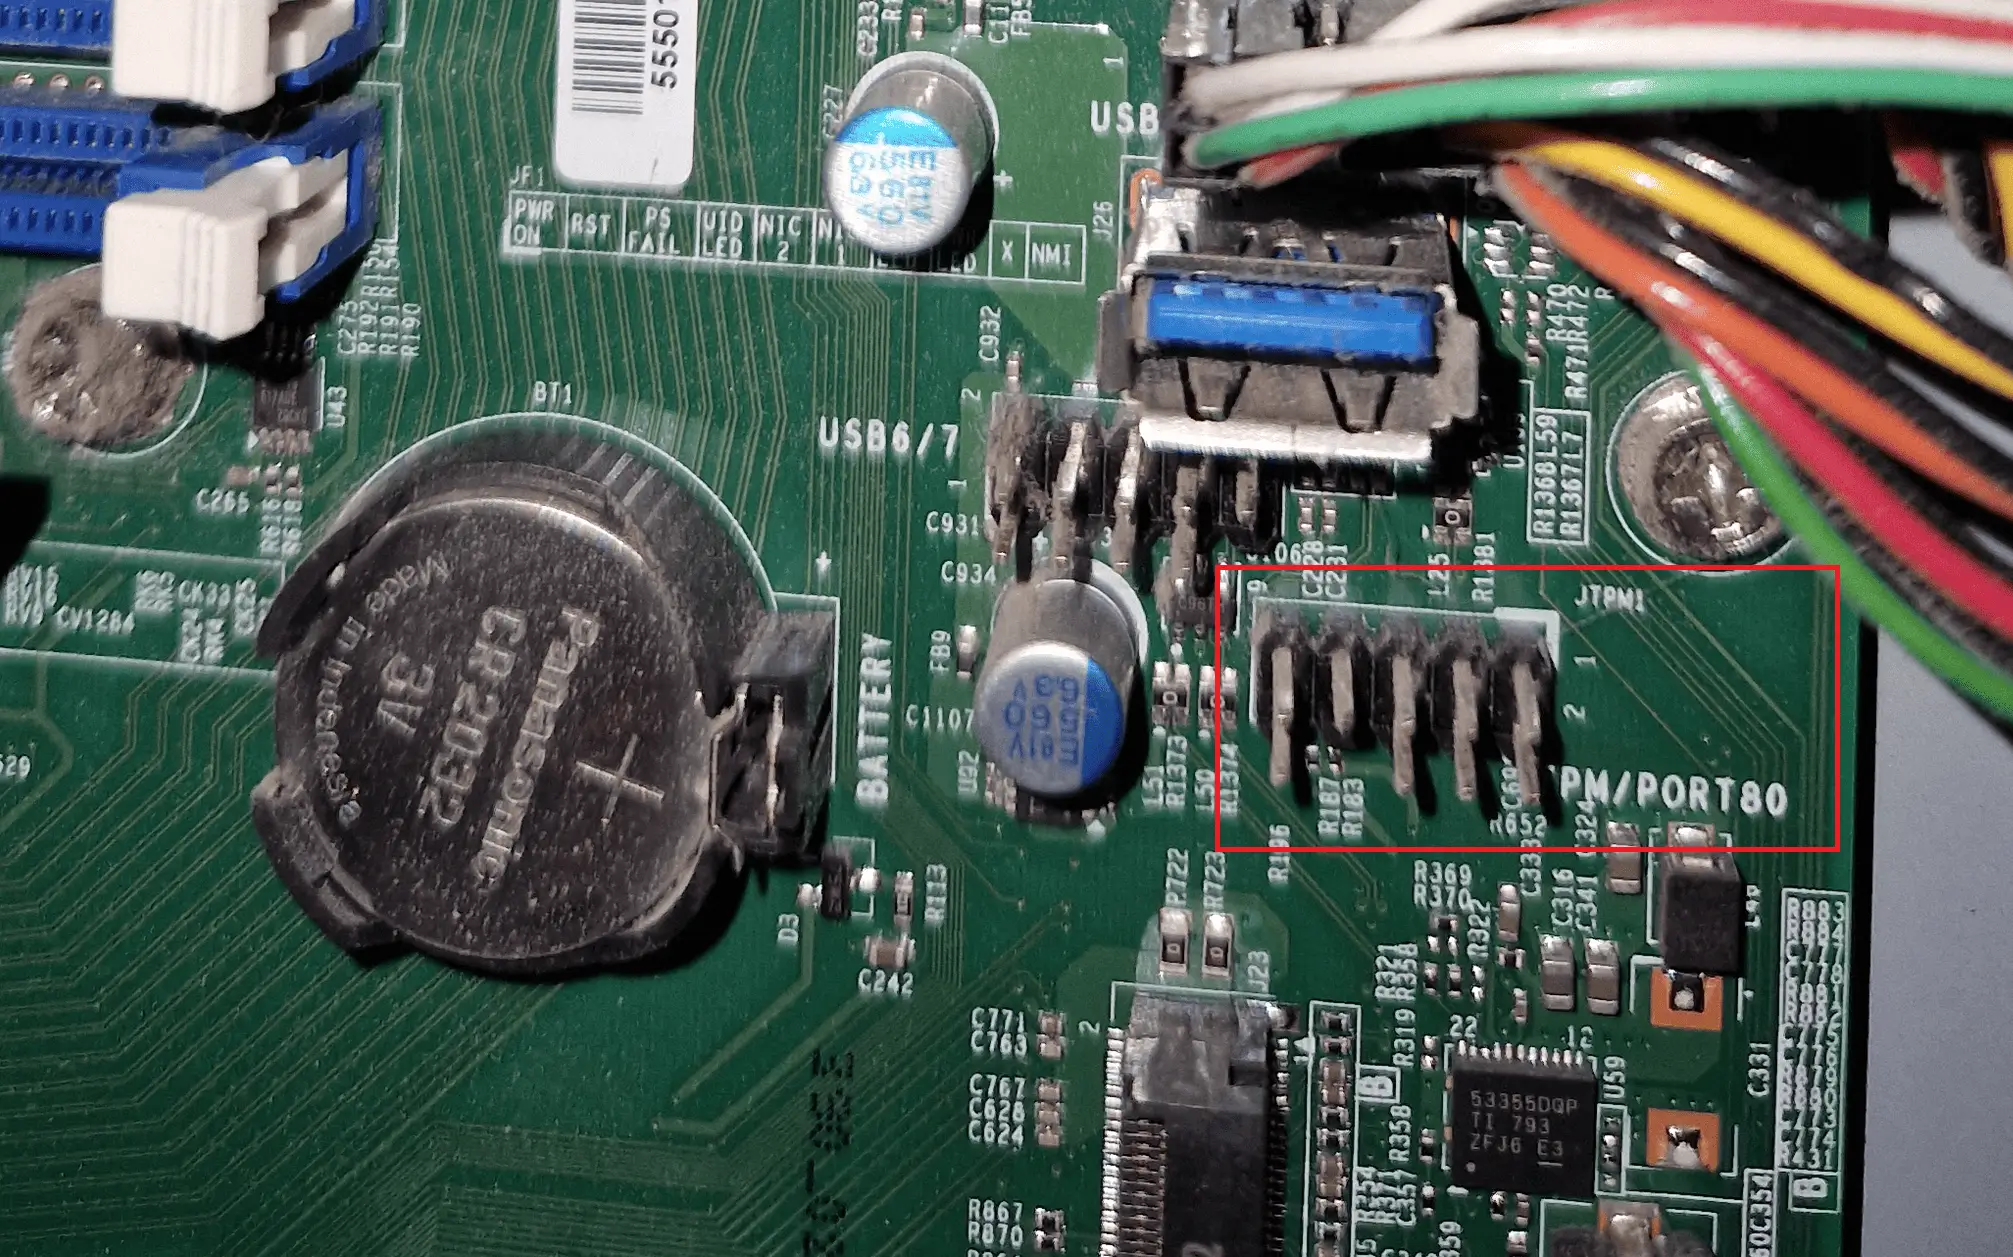
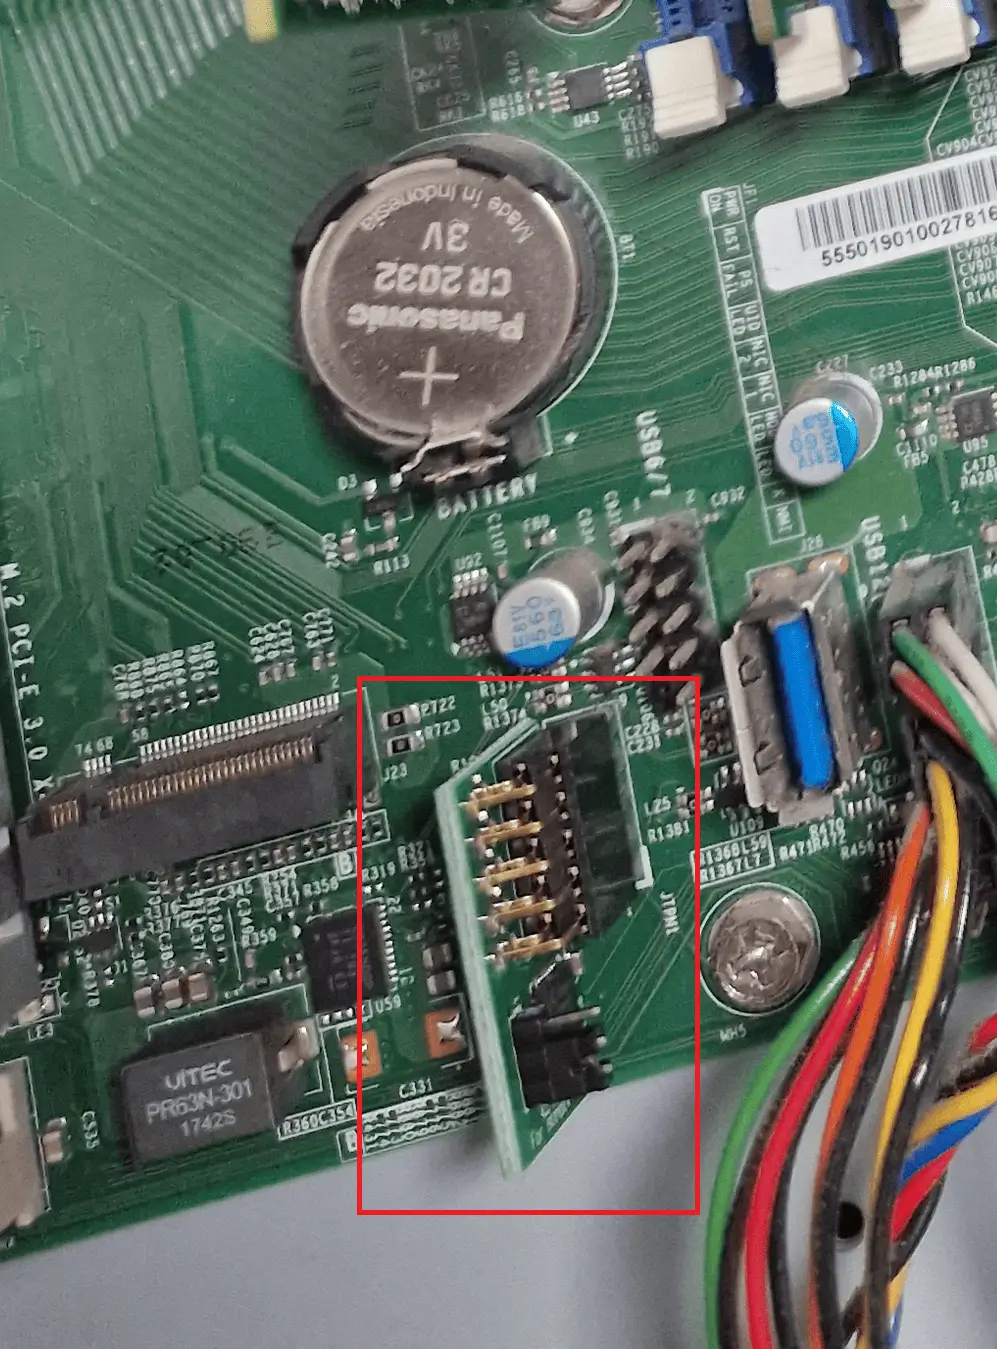
When the VGA adapter finally arrived and I started configuring the server, I found the next typical second-hand surprise: the firmware of almost every component, including the BIOS, the IPMI and the RAID controller, had not been updated in years. In many cases the installed versions were from 2019. Budget an afternoon for this. I cover the update path and the problems it caused in the software section.
CPU and Memory Upgrade
After a couple of days running the lab on the original configuration, two limits became visible. The 64 GB of RAM was a fine starting point, but it was exactly the amount I already had, so nothing had changed. And with 8 cores, the Xeon Silver 4110 was going to become the next bottleneck as soon as several nested VMs were busy at once.
This is where the second-hand server option pays for itself. Both problems were solved by buying parts.
The CPU
Once I had confirmed the motherboard model, I looked up compatible processors. Older Xeon Scalable CPUs are widely available on international platforms such as AliExpress at prices that made me suspect a scam. Given how low the risk was in absolute terms, I decided it was worth trying.
I chose an Intel Xeon Gold 6140 with 18 cores. I ordered it on November 24, it arrived on December 6 and I mounted it a few days later. The socket LGA3647 mounting mechanism is different from consumer sockets, since the cooler and the CPU carrier clip together before going onto the board, so read the manual once before you start.
Order thermal paste at the same time as the CPU. It costs a few euros and it is the one consumable you cannot improvise, since whatever is left on a second-hand cooler is years old and has done its job already.
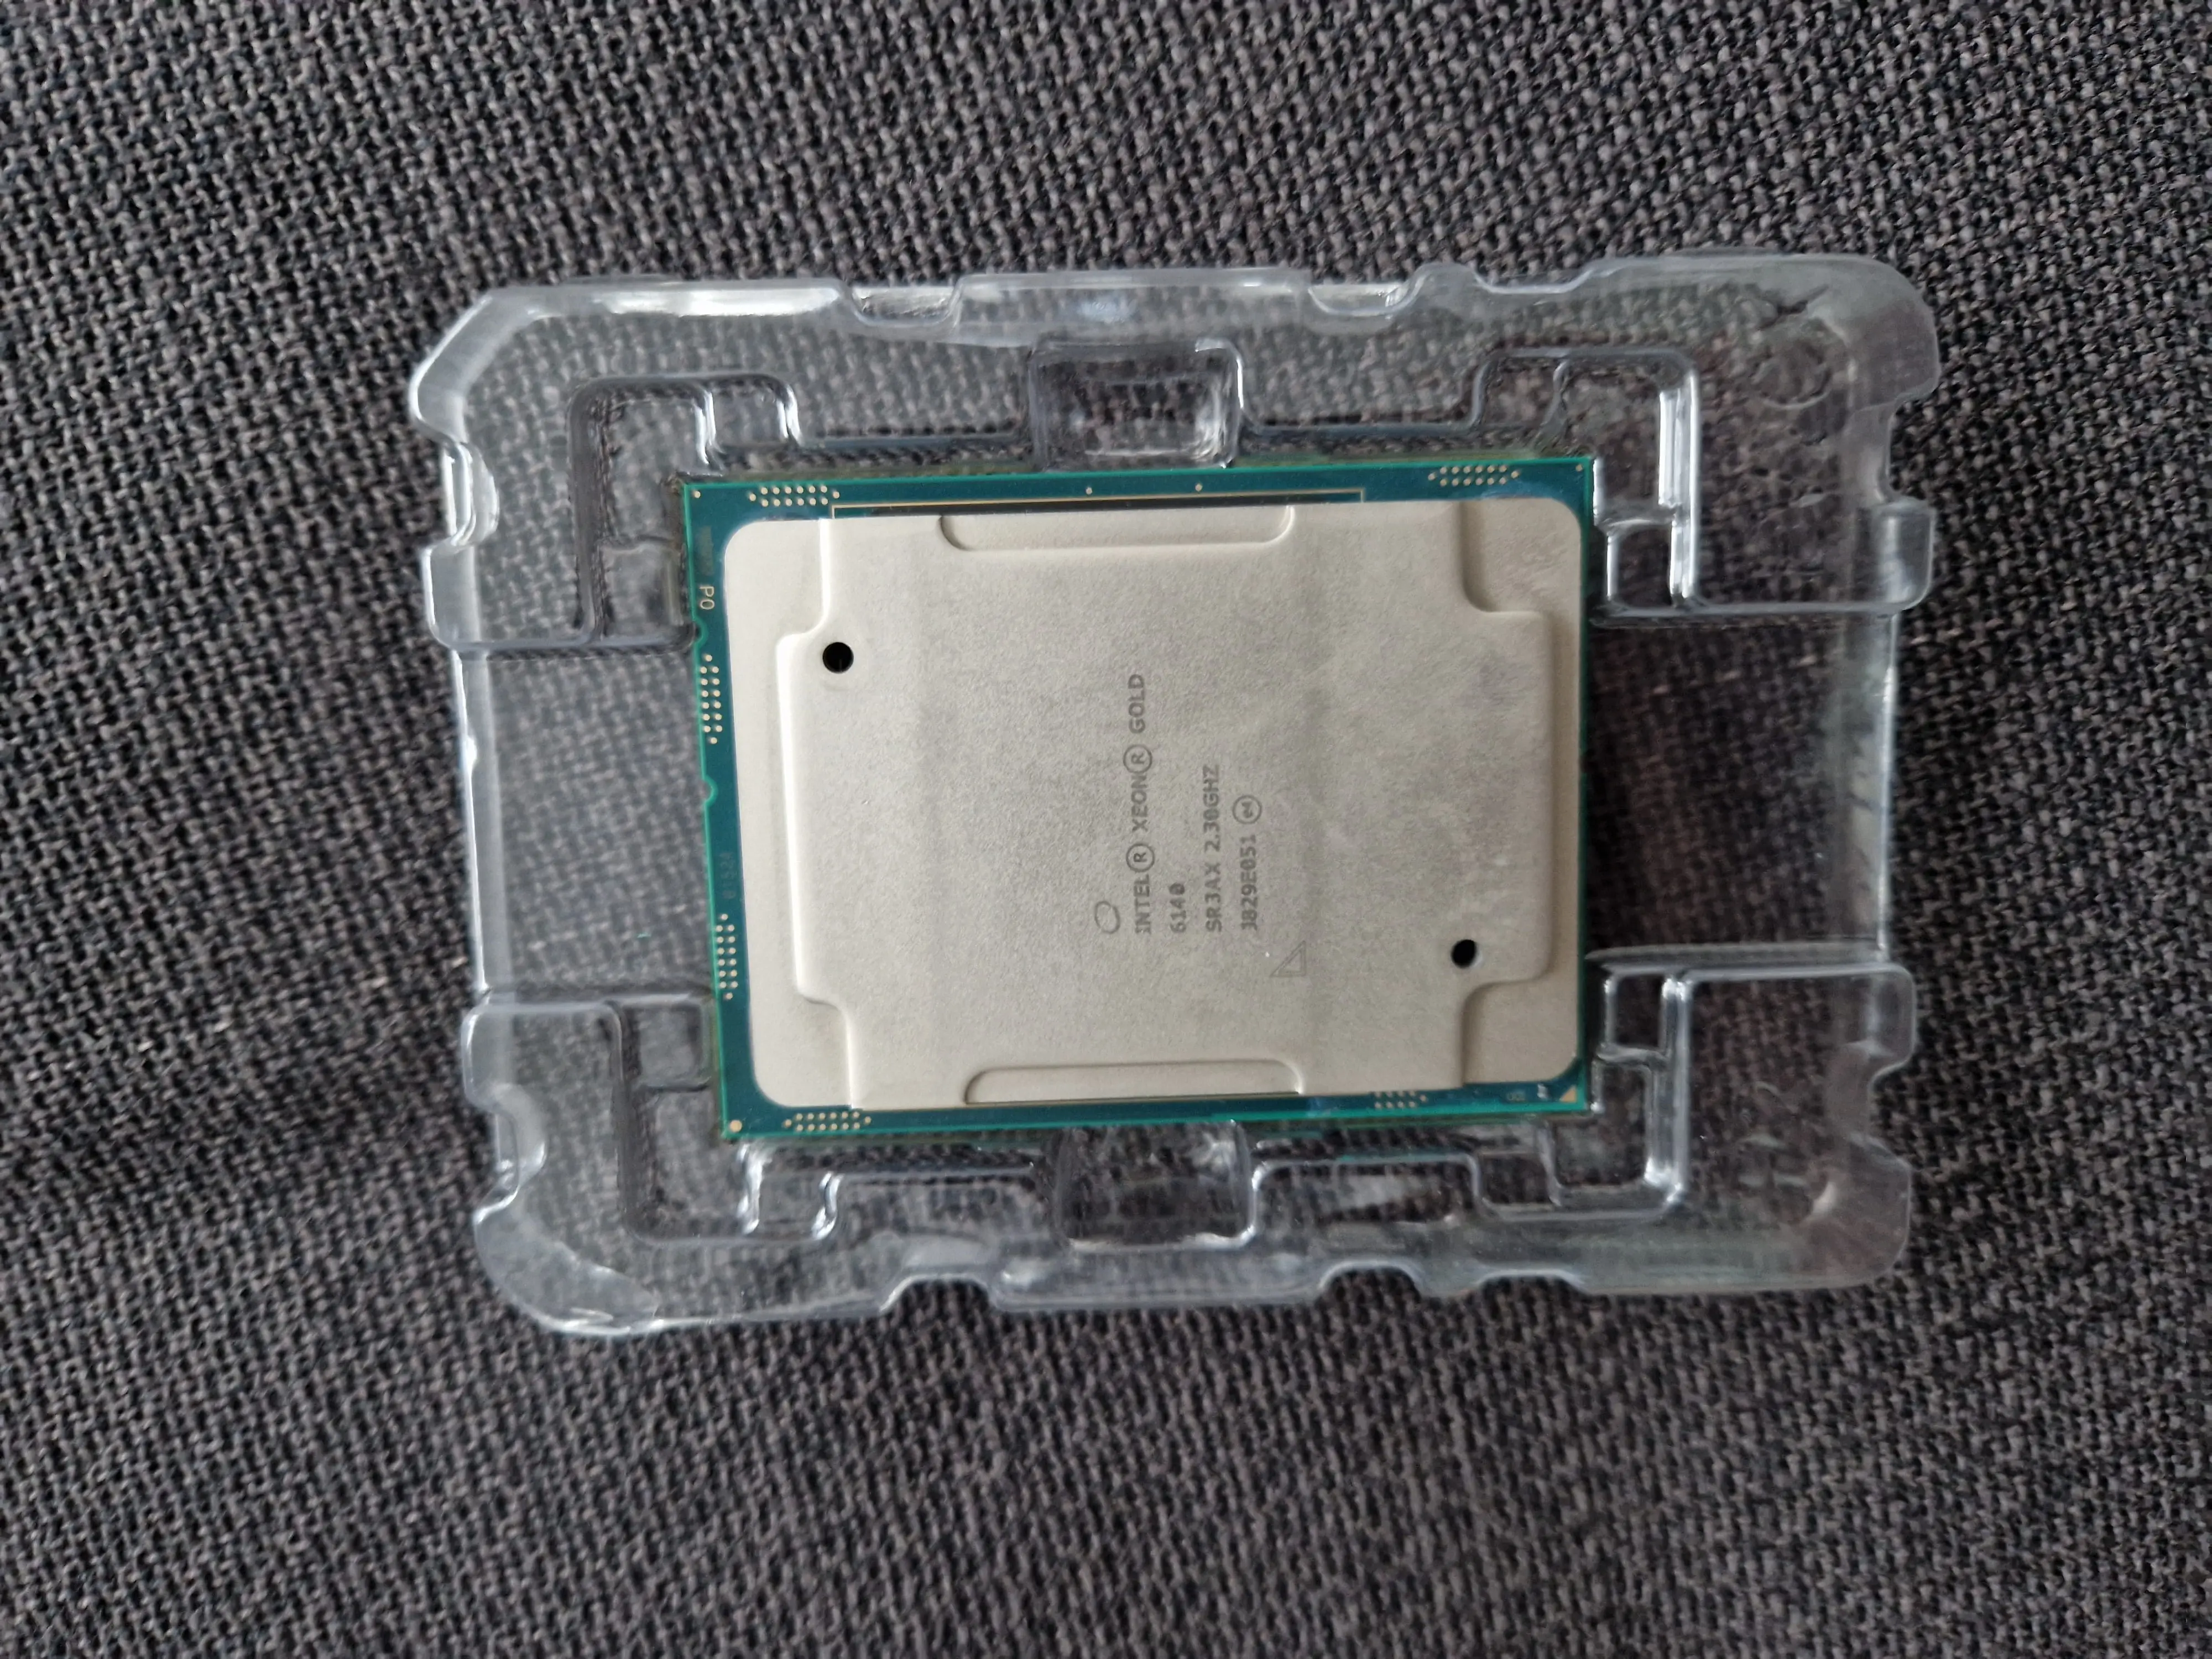
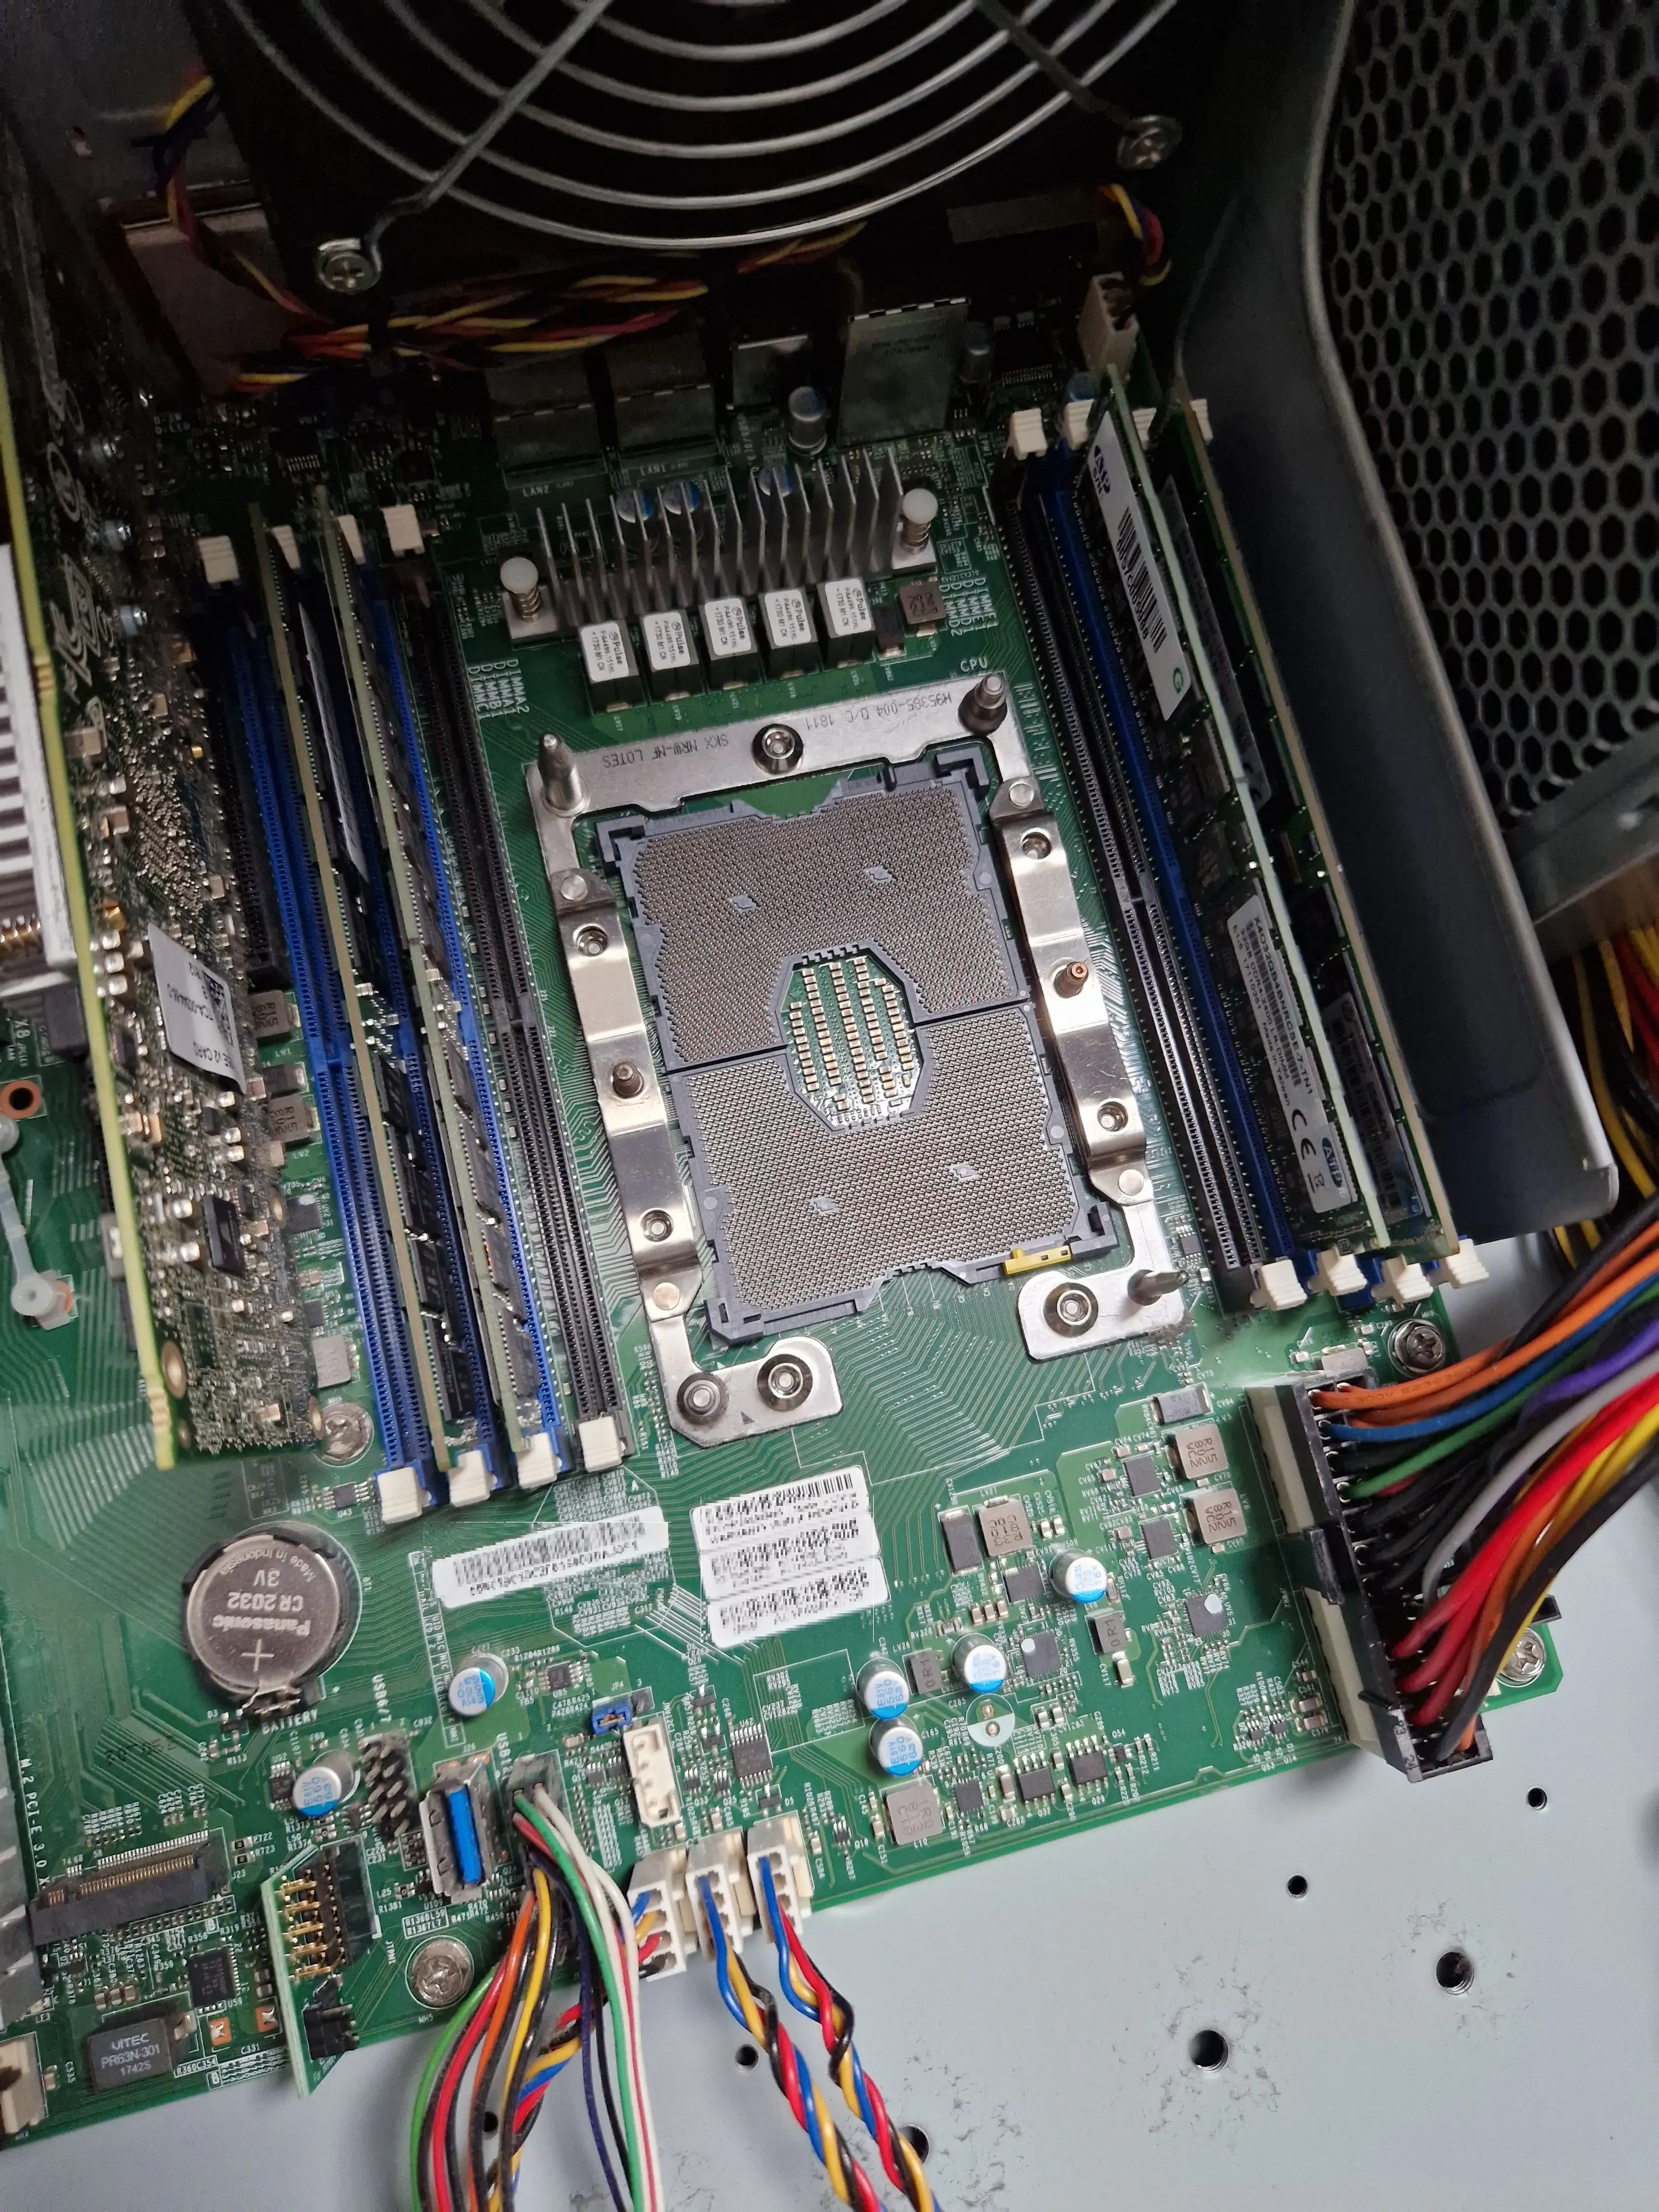
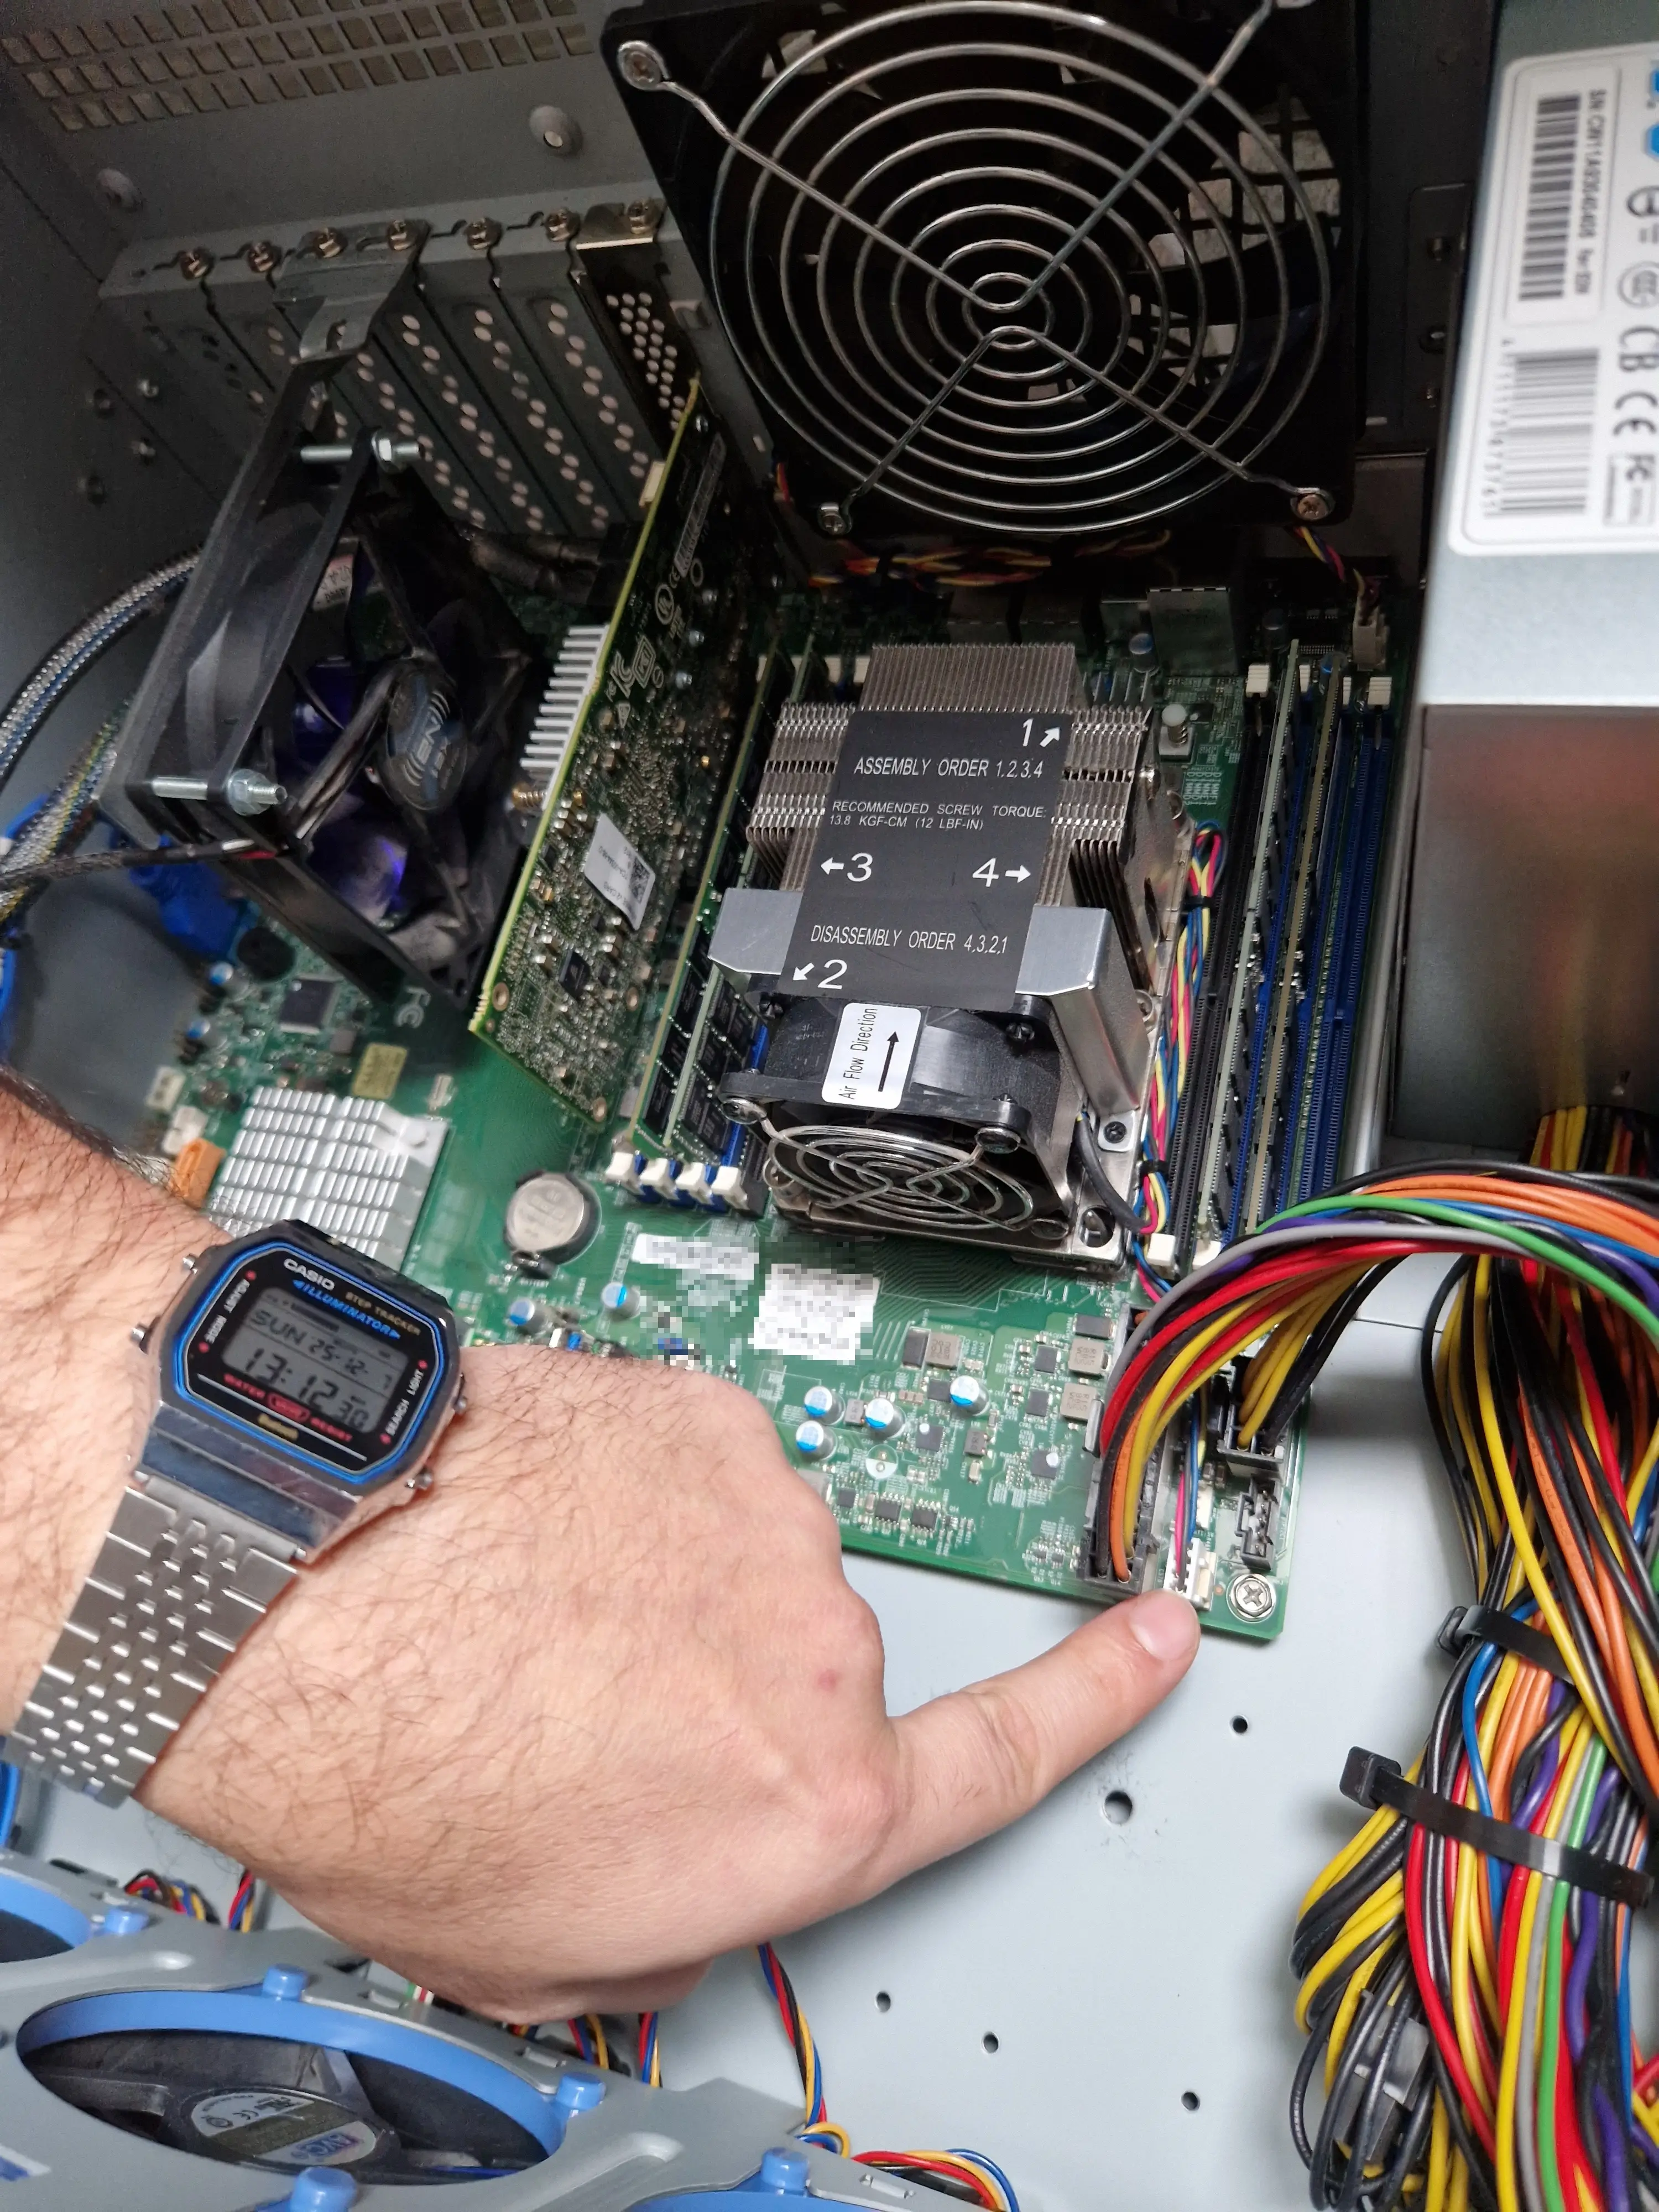
Not every attempt worked. I later tried a Xeon Platinum 8160, but the board did not recognize the DIMM B1 module with it installed, so it went back to the seller. Budget for the possibility that a cheap second-hand CPU does not behave.
The memory
The RAM was less forgiving. The server came with LRDIMM modules and load reduced memory cannot be mixed with registered or unbuffered modules. That single detail decides your upgrade path for you: check which memory type your board and existing modules use before you buy anything, because the wrong type will not run at all.
Combined with how DDR4 prices have developed recently, this was not cheap, although compared with DDR5 it was still a bargain. I added two more 32 GB Hynix ECC Load Reduced DDR4 2400 MHz modules for a total of 128 GB. I ordered them on December 1 and they arrived on December 4.
I will not bore you with the reasons behind the memory price increases, since there are already enough videos about it. What I can say is that, the way things look, I will be living with 128 GB during 2026.
Where the Server Lives
Here is the part of the decision that spec sheets never mention and that almost sent the whole project back to the classifieds.
After a couple of days with the server running in the office inside our apartment, both my wife and I agreed it was too noisy to stay there. It was not extremely loud, but it had that typical frequency that drills into your ear. Five chassis fans doing their job properly is not a living room sound.
So the server was exiled to the basement, which created two new problems.
Network
I have no Ethernet cabling from our second floor apartment down to the basement. I solved it with two PowerLine adapters, which carry Ethernet over the electrical wiring. My basement is on the same electrical circuit, so it worked without any tricks. It only reaches around 150 Mbit/s, but it is stable and for a lab that mostly talks to Azure and to itself that is more than enough.
Since some new devices down there need Wi-Fi as well, I set up a small access point. I reused an old travel companion, a GL AR300M that had been gathering dust and now has an essential job.
Add cabling to your budget while you are at it. A basement corner is never next to the socket you need, so around 10 metres of Ethernet plus the same again in power extension cost me about 20 EUR. It is the kind of expense nobody plans for and everybody ends up paying.
Climate
The bigger risk was the environment. Our basement is often more humid than I would like and gets colder than expected in winter. Moving the server there would not help much if it died after a couple of months.
So I bought a battery powered temperature and humidity sensor with Wi-Fi that reports once per hour, which is more than enough resolution for this.
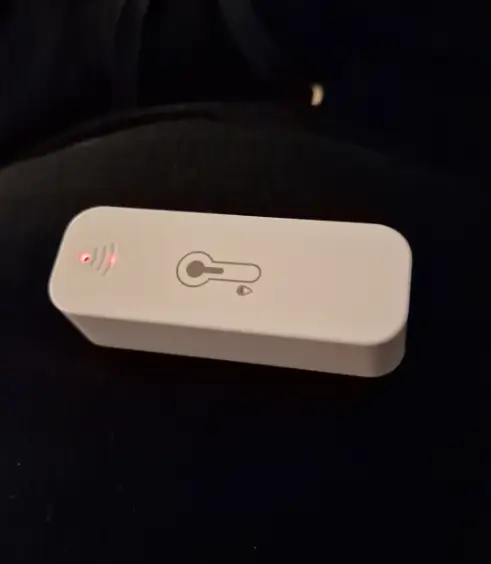
I monitored the basement through the first two weeks of December and saw humidity go above 70 percent at times. That is too high for electronics you want to keep for years. The fix was a dehumidifier and I chose the most analog version available.
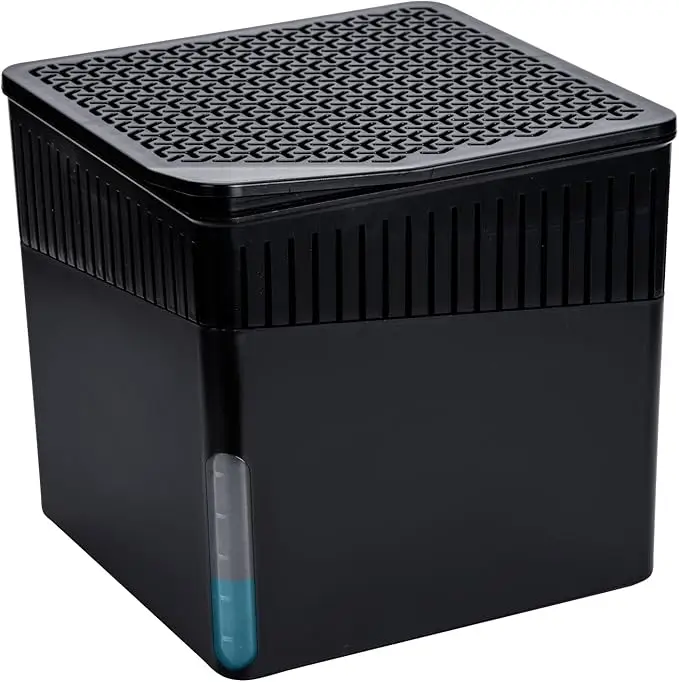
Humidity dropped to around 50 percent and stayed there, which no longer worries me. If you are considering a basement, a garage or an attic for your lab, measure first for two weeks and decide afterwards. It costs very little and it tells you whether you need to solve a climate problem or not.
The last piece was the least technical purchase of the whole project and one of the most useful: a small wheeled cart for 19,99 EUR. It keeps the chassis off the basement floor, which is exactly where humidity and dust are worst. It also means I can roll the server out to open it instead of dragging a heavy chassis across the room every time I want to change a component.
Storage and Power
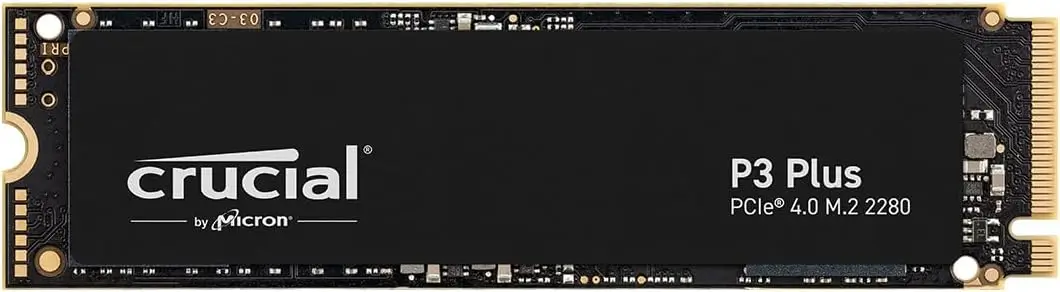
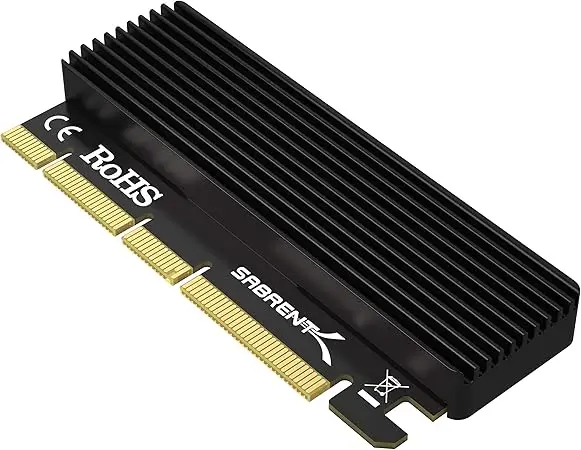
The last hardware addition was an NVMe drive I already had at home. The board has no M.2 slot, so I connected it through a PCIe adapter card, which also gives it the full bandwidth it deserves. It was not a strict requirement, since the SSDs that came with the server work fine, but nested virtualization is very sensitive to storage latency and this is the upgrade you feel most in daily use.
Finally, there is a smart plug. It does two jobs: it measures how much electricity the server draws and it lets me cut power completely when I am not using the lab. On a machine of this generation that is not a detail. Electricity is the running cost that quietly outgrows the purchase price if you leave everything switched on out of habit.
The numbers are better than I feared:
- Around 150 W while the server is running.
- Around 18 kWh per month in practice.
- Roughly 5 EUR per month on my German electricity tariff.
Those first two figures look inconsistent until you do the arithmetic. A machine like this drawing 150 W around the clock would land closer to 108 kWh per month. My bill stays near 5 EUR because the server is off most of the time. The smart plug is what makes switching it off effortless enough to become a habit.
If you go the second-hand server route, plan for this from day one. Decide that the lab is something you switch on when you need it, not something that hums along in the background. Do that and the running cost stops being an argument against the whole idea.
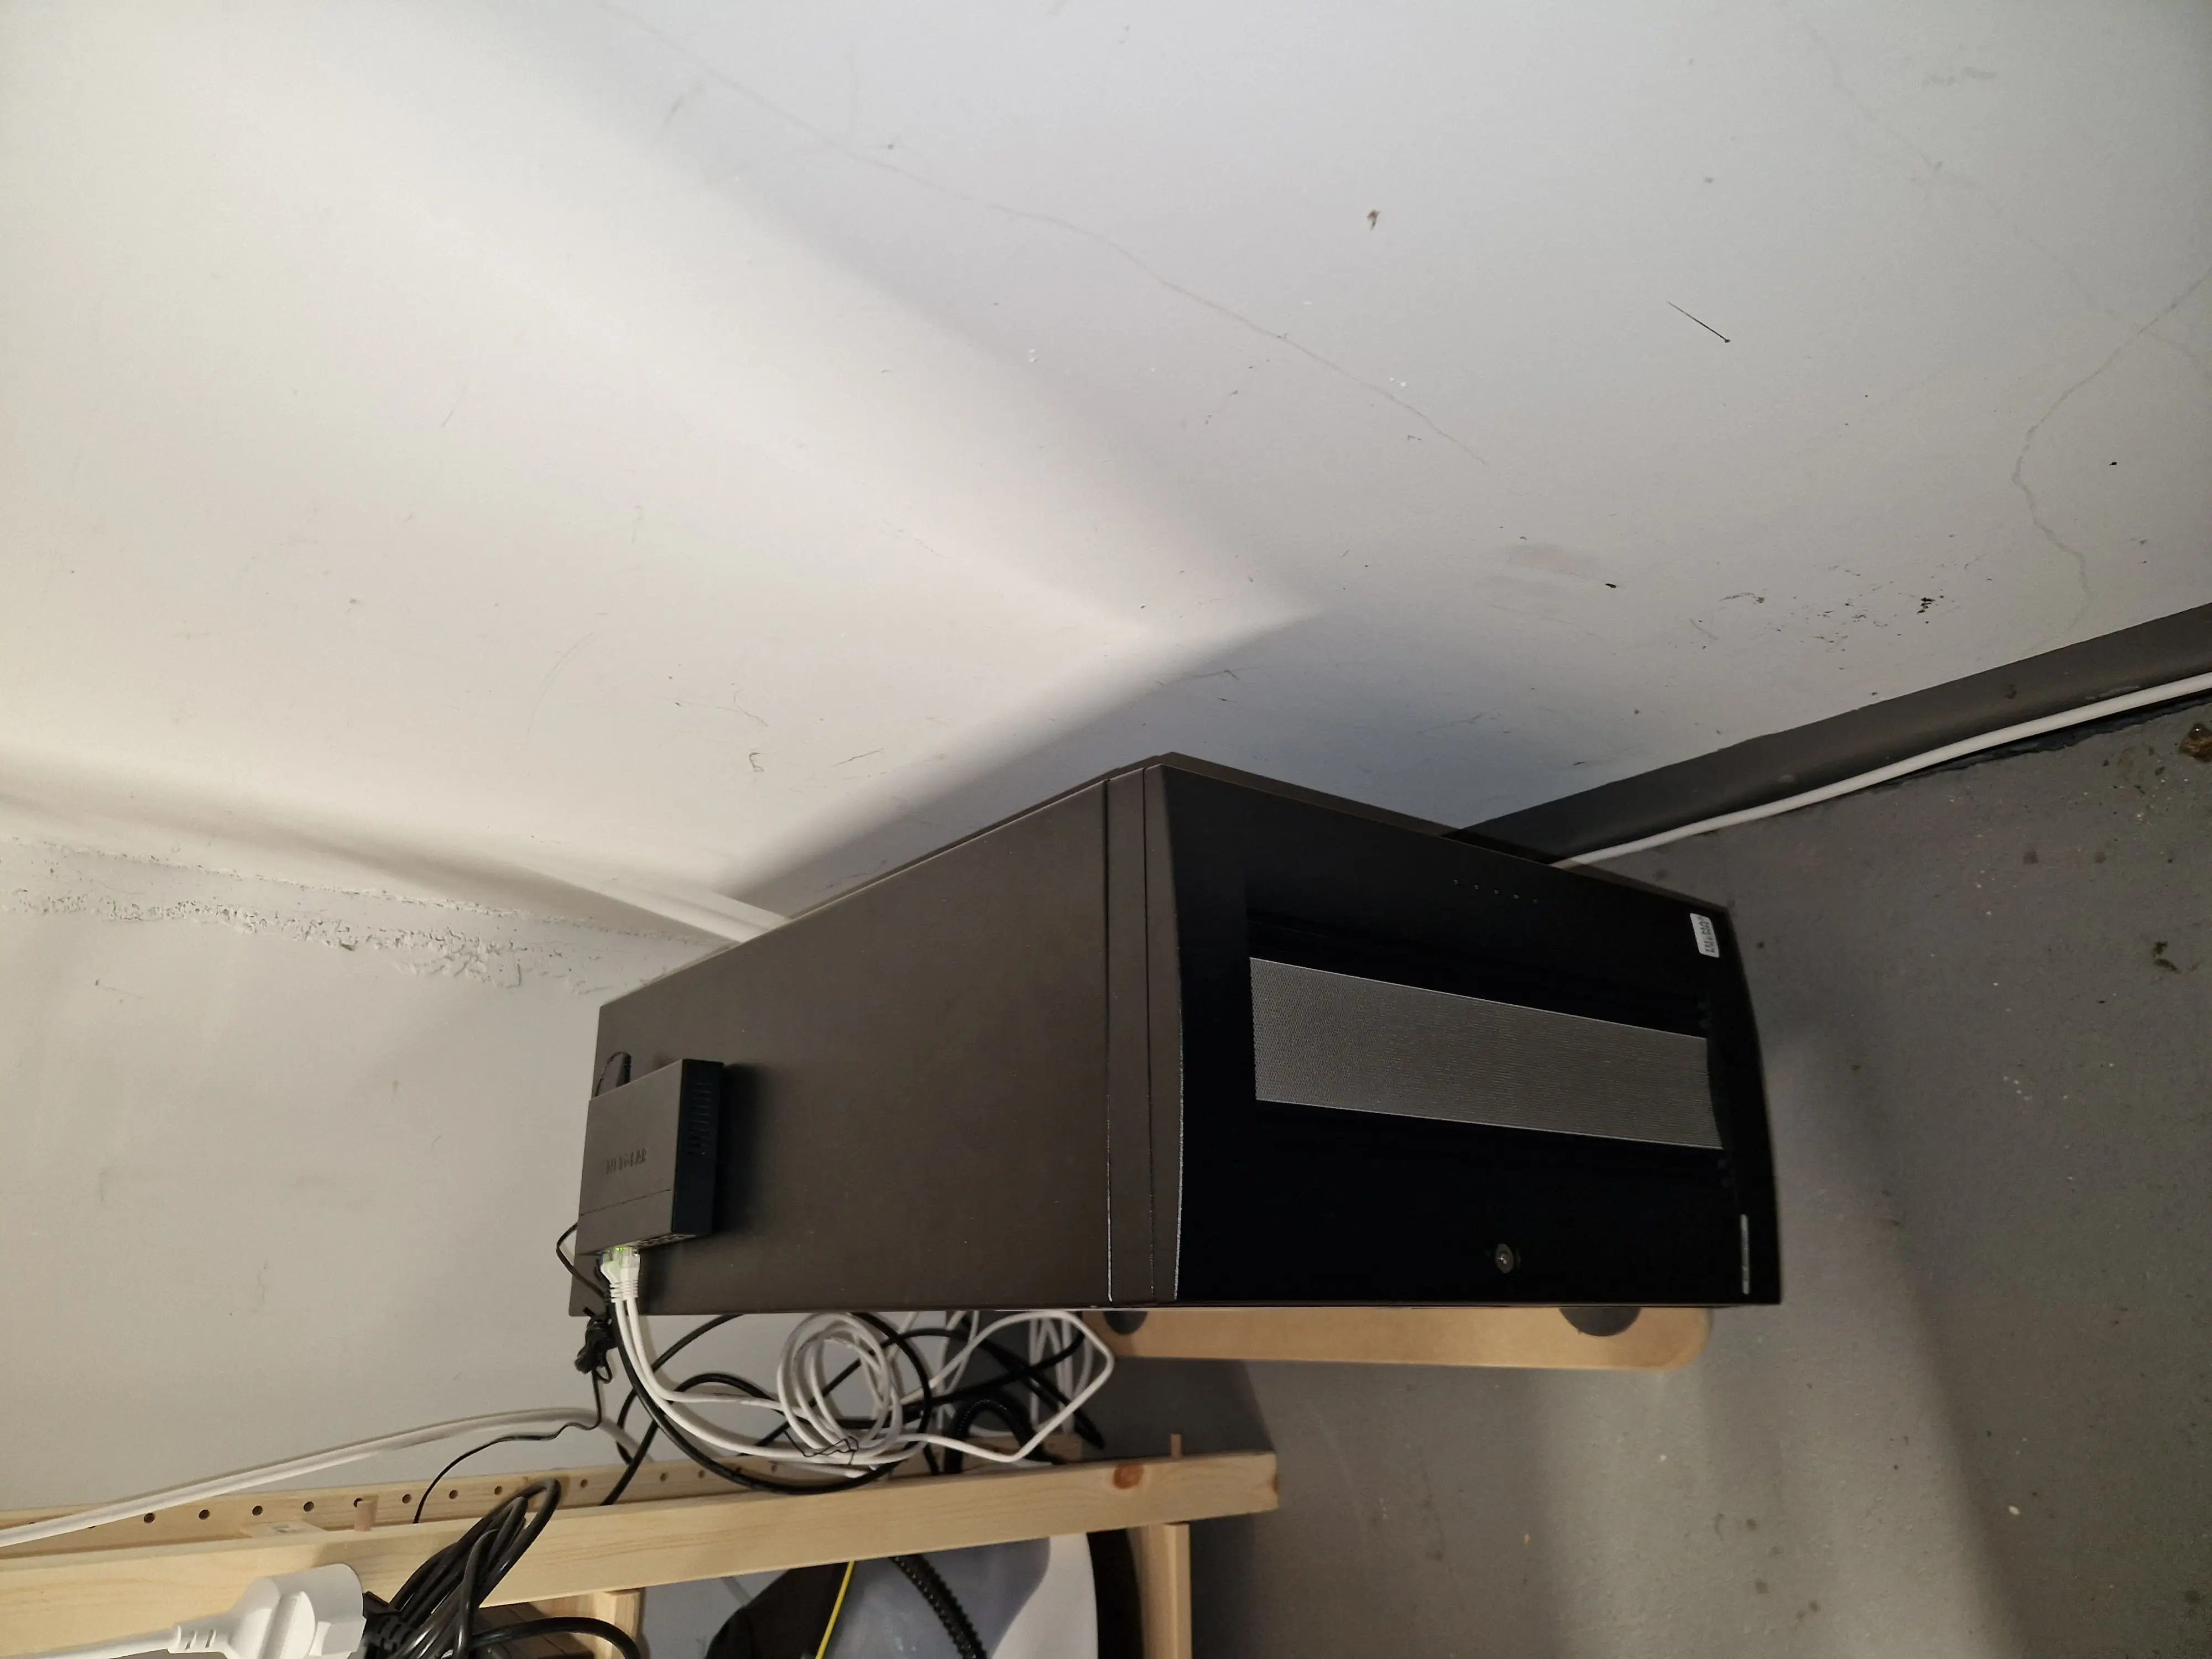
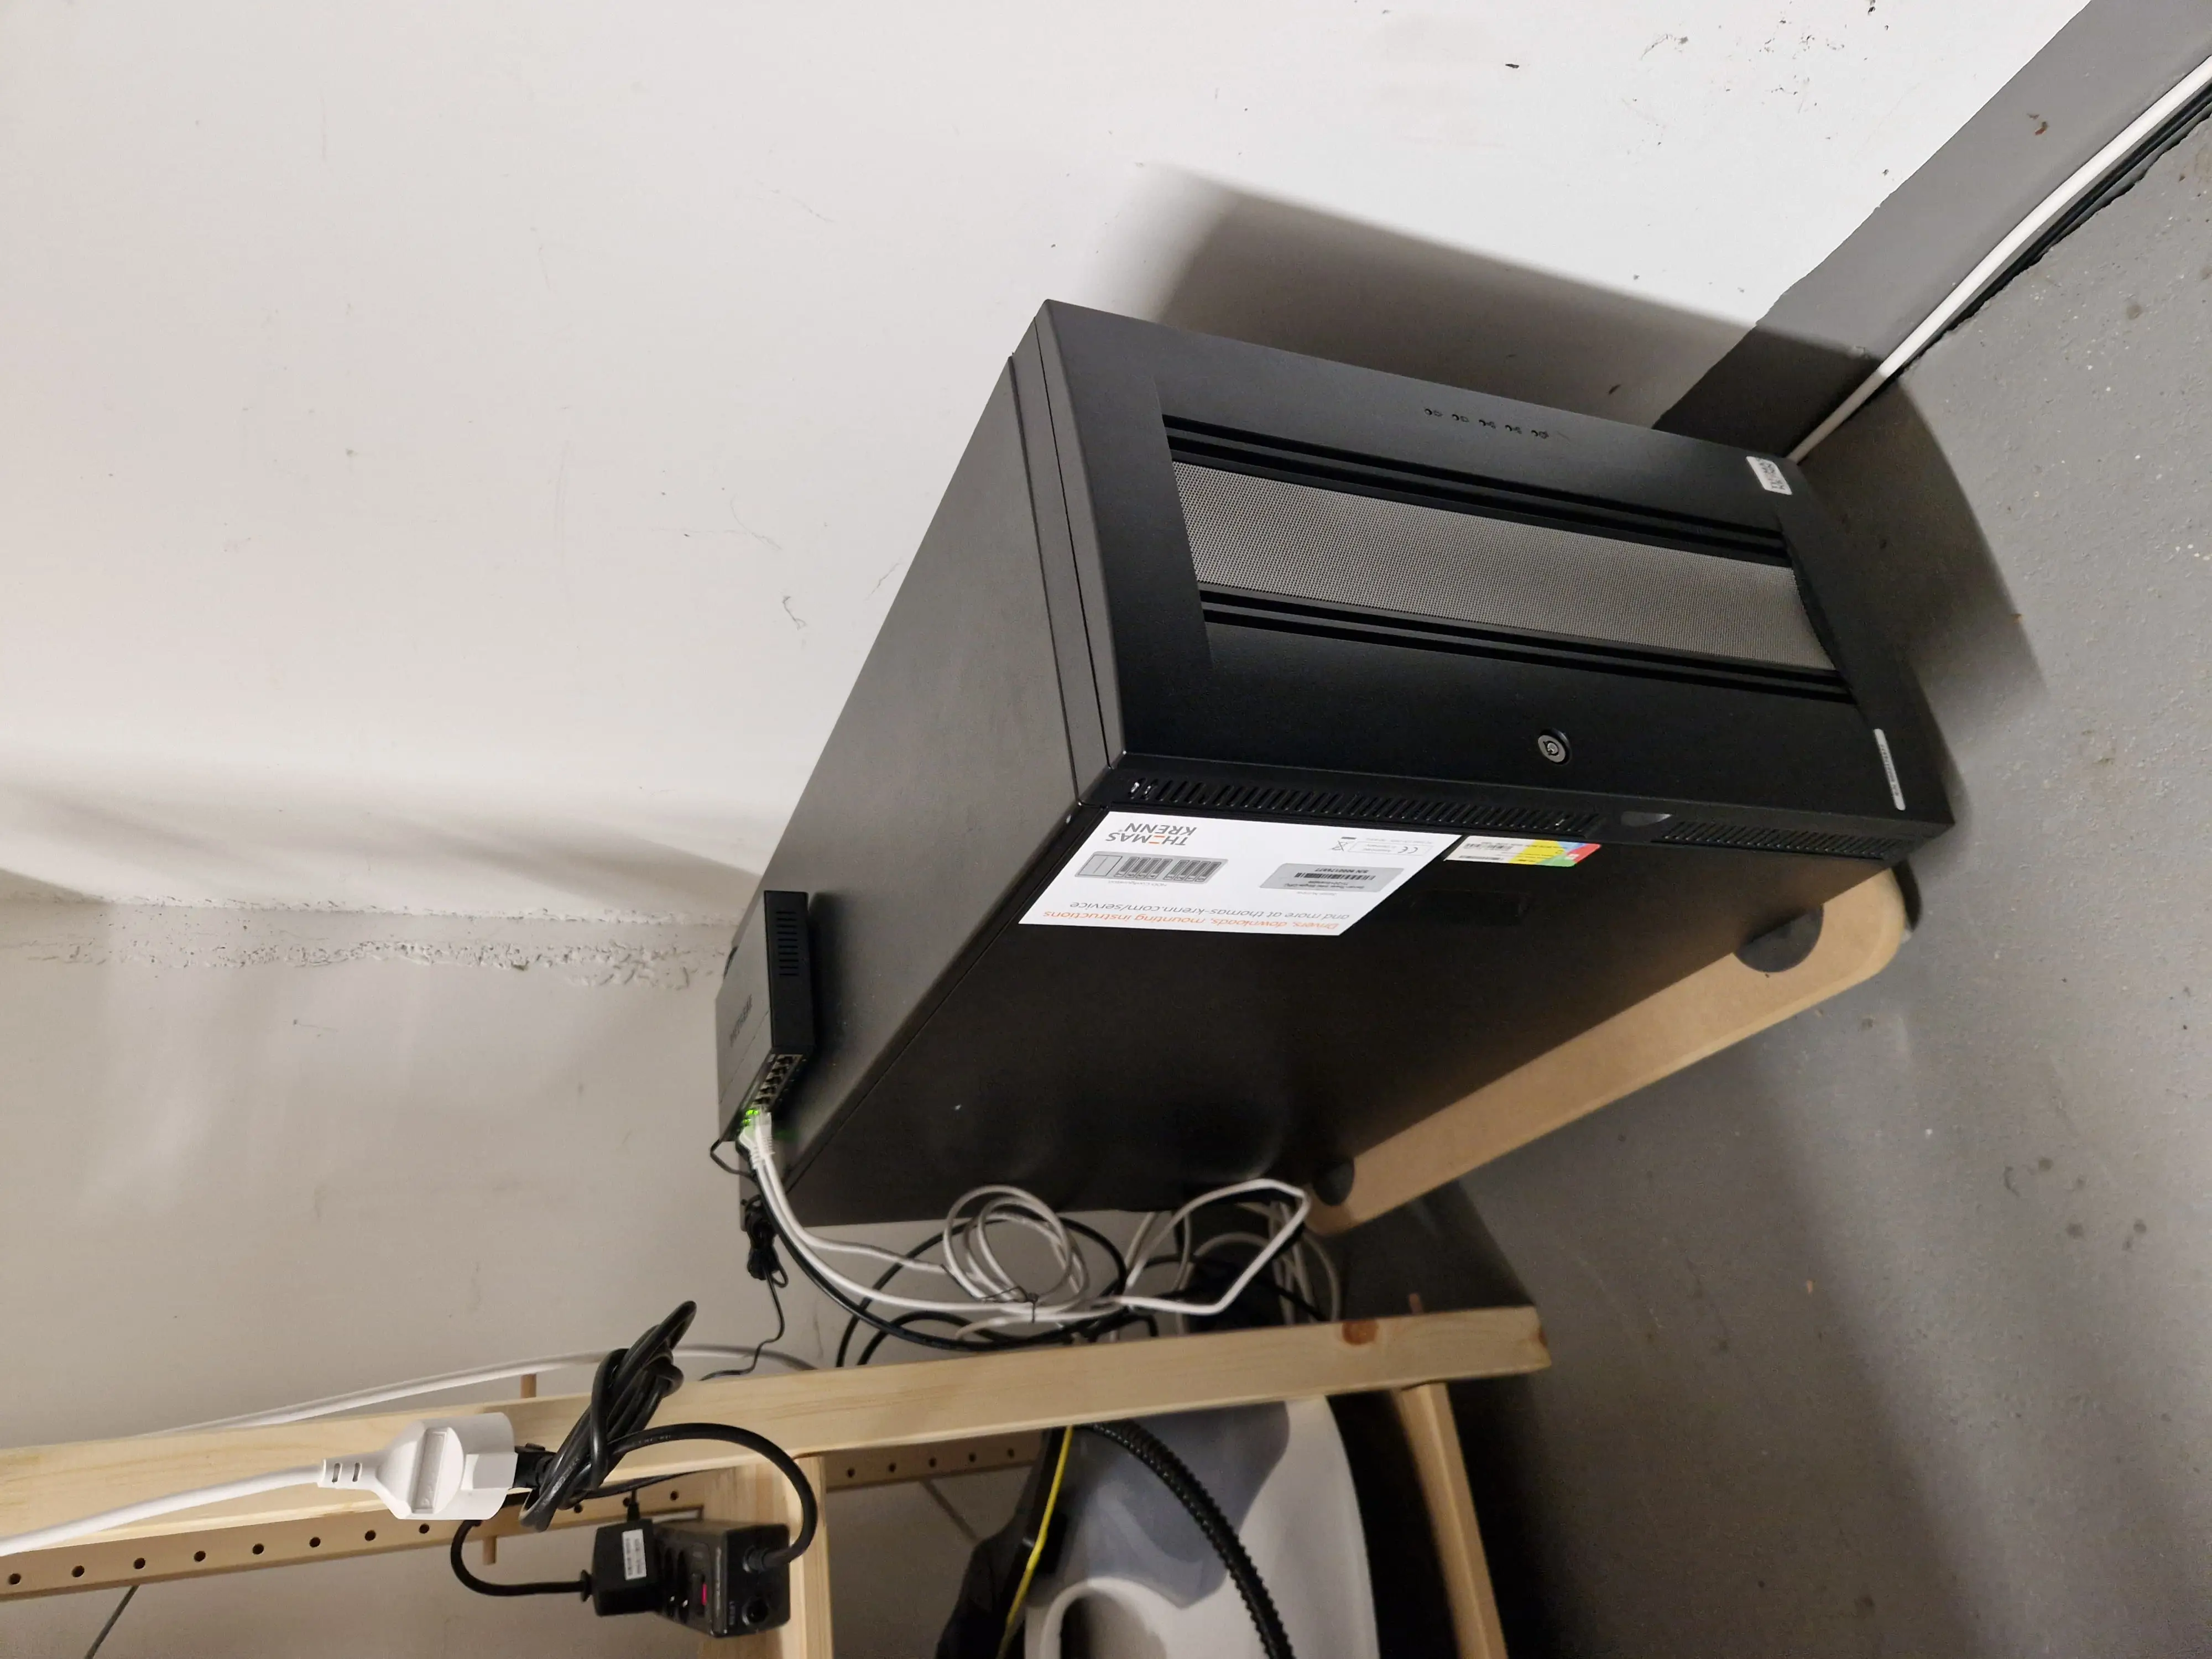
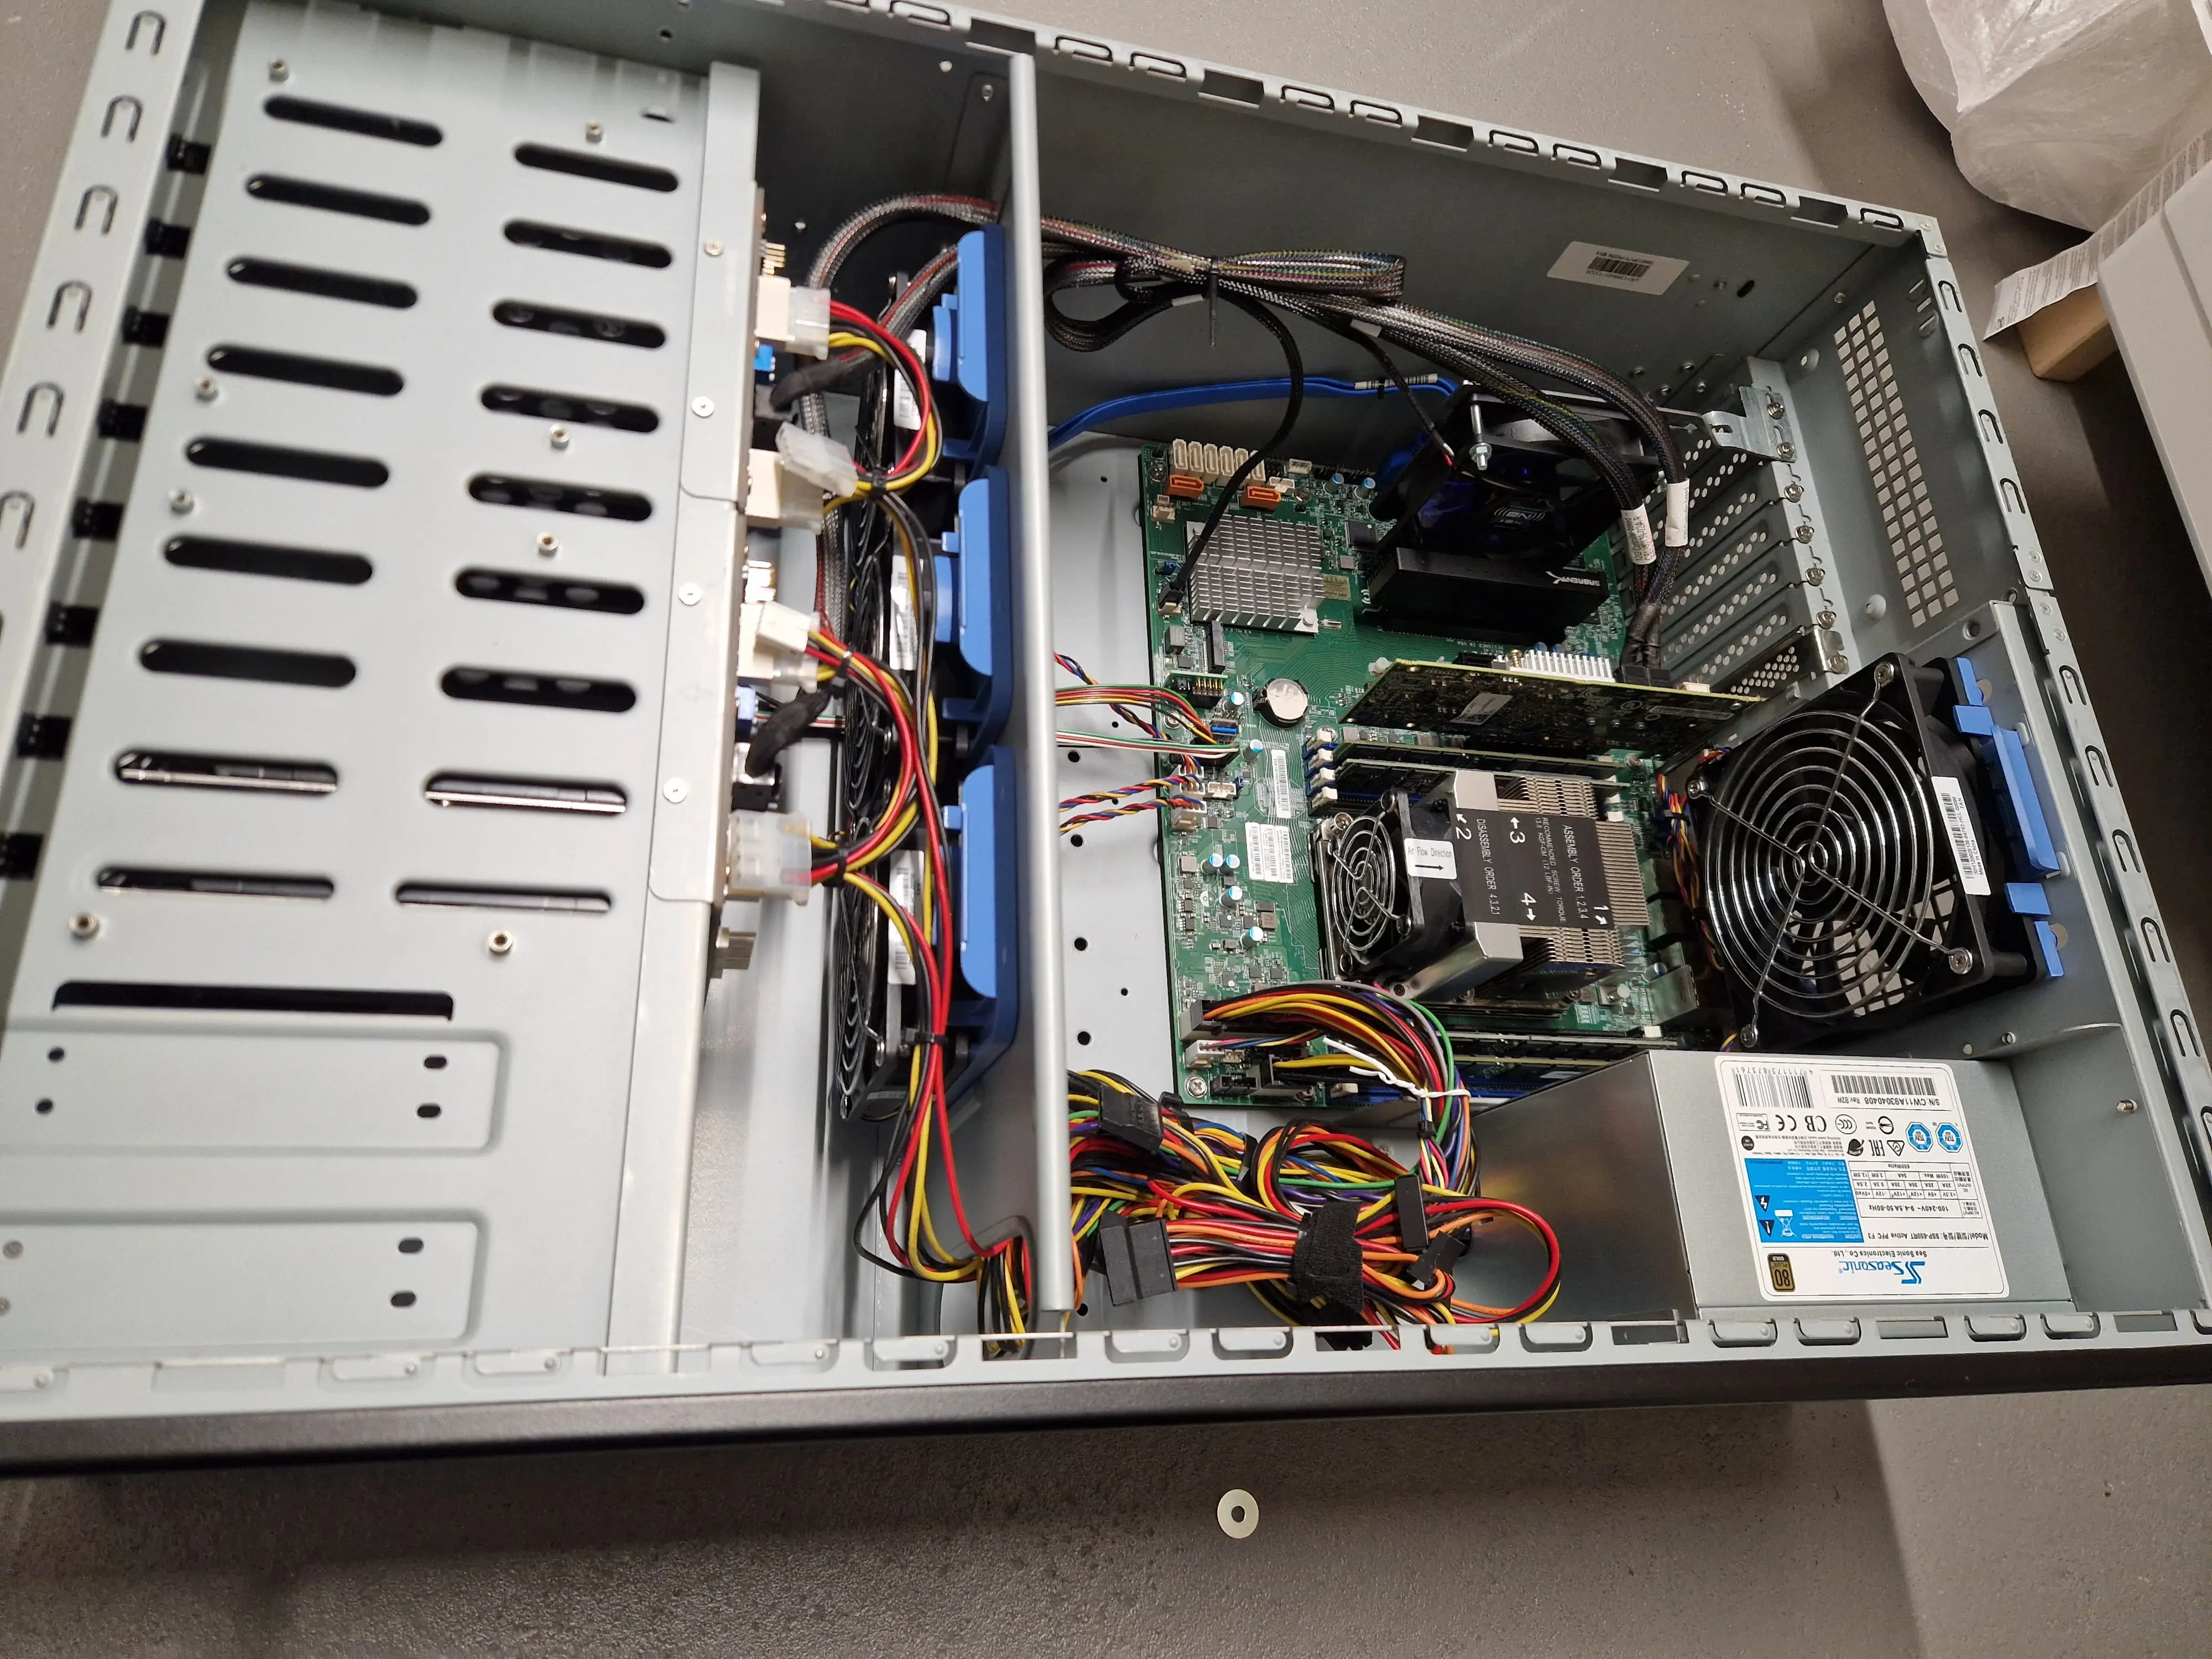
Here is the machine in January 2026, opened up to test the Platinum 8160 that did not make it:
The Software Side
The logical configuration is the part I enjoy most, so rather than promise a follow-up article I will keep it short and cover the decisions that mattered.
The host operating system
The host runs Windows Server 2025 Evaluation.
I seriously considered Linux, either with KVM, Proxmox, OpenStack or plain Debian. In the end I stayed in the Windows ecosystem for a very practical reason: my Azure Local scripts are written for Windows and Hyper-V, so anything else would have meant maintaining two versions of everything I publish. If you are building your own lab and your tooling looks like mine, the same logic probably applies to you.
The evaluation edition deserves a word of its own, because it answers a question nobody likes asking: how do you license a lab host. It is the full product, it is free and it comes with a time limit. The limit can be pushed a few times from an elevated prompt:
slmgr /rearm
In practice that means I reinstall the host roughly once a year. I have stopped treating that as a problem. A lab host rebuilt on a schedule is a lab host that stays clean and it enforces a useful discipline: if a yearly reinstall feels painful, that is your setup telling you too much of it lives on C:.
BIOS configuration
This took far longer than I expected. On a board of this generation the defaults are tuned for a general purpose virtualization host, not for running a nested hypervisor inside a virtual machine. The settings that matter are spread across several menus under names that do not obviously relate to each other.
What finally got me there was sitting down and working through the options systematically with AI, comparing what each setting does against what a nested Azure Local node needs, instead of my usual approach of changing one value and rebooting to see what happens. For a 300 page manual full of enterprise options that turned out to be a good use of the technology and it is the approach I would repeat.
Storage layout
The NVMe drive is set up as its own volume, E:, used for nothing except the nested Azure Local lab. Keeping the lab on a dedicated disk instead of a folder on the system drive is worth doing for two reasons: the virtual disks get the fastest storage in the machine all to themselves and blowing the environment away means clearing one volume rather than picking through directories.
The BitLocker lesson
Here is the mistake I promised earlier and it is a good one.
The system drive was protected with BitLocker. Everything was installed, everything was configured and the machine was finally in the state I wanted. Then I updated the firmware of the RAID controller, which is exactly the kind of tidy final step you take when you think you are done.
On the next boot, BitLocker asked for the recovery key for C:. Changing the storage controller firmware changes the measurements the TPM seals against, so from BitLocker’s point of view this was a different machine. It was right to ask.
I got lucky. I had saved a copy of the recovery key on D:, which was not encrypted at that point, so I booted from a USB drive, read the key off the data volume and got back in.
That was luck rather than planning. The lesson is the boring one everybody already knows and nobody applies to their own lab: keep the recovery key somewhere other than the machine it unlocks. A password manager, a printout or another device. And if you are about to touch storage controller firmware, BIOS or the TPM on an encrypted host, suspend BitLocker first with Suspend-BitLocker, then resume it once the machine boots cleanly again.
Keep your tooling off the system drive
The single habit I would recommend copying is this one. Nothing I depend on lives on C:. I keep two folders on the data drive:
D:\Toolsfor everything I install or unpackD:\Driversfor the driver export and the vendor installers
Given the yearly reinstall, this is not a nice to have. When Windows goes back on, I do not lose the toolbox, the PowerShell profile or the driver set that took an afternoon to collect. The rebuild becomes an evening of installing an operating system rather than a week of remembering what used to be there.
D:\Tools is a boring folder and splits into three groups:
- Vendor and hardware tooling, which is the part specific to this machine: the IPMI utilities from Thomas Krenn, Supermicro Update Manager for firmware, Super Doctor for sensor readings and maxView Storage Manager for the Adaptec RAID controller.
- Diagnostics and monitoring: HWiNFO for temperatures and fan speeds, the Sysinternals suite, Intel processor diagnostics, plus CPU and disk benchmarks I used to confirm each upgrade did something.
- The everyday kit: 7-Zip, winget, VS Code, GitHub Desktop, Azure CLI, my PowerShell profile with Cascadia Code, KeePass, VeraCrypt and Baretail for watching log files while a script runs.
D:\Drivers is the smaller folder but it saved me the most time. Before touching anything, I exported the complete working driver set from the running system and kept the vendor installers next to it:
$driverpath = "D:\Drivers\Export\SuperMicroX11"

# Export the drivers currently installed on the host
dism /online /export-driver /destination:$driverpath

# Reimport them after a rebuild
pnputil.exe /add-driver "$driverpath\*.inf" /subdirs /install
On second-hand server hardware this is not optional in my view. Chipset, RAID and IPMI drivers for a 2017 platform are not always a comfortable download away, so capture them once while the machine works.
Next to the export I keep the vendor installers, which for this board came to a long list:
- BIOS for the X11SPL-F, both the 4.4 release and the later 4.7 package applied through Supermicro Update Manager
- IPMI firmware for the ASPEED AST2500, plus IPMICFG and IPMIView for managing it
- Chipset, onboard SATA and USB 3.0 drivers, all of them 2020 vintage and none of them optional
- Onboard LAN, the Intel release, which is by far the largest download of the set
- VGA for the AST2500, so the console works properly once you have solved the VGA cable problem
- RAID, meaning the Adaptec controller driver and its firmware package
- NVMe drivers for the drive on the PCIe adapter
- The motherboard manual as a PDF, which I ended up reading more often than any of the above
One more note on method, in case you are about to update a machine of this age: most firmware and driver updates could not be installed directly to the latest version. I had to install the recommended intermediate versions first and work up in steps. Read the release notes before you flash anything.
Rebuilding the software in one go
The last piece of the puzzle is a plain text file with a list of winget commands. It is about as low tech as it gets and that is why it works. After a rebuild I paste it in and the machine has everything back:
winget install Microsoft.PowerShell
winget install JanDeDobbeleer.OhMyPosh
winget install --exact --id Microsoft.AzureCLI --silent --accept-package-agreements --accept-source-agreements
winget install --id Git.Git -e --source winget
winget install Helm.Helm
winget install -e --id Kubernetes.kubectl
winget install headlamp
winget install HashiCorp.Terraform
winget install -e --id Devolutions.RemoteDesktopManager
winget install -e --id PuTTY.PuTTY
winget install CrystalDewWorld.CrystalDiskMark
winget install CrystalDewWorld.CrystalDiskInfo
winget install JAMSoftware.TreeSize.Free
The Kubernetes and Terraform entries are there because the lab goes beyond Hyper-V. Helm, kubectl and Headlamp are what I use against the AKS Arc clusters from the LLM on AKS article. Terraform is the toolchain behind the Terraform deployment article. CrystalDiskMark and CrystalDiskInfo earned their place while I was checking whether the second-hand SSDs had any life left in them.
Keeping updates in the same file is what makes it a habit rather than a one time script:
winget update --all --include-unknown --accept-package-agreements --accept-source-agreements --silent
Remote access
The server sits in the basement and I have no intention of going down there to use it. Inside the flat the PowerLine link is enough, but the lab only earns its place if I can reach it from outside the home network too.
That job is handled by a Raspberry Pi running Tailscale. The Pi is the piece that is always on, drawing almost nothing, so it is what gives me a way into the home network from wherever I happen to be working. The server itself does not need to be exposed, no ports are forwarded on the router and nothing depends on my ISP handing out a stable address.
I like this split for a lab. The heavy machine is switched off most of the time, as the power figures above show, while the small always on device is the one that stays reachable. The IPMI interface then stays as the out of band path for the cases where the operating system is not cooperating.
What I would do differently
Three things, if I were starting this again tomorrow:
- Update all firmware before installing anything. BIOS, IPMI and the RAID controller first, operating system second. Doing it in that order would have saved me the BitLocker episode entirely.
- Export the drivers on day one, while the machine is still in a known working state.
- Decide the disk layout before installing Windows. Putting the lab on its own volume was the right call, but I arrived at it later than I should have.
None of that is specific to Supermicro or to Azure Local. It is what second-hand server hardware asks of you in exchange for the price.
What It All Cost
Some items are marked as already available because I already owned them. If I had needed to buy those too, the total would easily have been around 300 EUR higher.
| Item | Cost | Notes |
|---|---|---|
| Server | 320 EUR | Negotiated down from the original 350 EUR listing |
| Intel Xeon Gold 6140 | 17,84 EUR | CPU upgrade from the original Xeon Silver 4110 |
| Thermal paste | 7,30 EUR | Needed for the CPU swap, never reuse what is on a second-hand cooler |
| 2 x 32 GB LRDIMM RAM | 134,10 EUR | Upgrade to 128 GB total |
| TPM module | 22,68 EUR | Required for the Azure Local virtualization requirements |
| PCIe NVMe adapter | 10,32 EUR | The board has no M.2 slot |
| VGA to HDMI adapter | 12,99 EUR | Needed for initial local console access |
| PowerLine adapters | 31,97 EUR | Used to bring LAN connectivity to the basement |
| Ethernet and power extension cables | 20 EUR | Roughly 10 metres of each to reach the basement corner |
| Temperature and humidity sensor | 14,06 EUR | Used to monitor basement conditions |
| Dehumidifier | 10,93 EUR | Used to keep humidity around 50 percent |
| Wheeled cart | 19,99 EUR | Keeps the server off the basement floor and makes it movable |
| Smart plug | 9,99 EUR | Used to monitor power usage and cut power when idle |
| NVMe drive | Already available | Mounted on the PCIe adapter above |
| GL AR300M access point | Already available | Reused as the basement access point |
| Raspberry Pi | Already available | Runs Tailscale for remote access from outside the home network |
The final budget came to just over 630 EUR. That is more than I originally hoped to spend and the split is the part worth staring at: the server was 320 EUR and everything else added up to roughly the same amount again. Not a single one of those supporting items appears in the advert you answer.
That is the pattern to plan for. Whatever price you see in the listing, budget the same again for the parts that turn a used machine into a working lab. The individual amounts look harmless. 10 EUR here for an adapter, 7 EUR there for thermal paste and 20 EUR for cables is exactly how a 320 EUR bargain quietly doubles.
Conclusion
If you are asking yourself what to build your Azure Local lab on, my honest recommendation, in order:
- Start on the machine you already own. Follow the Demolab article and find out where you hit a wall before spending anything.
- If 64 GB covers your needs, buy a mini PC. It is quiet, small, efficient and it will live happily in your office.
- If you need more than 64 GB, look at second-hand enterprise hardware. You get memory capacity and expandability that no mini PC in that price range can match and you accept noise, size, power consumption and being your own support department in exchange.
My server is not new, quiet or elegant. What it gives me is the thing I was missing: a dedicated platform with enough memory, cores and storage flexibility to test advanced hybrid scenarios, without turning my work laptop into the center of everything and without tearing the environment down every time I close the lid.
The foundation is ready and the lab finally has its own home in the basement. If you are about to walk the same path, I hope this saved you an adapter you did not know you needed, a few hours in a BIOS menu or a very unpleasant evening with a BitLocker recovery prompt.
Comments