<?xml version="1.0" encoding="utf-8"?><feed xmlns="http://www.w3.org/2005/Atom" ><generator uri="https://jekyllrb.com/" version="3.10.0">Jekyll</generator><link href="https://schmitt-nieto.com/feed.xml" rel="self" type="application/atom+xml" /><link href="https://schmitt-nieto.com/" rel="alternate" type="text/html" /><updated>2026-05-06T20:07:50+02:00</updated><id>https://schmitt-nieto.com/feed.xml</id><title type="html">Cristian Schmitt Nieto´s Blog</title><subtitle>Welcome to my blog, where you will find all kinds of information related to Azure, Azure Virtual Desktop and Azure Local.</subtitle><author><name>Cristian Schmitt Nieto</name></author><entry><title type="html">Azure Local: Terraform Deployment</title><link href="https://schmitt-nieto.com/blog/azure-local-terraform/" rel="alternate" type="text/html" title="Azure Local: Terraform Deployment" /><published>2026-04-17T00:00:00+02:00</published><updated>2026-04-17T00:00:00+02:00</updated><id>https://schmitt-nieto.com/blog/azure-local-terraform</id><content type="html" xml:base="https://schmitt-nieto.com/blog/azure-local-terraform/"><![CDATA[<h2 id="introduction">Introduction</h2>

<p>If you have been following this series, you already know how I built my Azure Local demolab step by step: preparing the Hyper-V host, configuring the domain controller, registering the node with Azure Arc and then walking through the portal deployment. That workflow works, but it is entirely manual. Every time I tear down and rebuild the lab I repeat the same sequence of clicks and commands and every time I do that I risk a small configuration drift.</p>

<p>A few months ago I decided to change that. The goal was straightforward: replace the portal deployment path with a fully automated Terraform run that I could trigger from a pipeline with a service account and that I could later reuse for AVD, AKS and other workloads on top of Azure Local. Less clicking, more repeatable infrastructure.</p>

<p>Getting there turned out to be more work than I expected. The <a href="https://github.com/Azure/terraform-azurerm-avm-res-azurestackhci-cluster">Azure Verified Module (AVM) for Azure Local</a> is a good starting point, but it was written against a specific point in time and the Azure Local deployment API has moved since then. From the end of 2025 onward, several things changed: resource provider behavior, required role assignments and the API version that the Azure control plane actually accepts. When I first tried to apply the module against my lab, I got a series of failures that took real investigation to understand.</p>

<p>This article covers what I built, what broke, how I fixed it and how the deployment now flows end to end. I will also explain where I plan to take the repository from here.</p>

<h2 id="the-azshci-repository">The AzSHCI Repository</h2>

<p>All of the automation lives in my <a href="https://github.com/schmittnieto/AzSHCI">AzSHCI repository</a>.</p>

<p><a href="https://github.com/schmittnieto/AzSHCI"><img src="https://badgen.net/https/raw.githubusercontent.com/schmittnieto/AzSHCI/refs/heads/main/terraform/lastdeployment.json?cache=300" /></a></p>

<p>It has two parallel paths that work together:</p>

<ul>
  <li><strong><code class="language-plaintext highlighter-rouge">scripts/01Lab/</code></strong>: PowerShell scripts that handle everything from Azure prerequisites through Hyper-V infrastructure setup, domain controller configuration and Arc registration. These run before Terraform comes into the picture.</li>
  <li><strong><code class="language-plaintext highlighter-rouge">terraform/</code></strong>: A root Terraform configuration that calls a local fork of the AVM module. The fork carries the fixes and additions that were needed to make the deployment work against the current Azure API.</li>
</ul>

<p>The long-term vision for the repository is a single codebase that can deploy not just the Azure Local cluster but also the workloads on top of it: AVD host pools, AKS clusters and potentially other services. The Terraform path is designed from the start to be consumed from a CI/CD pipeline using a service principal, so every credential is handled through a Key Vault and no secrets live in the repository.</p>

<h2 id="prerequisites-the-first-script">Prerequisites: The First Script</h2>

<p>Before any Terraform runs, Azure needs to be in the right state. The script <code class="language-plaintext highlighter-rouge">scripts/01Lab/00_AzurePreRequisites.ps1</code> handles that in a single, interactive run.</p>

<p>What it does:</p>

<ol>
  <li>Checks for and installs the required Az PowerShell modules (<code class="language-plaintext highlighter-rouge">Az.Accounts</code>, <code class="language-plaintext highlighter-rouge">Az.Resources</code>).</li>
  <li>Verifies your Azure session and prompts a device code login if no active session is found.</li>
  <li>Lets you select a subscription interactively.</li>
  <li>Lets you choose an existing resource group or create a new one.</li>
  <li>Assigns the required RBAC roles to a user or to a newly created service principal.</li>
  <li>Registers all required resource providers.</li>
</ol>

<p>The roles it assigns fall into two scopes. At resource group scope: <code class="language-plaintext highlighter-rouge">Azure Connected Machine Onboarding</code>, <code class="language-plaintext highlighter-rouge">Azure Connected Machine Resource Administrator</code>, <code class="language-plaintext highlighter-rouge">Key Vault Data Access Administrator</code>, <code class="language-plaintext highlighter-rouge">Key Vault Secrets Officer</code>, <code class="language-plaintext highlighter-rouge">Key Vault Contributor</code> and <code class="language-plaintext highlighter-rouge">Storage Account Contributor</code>. At subscription scope: <code class="language-plaintext highlighter-rouge">Azure Stack HCI Administrator</code> and <code class="language-plaintext highlighter-rouge">Reader</code>.</p>

<p>The resource providers it registers cover the full Azure Local stack: <code class="language-plaintext highlighter-rouge">Microsoft.HybridCompute</code>, <code class="language-plaintext highlighter-rouge">Microsoft.AzureStackHCI</code>, <code class="language-plaintext highlighter-rouge">Microsoft.Kubernetes</code>, <code class="language-plaintext highlighter-rouge">Microsoft.KubernetesConfiguration</code>, <code class="language-plaintext highlighter-rouge">Microsoft.ExtendedLocation</code>, <code class="language-plaintext highlighter-rouge">Microsoft.ResourceConnector</code>, <code class="language-plaintext highlighter-rouge">Microsoft.HybridContainerService</code> and several others.</p>

<p>If you create a service principal through this script, it prints the connection details at the end. Those credentials go into your Terraform variables file and Key Vault reference and from that point the pipeline can run unattended. Here is a full run with sensitive values redacted:</p>

<div class="language-plaintext highlighter-rouge"><div class="highlight"><pre class="highlight"><code>Checking required Az modules...
Module 'Az.Accounts' is available.
Module 'Az.Resources' is available.
All required modules loaded.
Active session: admin@&lt;tenant&gt;.com on subscription 'Azure-Abonnement 1'.
Use this session? (Y/N): N
Starting device code login...
[Login to Azure] To sign in, use a web browser to open the page https://login.microsoft.com/device
and enter the code GAX*****QB to authenticate.

Authenticated to Azure.
Retrieving available subscriptions...

Select the subscription to use:
    0. Azure-Abonnement 1
Select subscription: 0
Using subscription 'Azure-Abonnement 1' (&lt;subscription-id&gt;).

Resource Group setup:
  1. Use an existing resource group
  2. Create a new resource group
Select option (1 or 2): 2

Recommended resource group name: 'rg-azlocal-lab'
Enter resource group name (press Enter to accept recommendation): rg-azlocal-demolab

Select the Azure region for the new resource group:
    0. westeurope
    1. northeurope
    2. eastus
    ...
Enter a list number or type a region name directly: 0
Creating resource group 'rg-azlocal-demolab' in 'westeurope'...
Resource group 'rg-azlocal-demolab' created.

Select how to assign the required Azure RBAC roles:
  1. Assign to an existing user account
  2. Create a new Service Principal and assign roles to it
Select option (1 or 2): 2

Recommended SPN name: 'sp-azlocal-lab'
Enter SPN display name (press Enter to accept recommendation): sp-azlocal-demolab
Creating app registration 'sp-azlocal-demolab'...
App registration created. AppId: &lt;app-id&gt;
Creating service principal...
Service principal created. ObjectId: &lt;object-id&gt;
Generating client secret (valid for 2 years)...
Client secret generated.
Waiting 20 seconds for the SPN to propagate before assigning roles...

Assigning resource group scoped roles to 'sp-azlocal-demolab'...
Assigned 'Azure Connected Machine Onboarding' at RG scope.
Assigned 'Azure Connected Machine Resource Administrator' at RG scope.
Assigned 'Key Vault Data Access Administrator' at RG scope.
Assigned 'Key Vault Secrets Officer' at RG scope.
Assigned 'Key Vault Contributor' at RG scope.
Assigned 'Storage Account Contributor' at RG scope.

Assigning subscription scoped roles to 'sp-azlocal-demolab'...
Assigned 'Azure Stack HCI Administrator' at subscription scope.
Assigned 'Reader' at subscription scope.

Checking and registering required resource providers...
Provider 'Microsoft.HybridCompute' is already registered.
Provider 'Microsoft.GuestConfiguration' is already registered.
Provider 'Microsoft.HybridConnectivity' is already registered.
Provider 'Microsoft.AzureStackHCI' is already registered.
Provider 'Microsoft.Kubernetes' is already registered.
Provider 'Microsoft.KubernetesConfiguration' is already registered.
Provider 'Microsoft.ExtendedLocation' is already registered.
Provider 'Microsoft.ResourceConnector' is already registered.
Provider 'Microsoft.HybridContainerService' is already registered.
Provider 'Microsoft.Attestation' is already registered.
Provider 'Microsoft.Storage' is already registered.
Provider 'Microsoft.KeyVault' is already registered.
Provider 'Microsoft.Insights' is already registered.

Azure prerequisites setup completed.

Summary:
  Subscription : Azure-Abonnement 1 (&lt;subscription-id&gt;)
  Resource Group: rg-azlocal-demolab (location: westeurope)
  Principal    : sp-azlocal-demolab

================================================================
  SERVICE PRINCIPAL CONNECTION DETAILS
  Save these values securely. The secret cannot be retrieved
  again after this session ends.
================================================================

  Display Name    : sp-azlocal-demolab
  Tenant ID       : &lt;tenant-id&gt;
  Subscription ID : &lt;subscription-id&gt;
  App ID          : &lt;app-id&gt;
  Client Secret   : &lt;client-secret&gt;
  Secret Expiry   : 2028-04-17

  IMPORTANT: Rotate this secret before it expires to avoid service disruptions.

  To connect with this SPN in PowerShell:

  $spnCredential = New-Object PSCredential(
      "&lt;app-id&gt;",
      (ConvertTo-SecureString "&lt;client-secret&gt;" -AsPlainText -Force))
  Connect-AzAccount -ServicePrincipal `
      -Tenant "&lt;tenant-id&gt;" `
      -Subscription "&lt;subscription-id&gt;" `
      -Credential $spnCredential

================================================================
</code></pre></div></div>

<h2 id="infrastructure-and-cluster-preparation">Infrastructure and Cluster Preparation</h2>

<p>With the Azure side ready, the next scripts prepare the local environment:</p>

<ul>
  <li><strong><code class="language-plaintext highlighter-rouge">00_Infra_AzHCI.ps1</code></strong> builds the Hyper-V infrastructure: virtual switches, storage paths and the Azure Local node VM.</li>
  <li><strong><code class="language-plaintext highlighter-rouge">01_DC.ps1</code></strong> sets up the domain controller that the cluster needs for Active Directory integration.</li>
  <li><strong><code class="language-plaintext highlighter-rouge">02_Cluster.ps1</code></strong> performs the Arc registration of the node. After this script completes, the machine appears in Azure as an Arc-enabled server and is ready for the Terraform deployment step.</li>
</ul>

<h2 id="the-terraform-architecture">The Terraform Architecture</h2>

<p>The Terraform configuration is a thin root module that creates a few shared prerequisites and then calls the Azure Local cluster module. The shared prerequisites are:</p>

<ul>
  <li><strong>Key Vault</strong> with RBAC authorization enabled, used to store the deployment credentials.</li>
  <li><strong>Witness storage account</strong> for the cluster quorum.</li>
  <li>Required <strong>role assignments</strong> at resource group scope for the Arc machine identity and the Azure Stack HCI resource provider service principal.</li>
  <li><strong>Edge device registration</strong> (<code class="language-plaintext highlighter-rouge">Microsoft.AzureStackHCI/edgeDevices</code>) for the Arc node.</li>
</ul>

<p>The cluster module is a local fork of the AVM module. The fork is not a divergence for its own sake. It carries specific fixes that the upstream module did not have at the time of writing and I will describe those in the next section.</p>

<h3 id="staged-deployment">Staged deployment</h3>

<p>The deployment happens in two stages, controlled by a single variable:</p>

<p><strong>Stage 1 (<code class="language-plaintext highlighter-rouge">is_exported = false</code>)</strong>: Terraform creates the Key Vault, storage account, RBAC assignments and edge device registration, then submits <code class="language-plaintext highlighter-rouge">deploymentSettings</code> to Azure with <code class="language-plaintext highlighter-rouge">deploymentMode = Validate</code>. Azure runs a validation sequence that checks connectivity, Active Directory and node configuration. This takes roughly 10 to 30 minutes.</p>

<p><strong>Stage 2 (<code class="language-plaintext highlighter-rouge">is_exported = true</code>)</strong>: After validation succeeds in the portal, you flip <code class="language-plaintext highlighter-rouge">is_exported</code> to <code class="language-plaintext highlighter-rouge">true</code> and run <code class="language-plaintext highlighter-rouge">terraform apply</code> again. This patches <code class="language-plaintext highlighter-rouge">deploymentMode</code> to <code class="language-plaintext highlighter-rouge">Deploy</code> and Azure starts the full cluster provisioning, which takes 30 to 60 minutes.</p>

<p>A second variable, <code class="language-plaintext highlighter-rouge">deployment_completed</code>, controls whether Terraform attempts to read post-deployment data sources like the custom location. Set it to <code class="language-plaintext highlighter-rouge">false</code> during and after deployment and flip it to <code class="language-plaintext highlighter-rouge">true</code> only after the Azure portal confirms the deployment is complete.</p>

<h2 id="what-broke-and-how-i-fixed-it">What Broke and How I Fixed It</h2>

<p>This section documents the real debugging journey. I am including it because if you try to use any version of the AVM module against a current Azure subscription, you will likely hit some of these same issues.</p>

<h3 id="missing-edgedevices-resource">Missing edgeDevices resource</h3>

<p>The most impactful missing piece was the <code class="language-plaintext highlighter-rouge">Microsoft.AzureStackHCI/edgeDevices</code> resource. This resource registers each Arc machine with the HCI edge management system and lets the LcmController’s ARM client communicate back to Azure. Without it, every deployment settings validation failed with:</p>

<div class="language-plaintext highlighter-rouge"><div class="highlight"><pre class="highlight"><code>Failed to download deployment settings file using edge Arm client
</code></pre></div></div>

<p>The upstream AVM module did not include this resource at all. Adding <code class="language-plaintext highlighter-rouge">edgedevices.tf</code> with the correct API version (<code class="language-plaintext highlighter-rouge">2025-09-15-preview</code>) and ensuring it depends on the RBAC assignments resolved the failure.</p>

<h3 id="missing-role-assignments">Missing role assignments</h3>

<p>The ARM QuickStart template assigns two roles to the Arc machine identity at resource group scope that the AVM module was not creating:</p>

<ul>
  <li><code class="language-plaintext highlighter-rouge">Azure Stack HCI Device Management Role</code></li>
  <li><code class="language-plaintext highlighter-rouge">Azure Stack HCI Connected InfraVMs</code></li>
</ul>

<p>Without these, the LcmController cannot install the required Arc extensions. I added <code class="language-plaintext highlighter-rouge">machine_rg_role_assign</code> in <code class="language-plaintext highlighter-rouge">rolebindings.tf</code> to mirror the ARM template behavior.</p>

<h3 id="api-version-changes">API version changes</h3>

<p>Between late 2024 and early 2025, the live Azure endpoint stopped accepting <code class="language-plaintext highlighter-rouge">networkingType</code> and <code class="language-plaintext highlighter-rouge">networkingPattern</code> as body fields. Sending them causes an HTTP 400 <code class="language-plaintext highlighter-rouge">ObjectAdditionalProperties</code> error. The fix is to omit them by setting both variables to empty strings; the <code class="language-plaintext highlighter-rouge">merge()</code> logic in <code class="language-plaintext highlighter-rouge">locals.tf</code> then drops them from the JSON body.</p>

<p>The API version itself also matters. The ARM QuickStart template uses <code class="language-plaintext highlighter-rouge">2025-09-15-preview</code> for both <code class="language-plaintext highlighter-rouge">Microsoft.AzureStackHCI/clusters</code> and <code class="language-plaintext highlighter-rouge">Microsoft.AzureStackHCI/clusters/deploymentSettings</code>. Using a newer preview version can change how the control plane processes the request. After several failed attempts with <code class="language-plaintext highlighter-rouge">2026-03-01-preview</code>, reverting to <code class="language-plaintext highlighter-rouge">2025-09-15-preview</code> was the right call.</p>

<h3 id="the-lcmcontroller-0settings-bug">The LcmController 0.settings bug</h3>

<p>This one took the most iterations to nail down and I want to be honest: I went down several wrong paths before finding the real cause. The full investigation trail, including the false leads and the intermediate workarounds I tried, is documented in the <a href="https://github.com/schmittnieto/AzSHCI/blob/main/terraform/CHANGELOG.md">CHANGELOG</a> if you want the unfiltered version. I will keep this section to what actually matters.</p>

<p>The symptom was a BITS failure during validation:</p>

<div class="language-plaintext highlighter-rouge"><div class="highlight"><pre class="highlight"><code>Cannot bind argument to parameter 'Source' because it is an empty string.
</code></pre></div></div>

<p>The root cause is a type-checking bug in <code class="language-plaintext highlighter-rouge">DownloadHelpers.psm1</code> inside the <code class="language-plaintext highlighter-rouge">AzureEdgeLifecycleManager</code> Arc extension (NuGet package <code class="language-plaintext highlighter-rouge">10.2601.0.1162</code>). When Terraform creates <code class="language-plaintext highlighter-rouge">deploymentSettings</code>, Azure writes a minimal object to the LcmController runtime settings file that carries only cloud identity markers and no actual deployment payload. A null-check in <code class="language-plaintext highlighter-rouge">GetTargetBuildManifest</code> fails to detect this correctly because <code class="language-plaintext highlighter-rouge">[string]::IsNullOrEmpty()</code> returns <code class="language-plaintext highlighter-rouge">$false</code> for any non-null PowerShell object, even one with no useful content. The fallback that would download the cloud manifest never activates and the code ends up with four empty download URLs.</p>

<p>One important lesson from this: the four required Arc extensions (<code class="language-plaintext highlighter-rouge">AzureEdgeTelemetryAndDiagnostics</code>, <code class="language-plaintext highlighter-rouge">AzureEdgeDeviceManagement</code>, <code class="language-plaintext highlighter-rouge">AzureEdgeLifecycleManager</code>, <code class="language-plaintext highlighter-rouge">AzureEdgeRemoteSupport</code>) must be installed through the cluster creation process itself. Trying to pre-stage them manually before <code class="language-plaintext highlighter-rouge">terraform apply</code> is not only unnecessary, it can leave the node in a state where validation rejects it. Let Terraform handle the extension installation as part of Stage 1. The <code class="language-plaintext highlighter-rouge">03_TroubleshootingExtensions.ps1</code> script remains in the repository as a troubleshooting tool for environments where extensions end up in a <code class="language-plaintext highlighter-rouge">Failed</code> state after a previous failed apply, not as a required step in the normal flow.</p>

<h2 id="step-by-step-deployment">Step-by-Step Deployment</h2>

<p>With all of the above in place, here is the actual deployment flow.</p>

<h3 id="step-1-azure-prerequisites">Step 1: Azure prerequisites</h3>

<p>Run <code class="language-plaintext highlighter-rouge">00_AzurePreRequisites.ps1</code>, select or create a resource group and either assign roles to your own account or let the script create a service principal. Note the SPN credentials if you created one. The full output of this script is shown in the <a href="#prerequisites-the-first-script">Prerequisites section above</a>.</p>

<h3 id="step-2-build-the-hyper-v-infrastructure">Step 2: Build the Hyper-V infrastructure</h3>

<p>Run <code class="language-plaintext highlighter-rouge">00_Infra_AzHCI.ps1</code> to create the Hyper-V host infrastructure for the lab node. This step is identical to the one described in the <a href="/blog/azure-stack-hci-demolab/">demolab article</a>, so refer to it for a detailed walkthrough.</p>

<p><a href="/assets/img/post/2026-04-17-azure-local-terraform/00_Infra_Overview.webp" target="_blank">
  <img src="/assets/img/post/2026-04-17-azure-local-terraform/00_Infra_Overview.webp" alt="Hyper-V infrastructure overview" style="border: 2px solid grey;" />
</a></p>

<h3 id="step-3-configure-the-domain-controller">Step 3: Configure the domain controller</h3>

<p>Run <code class="language-plaintext highlighter-rouge">01_DC.ps1</code> to set up Active Directory on the domain controller VM. Again, this step is identical to the one covered in the <a href="/blog/azure-stack-hci-demolab/">demolab article</a>.</p>

<p><a href="/assets/img/post/2026-04-17-azure-local-terraform/01_DC_Setup.webp" target="_blank">
  <img src="/assets/img/post/2026-04-17-azure-local-terraform/01_DC_Setup.webp" alt="Domain controller setup" style="border: 2px solid grey;" />
</a></p>

<h3 id="step-4-register-the-node-with-arc">Step 4: Register the node with Arc</h3>

<p>Run <code class="language-plaintext highlighter-rouge">02_Cluster.ps1</code> to Arc-register the Azure Local node. Confirm the machine appears in Azure portal as an Arc-enabled server before continuing.</p>

<p><a href="/assets/img/post/2026-04-17-azure-local-terraform/02_Cluster_ArcRegistration.webp" target="_blank">
  <img src="/assets/img/post/2026-04-17-azure-local-terraform/02_Cluster_ArcRegistration.webp" alt="Cluster Node Setup" style="border: 2px solid grey;" />
</a></p>

<p><a href="/assets/img/post/2026-04-17-azure-local-terraform/02_Cluster_ArcPortal.webp" target="_blank">
  <img src="/assets/img/post/2026-04-17-azure-local-terraform/02_Cluster_ArcPortal.webp" alt="Arc node in Azure portal" style="border: 2px solid grey;" />
</a></p>

<h3 id="step-5-configure-terraform-variables">Step 5: Configure Terraform variables</h3>

<p>Copy <code class="language-plaintext highlighter-rouge">terraform/terraform.tfvars.example</code> to <code class="language-plaintext highlighter-rouge">terraform/terraform.tfvars</code>. Replace every <code class="language-plaintext highlighter-rouge">TODO</code> value with your actual credentials and network settings. Key variables for a single-node lab:</p>

<div class="language-hcl highlighter-rouge"><div class="highlight"><pre class="highlight"><code><span class="nx">management_adapters</span> <span class="err">=</span> <span class="p">[</span><span class="s2">"MGMT1"</span><span class="p">]</span>
<span class="nx">rdma_enabled</span>        <span class="err">=</span> <span class="kc">false</span>
<span class="nx">networking_type</span>     <span class="err">=</span> <span class="s2">""</span>
<span class="nx">networking_pattern</span>  <span class="err">=</span> <span class="s2">""</span>
<span class="nx">witness_type</span>        <span class="err">=</span> <span class="s2">""</span>
<span class="nx">is_exported</span>         <span class="err">=</span> <span class="kc">false</span>
<span class="nx">deployment_completed</span> <span class="err">=</span> <span class="kc">false</span>
</code></pre></div></div>

<h3 id="step-6-authenticate-with-azure-cli">Step 6: Authenticate with Azure CLI</h3>

<p>Terraform uses the Azure CLI session to authenticate. Log in with the service principal created in Step 1 and set the target subscription:</p>

<div class="language-powershell highlighter-rouge"><div class="highlight"><pre class="highlight"><code><span class="n">az</span><span class="w"> </span><span class="nx">login</span><span class="w"> </span><span class="nt">--service-principal</span><span class="w"> </span><span class="se">`
</span><span class="w">    </span><span class="nt">--username</span><span class="w"> </span><span class="s2">"&lt;app-id&gt;"</span><span class="w"> </span><span class="se">`
</span><span class="w">    </span><span class="nt">--password</span><span class="w"> </span><span class="s2">"&lt;client-secret&gt;"</span><span class="w"> </span><span class="se">`
</span><span class="w">    </span><span class="nt">--tenant</span><span class="w"> </span><span class="s2">"&lt;tenant-id&gt;"</span><span class="w">
</span><span class="n">az</span><span class="w"> </span><span class="nx">account</span><span class="w"> </span><span class="nx">set</span><span class="w"> </span><span class="nt">--subscription</span><span class="w"> </span><span class="s2">"&lt;subscription-id&gt;"</span><span class="w">
</span></code></pre></div></div>

<h3 id="step-7-initialize-and-run-stage-1-validate">Step 7: Initialize and run Stage 1 (Validate)</h3>

<div class="language-powershell highlighter-rouge"><div class="highlight"><pre class="highlight"><code><span class="n">terraform</span><span class="w"> </span><span class="nx">init</span><span class="w">
</span><span class="n">terraform</span><span class="w"> </span><span class="nx">plan</span><span class="w">
</span><span class="n">terraform</span><span class="w"> </span><span class="nx">apply</span><span class="w">
</span></code></pre></div></div>

<p>Review the plan output before confirming the apply. Terraform creates the Key Vault, storage account, RBAC assignments and edge device registration, then submits the deployment settings to Azure for validation.</p>

<p><a href="/assets/img/post/2026-04-17-azure-local-terraform/TF_Init.webp" target="_blank">
  <img src="/assets/img/post/2026-04-17-azure-local-terraform/TF_Init.webp" alt="terraform init output" style="border: 2px solid grey;" />
</a></p>

<p><a href="/assets/img/post/2026-04-17-azure-local-terraform/TF_Plan_Stage1.webp" target="_blank">
  <img src="/assets/img/post/2026-04-17-azure-local-terraform/TF_Plan_Stage1.webp" alt="terraform plan output Stage 1" style="border: 2px solid grey;" />
</a></p>

<p><a href="/assets/img/post/2026-04-17-azure-local-terraform/TF_Apply_Stage1_Validate.webp" target="_blank">
  <img src="/assets/img/post/2026-04-17-azure-local-terraform/TF_Apply_Stage1_Validate.webp" alt="Stage 1 apply complete" style="border: 2px solid grey;" />
</a></p>

<p>Validation runs as part of the apply itself. Once Terraform reports the apply as complete, Stage 1 is done (takes arround 90 minutes) and you can move straight to Stage 2.</p>

<h3 id="step-8-switch-to-stage-2-deploy">Step 8: Switch to Stage 2 (Deploy)</h3>

<p>Set <code class="language-plaintext highlighter-rouge">is_exported = true</code> in <code class="language-plaintext highlighter-rouge">terraform.tfvars</code> and run <code class="language-plaintext highlighter-rouge">terraform apply</code> again. Terraform patches <code class="language-plaintext highlighter-rouge">deploymentMode</code> to <code class="language-plaintext highlighter-rouge">Deploy</code> and Azure starts the full cluster provisioning. This apply will run for 90 to 180 minutes while Azure works through the FullCloudDeployment plan.</p>

<p><a href="/assets/img/post/2026-04-17-azure-local-terraform/TF_Apply_Stage2.webp" target="_blank">
  <img src="/assets/img/post/2026-04-17-azure-local-terraform/TF_Apply_Stage2.webp" alt="Stage 2 terraform apply" style="border: 2px solid grey;" />
</a></p>

<p>While Terraform is waiting, you can follow the deployment progress in real time in the Azure portal under the Azure Local resource. Each step of the plan is shown individually, which makes it much easier to spot a failure early rather than waiting for a Terraform timeout.</p>

<p><a href="/assets/img/post/2026-04-17-azure-local-terraform/TF_Portal_Deploying.webp" target="_blank">
  <img src="/assets/img/post/2026-04-17-azure-local-terraform/TF_Portal_Deploying.webp" alt="Azure portal showing deployment steps in progress" style="border: 2px solid grey;" />
</a></p>

<p>Once the apply finishes and all steps complete successfully, this is what it looks like from both sides. First, the Terraform output confirming all resources were created:</p>

<p><a href="/assets/img/post/2026-04-17-azure-local-terraform/TF_Apply_Stage2_completed.webp" target="_blank">
  <img src="/assets/img/post/2026-04-17-azure-local-terraform/TF_Apply_Stage2_completed.webp" alt="Terraform apply Stage 2 complete" style="border: 2px solid grey;" />
</a></p>

<p>And the Azure portal showing the cluster as successfully deployed:</p>

<p><a href="/assets/img/post/2026-04-17-azure-local-terraform/TF_Portal_Deployed.webp" target="_blank">
  <img src="/assets/img/post/2026-04-17-azure-local-terraform/TF_Portal_Deployed.webp" alt="Azure portal showing deployment complete" style="border: 2px solid grey;" />
</a></p>

<h3 id="step-9-enable-post-deployment-outputs">Step 9: Enable post-deployment outputs</h3>

<p>Once the portal confirms the deployment is complete and Terraform finishes the apply, set <code class="language-plaintext highlighter-rouge">deployment_completed = true</code> in <code class="language-plaintext highlighter-rouge">terraform.tfvars</code> and run <code class="language-plaintext highlighter-rouge">terraform apply</code> once more. This allows Terraform to read the custom location output that is only available after the Azure deployment engine finishes.</p>

<p><a href="/assets/img/post/2026-04-17-azure-local-terraform/TF_Apply_Stage2_Complete.webp" target="_blank">
  <img src="/assets/img/post/2026-04-17-azure-local-terraform/TF_Apply_Stage2_Complete.webp" alt="Terraform apply complete with post-deployment outputs" style="border: 2px solid grey;" />
</a></p>

<h2 id="recovery-helpers">Recovery Helpers</h2>

<p>If a <code class="language-plaintext highlighter-rouge">terraform apply</code> times out or you lose Terraform state after a successful apply, the configuration includes two recovery variables to help you get back on track without destroying and rebuilding:</p>

<ul>
  <li>
    <p><strong><code class="language-plaintext highlighter-rouge">import_deployment_settings</code></strong> (<code class="language-plaintext highlighter-rouge">bool</code>, default <code class="language-plaintext highlighter-rouge">false</code>): When <code class="language-plaintext highlighter-rouge">true</code>, imports the pre-existing <code class="language-plaintext highlighter-rouge">deploymentSettings/default</code> into state before the plan phase. Use this when a previous apply timed out but the resource already exists in Azure.</p>
  </li>
  <li>
    <p><strong><code class="language-plaintext highlighter-rouge">import_machine_rg_role_assignment_ids</code></strong> (<code class="language-plaintext highlighter-rouge">map(string)</code>, default <code class="language-plaintext highlighter-rouge">{}</code>): When the <code class="language-plaintext highlighter-rouge">machine_rg_role_assign</code> role assignments already exist in Azure and a new apply would fail with <code class="language-plaintext highlighter-rouge">409 Conflict</code>, populate this map with the existing assignment GUIDs (visible in the 409 error message) and run <code class="language-plaintext highlighter-rouge">terraform apply</code> to import them. Reset to <code class="language-plaintext highlighter-rouge">{}</code> afterward.</p>
  </li>
</ul>

<p>If the Arc machine was manually deleted from Azure and you need to run <code class="language-plaintext highlighter-rouge">terraform destroy</code>, set <code class="language-plaintext highlighter-rouge">enable_cluster_module = false</code> to skip the cluster module and avoid failing Arc data-source lookups.</p>

<p>It is also worth noting that the cluster deployment creates additional Azure resources such as Arc extensions and logical networks that are lifecycle-managed by the cluster resource itself: they are created and destroyed together with it, so they do not need to be imported separately. The custom location is the exception, it is the only post-deployment resource that Terraform captures in state and exposes as an output, since workload modules (AVD, AKS) need to reference it. Everything else is handled by Azure as part of the cluster’s own lifecycle.</p>

<h2 id="what-is-next">What Is Next</h2>

<p>The cluster deployment is the foundation. The repository’s goal from the start has been to automate the full workload lifecycle on top of Azure Local, not just the cluster itself. The next steps are:</p>

<ul>
  <li><strong>Azure Virtual Desktop</strong>: A Terraform module for AVD host pools, session hosts and workspace configuration, deployable against the custom location created by the cluster deployment.</li>
  <li><strong>AKS on Azure Local</strong>: Terraform for AKS cluster creation using the Arc-enabled Kubernetes stack, scoped to the same resource group and custom location.</li>
  <li><strong>Pipelines</strong>: GitHub Actions or Azure DevOps pipeline definitions that call these Terraform configurations using the service principal created by <code class="language-plaintext highlighter-rouge">00_AzurePreRequisites.ps1</code>. The goal is a single pipeline trigger that goes from a fresh Arc-registered node to a fully deployed cluster with workloads.</li>
</ul>

<p>If you have questions, hit issues, or have already gone through a similar Terraform journey with Azure Local, I would love to hear from you in the comments below. The repository is public and pull requests are welcome.</p>]]></content><author><name>Cristian Schmitt Nieto</name></author><category term="Blog" /><category term="Azure Local" /><category term="Azure Stack HCI" /><category term="Terraform" /><category term="Automation" /><category term="Infrastructure as Code" /><summary type="html"><![CDATA[Deploy Azure Local with Terraform using a fixed AVM fork, staged validation and a service principal ready for pipeline-driven AVD and AKS automation.]]></summary></entry><entry><title type="html">Reflecting on 2025 and Goals for 2026</title><link href="https://schmitt-nieto.com/blog/year-recap-2025/" rel="alternate" type="text/html" title="Reflecting on 2025 and Goals for 2026" /><published>2025-12-31T00:00:00+01:00</published><updated>2025-12-31T00:00:00+01:00</updated><id>https://schmitt-nieto.com/blog/year-recap-2025</id><content type="html" xml:base="https://schmitt-nieto.com/blog/year-recap-2025/"><![CDATA[<h2 id="introduction">Introduction</h2>

<p>Hello everyone, another year has gone by. As I did last year, I’ve set myself the goal of writing down a list of objectives for 2026, along with the main events that took place during 2025. This blog post is a bit more personal and less technical than usual, and its main purpose is to track the progress of my blog as well as my personal goals.</p>

<p>I want to be able to come back here next December and clearly see what I’ve managed to move forward and what I didn’t quite achieve, since my focus tends to change quite a bit throughout the year 😅</p>

<h2 id="2025-recap">2025 Recap</h2>

<h3 id="personal-highlights">Personal Highlights</h3>

<p>When I look back at my photo albums, I realize just how much has happened over the year. 2025 has been a great year, at least when it comes to personal and family goals. I’ve truly enjoyed spending time with my loved ones, and I’ve gained a much healthier perspective on how I approach life.</p>

<p>On the professional side, I’ve also continued to grow and evolve, and you’ll see a couple of articles about that during 2026 😜. Even though I didn’t manage to achieve some of the goals I set at the beginning of last year, like attending Ignite, I did attend several conferences and surrounded myself with some truly amazing people in the professional space, not all of them coworkers, which also led to making a few new friends along the way 🤗</p>

<h3 id="professional-achievements">Professional Achievements</h3>

<p>I wrapped up 2024 and started 2025 by earning Microsoft certifications in the areas I focused on the most throughout the year, namely Microsoft Identity and Access Administrator and Endpoint Administrator. During 2025, I was heavily focused on strengthening my overall knowledge and further developing my expertise around AVD, both in cloud and hybrid environments, with all the related challenges that come with them.</p>

<p>That said, this didn’t stop me from continuing to write and dedicating my free time to one of my favorite hobbies: Azure Local. In 2025, I published eight blog posts focused exclusively on Azure Local and solutions built for or around it. While I initially planned to write more about other topics, the way I approach each article, in terms of quality and the time invested, made it harder to branch out as much as I intended.</p>

<p>This time, I won’t include a list of articles like I did last year, nor a list of books I’m reading or have finished. This year, that list would be way too long, over 30 new books, and yes, I did finish the ones from last year as well. If anyone is curious about what I’m reading, feel free to reach out to me on LinkedIn and I’ll happily share the list 😜</p>

<h3 id="blog-stats-for-2025">Blog Stats for 2025</h3>

<p>Overall, blog statistics have improved this year, even though I slowed down a bit in the second half in terms of posting frequency. Since this is the first year where I have a full set of statistics, it’s honestly great to see how well the blog is being received, especially considering it focuses on a very niche topic, currently almost exclusively Azure Local.</p>

<p>As usual, the main statistics are split across Google Analytics, Google Search Console, Clarity, Bing, LinkedIn and this year I’m also adding my GitHub Rewind.</p>

<h4 id="google-analytics">Google Analytics</h4>
<p><a href="/assets/img/post/2025-12-31-new-year/google-analytics.png" target="_blank">
  <img src="/assets/img/post/2025-12-31-new-year/google-analytics.png" alt="Google Analytics Screenshot" style="border: 2px solid grey;" />
</a></p>

<h4 id="google-search-console">Google Search Console</h4>
<p><a href="/assets/img/post/2025-12-31-new-year/google-search-console.png" target="_blank">
  <img src="/assets/img/post/2025-12-31-new-year/google-search-console.png" alt="Google Search Console Screenshot" style="border: 2px solid grey;" />
</a></p>

<h4 id="clarity">Clarity</h4>
<p><a href="/assets/img/post/2025-12-31-new-year/clarity.png" target="_blank">
  <img src="/assets/img/post/2025-12-31-new-year/clarity.png" alt="Microsoft Clarity Screenshot" style="border: 2px solid grey;" />
</a></p>

<h4 id="bing-webmaster-tools">Bing Webmaster Tools</h4>
<p><a href="/assets/img/post/2025-12-31-new-year/bing-webmaster.png" target="_blank">
  <img src="/assets/img/post/2025-12-31-new-year/bing-webmaster.png" alt="Bing Webmaster Screenshot" style="border: 2px solid grey;" />
</a></p>

<h4 id="linkedin">LinkedIn</h4>
<p><a href="/assets/img/post/2025-12-31-new-year/linkedin1.png" target="_blank">
  <img src="/assets/img/post/2025-12-31-new-year/linkedin1.png" alt="LinkedIn Stats Screenshot 1" style="border: 2px solid grey;" />
</a>
<a href="/assets/img/post/2025-12-31-new-year/linkedin2.png" target="_blank">
  <img src="/assets/img/post/2025-12-31-new-year/linkedin2.png" alt="LinkedIn Stats Screenshot 2" style="border: 2px solid grey;" />
</a>
<a href="/assets/img/post/2025-12-31-new-year/linkedin3.png" target="_blank">
  <img src="/assets/img/post/2025-12-31-new-year/linkedin3.png" alt="LinkedIn Stats Screenshot 3" style="border: 2px solid grey;" />
</a></p>

<h4 id="github">GitHub</h4>
<p><a href="/assets/img/post/2025-12-31-new-year/github.png" target="_blank">
  <img src="/assets/img/post/2025-12-31-new-year/github.png" alt="Github Rewind" style="border: 2px solid grey;" />
</a></p>

<p>Overall, the growth this year has been quite positive, both in terms of community engagement and content. It’s true that I should have, and wanted to, publish more blog posts, but work commitments and family time took priority, which led me to put the blog slightly on hold during the second half of the year. This is clearly reflected in the statistics.</p>

<h2 id="goals-for-2026">Goals for 2026</h2>

<p>This year, I’m setting goals that are less focused on technology and the blog itself:</p>

<ul>
  <li>Don’t start smoking again (I relapsed in 2025 😅)</li>
  <li>Go to the gym more regularly</li>
  <li>Improve my Chinese (I started studying it last year)</li>
  <li>Further reduce mobile phone usage and aim for less than one hour per day</li>
  <li>Publish one blog post per month</li>
</ul>

<p>As always, I wrap up the year by thanking everyone who has been by my side, and especially my wife and my daughter ♥️</p>

<p>I wish you all a happy 2026!</p>]]></content><author><name>Cristian Schmitt Nieto</name></author><category term="Blog" /><category term="Blog" /><summary type="html"><![CDATA[A look back at 2025's milestones and a roadmap for 2026. Personal growth, professional achievements and ambitious goals for the future.]]></summary></entry><entry><title type="html">Azure Local: How to Deploy LLMs on AKS</title><link href="https://schmitt-nieto.com/blog/azure-local-llm/" rel="alternate" type="text/html" title="Azure Local: How to Deploy LLMs on AKS" /><published>2025-11-30T00:00:00+01:00</published><updated>2025-11-30T00:00:00+01:00</updated><id>https://schmitt-nieto.com/blog/azure-local-llm</id><content type="html" xml:base="https://schmitt-nieto.com/blog/azure-local-llm/"><![CDATA[<h2 id="introduction">Introduction</h2>

<p>Welcome to a new article on my blog. Today I’m covering a topic that helps deepen your understanding of Kubernetes: the deployment of Large Language Models (LLMs) on Azure Kubernetes Services (AKS) running on Azure Local. I’ll explain some basic concepts along the way. If anything sounds unfamiliar, I recommend checking out my previous article: <a href="/blog/azure-local-aks/">Azure Local: AKS and SQL Managed Instances</a>.</p>

<p>Let me also apologize up front for the slight clickbait in the title. Because of my lab setup (a laptop with 64 GB of RAM, where Azure Local only gets 34 GB) I didn’t deploy an actual LLM, but a Small Language Model (SLM). The process and implementation are identical, though.</p>

<h2 id="infrastructure-design">Infrastructure Design</h2>

<p>Before deploying anything, we should review the resources we have available and come up with a plan. As mentioned, I only have my “Azure Local Lab” running fully virtualized on my laptop. Since I can’t use a GPU on AKS here and RAM is limited (around 20 GB free for AKS, shared between the control plane and the worker nodes), I designed a simple and lightweight proof of concept.</p>

<p>If I had the right hardware, I would have deployed KAITO (<a href="https://github.com/kaito-project/kaito">Kubernetes AI Toolchain Operator</a>). But since I currently don’t have a GPU available, we’ll stick to my CPU-only variant. Still, here is the KAITO architecture for reference:<br />
<a href="/assets/img/post/2025-11-29-azure-local-llm/Kaito.png" target="_blank">
  <img src="/assets/img/post/2025-11-29-azure-local-llm/Kaito.png" alt="KAITO" style="border: 2px solid grey;" />
</a></p>

<p>To make the architecture of my lab easier to understand, I prepared a diagram based on the one shown in the official <a href="https://learn.microsoft.com/en-us/azure/architecture/example-scenario/hybrid/aks-baseline">Baseline Architecture for AKS on Azure Local</a>.</p>

<p><a href="/assets/img/post/2025-11-29-azure-local-llm/AKS-Architecture.png" target="_blank">
  <img src="/assets/img/post/2025-11-29-azure-local-llm/AKS-Architecture.png" alt="AKS Architecture" style="border: 2px solid grey;" />
</a></p>

<p>In the diagram you can see the components we’ll deploy:</p>

<ul>
  <li><strong>Azure Local</strong>: A single virtualized node that in turn hosts the nested AKS cluster</li>
  <li><strong>AKS VMs</strong>:
    <ul>
      <li>One control plane VM that acts as API server and LoadBalancer (via MetalLB)</li>
      <li>One worker node responsible for running the workloads</li>
      <li>Control plane size: Standard_K8S3_v1 (4 vCPUs, 6 GB RAM)</li>
      <li>Worker node size: Standard_A4_v2 (4 vCPUs, 8 GB RAM)</li>
    </ul>
  </li>
  <li><strong>Logical AKS infrastructure</strong>:
    <ul>
      <li>A dedicated namespace for LLM-related workloads</li>
      <li>A single external IP from MetalLB (172.19.19.90) for Open WebUI</li>
      <li>Persistent storage of 25 Gi for Ollama to keep the model files between updates</li>
    </ul>
  </li>
</ul>

<p>This is the workload architecture inside AKS:</p>

<p><a href="/assets/img/post/2025-11-29-azure-local-llm/slm-llm-stack-arch.png" target="_blank">
  <img src="/assets/img/post/2025-11-29-azure-local-llm/slm-llm-stack-arch.png" alt="SLM AKS Architecture on Azure Local" style="border: 2px solid grey;" />
</a></p>

<p>The whole deployment is carried out from my laptop, which has direct Layer 2 network access to the AKS cluster. I use Az CLI, kubectl and Helm. Throughout the process I’ll point out which tool is used and why. The goal here is to test LLM capabilities in this specific environment, not to deploy a standardized production-grade AKS hybrid application.</p>

<p>If you’re interested in the proper deployment approach for production AKS hybrid applications, I recommend reading:<br />
<a href="https://learn.microsoft.com/en-us/azure/architecture/example-scenario/hybrid/aks-hybrid-azure-local">Deploy and operate apps with AKS enabled by Azure Arc on Azure Local</a>.<br />
That article covers pipelines, GitOps, Flux, Helm and other components, giving you a great high-level overview of the possibilities.</p>

<p>Another option would be a hybrid model using self-hosted agents and a Service Bearer Token (which we’ll create later in this article under “Creating a Service Account to Manage AKS Locally”). This can give you more flexibility, though I personally recommend the GitOps approach.</p>

<p>With the architecture clear, let’s move on to implementation.</p>

<h2 id="requirements-and-tool-installation">Requirements and Tool Installation</h2>

<p>To deploy everything, you’ll need:</p>

<ul>
  <li>A client machine (in my case the laptop running the lab) with direct network access to the AKS cluster running on Azure Local</li>
  <li>The following tools installed:
    <ul>
      <li>Helm, for deploying workloads to AKS</li>
      <li>Az CLI with the aksarc module, to authenticate and retrieve local AKS credentials</li>
      <li>kubectl, to manage AKS directly</li>
    </ul>
  </li>
  <li>An AKS cluster capable of running the workload (at least 8 GB RAM on the worker node) with temporary internet access during deployment</li>
  <li>The ability to add or modify local IP addresses used by the LoadBalancer (MetalLB)</li>
</ul>

<p>Some of these requirements were already covered in the previous article, but let’s go through the ones that weren’t.</p>

<h3 id="modifying-aks">Modifying AKS</h3>

<p>As mentioned, my lab runs nested on a laptop with 64 GB RAM, and Azure Local can only use around 36 GB or else the laptop becomes unusable. The Azure Arc Resource Bridge VM alone consumes 8 GB (or 16 GB during updates since another image is temporarily mounted). Azure Local itself uses between 4 and 8 GB depending on the moment. That leaves roughly 20 GB for AKS.</p>

<p>This memory has to be shared between the control plane and the worker nodes. To simplify the scenario, I limited the cluster to:</p>

<ul>
  <li>One control plane with the minimum RAM → <strong>6 GB</strong></li>
  <li>One worker node with enough RAM to run Ollama and Open WebUI → <strong>8 GB</strong></li>
</ul>

<p>I made these changes directly in the Azure Local portal under <em>Settings &gt; Node pools</em>.<br />
I also added the IP range 172.19.19.90–172.19.19.99 for MetalLB under <em>Settings &gt; Networking</em>.</p>

<p><a href="/assets/img/post/2025-11-29-azure-local-llm/AKSnodemodificationandLB.png" target="_blank">
  <img src="/assets/img/post/2025-11-29-azure-local-llm/AKSnodemodificationandLB.png" alt="AKS Nodes Modification and LB changes" style="border: 2px solid grey;" />
</a></p>

<p>Once AKS is ready, we need a local management channel using a bearer token.</p>

<h3 id="creating-a-service-account-to-manage-aks-locally">Creating a Service Account to Manage AKS Locally</h3>

<p>I’ve needed bearer tokens long before AI workloads became trendy. In past projects I used them for self-hosted agents and even started a repository almost two years ago that covered this topic:<br />
<a href="https://github.com/schmittnieto/AKSHybrid/">AKS Hybrid</a>.<br />
It’s a bit abandoned because I moved the more interesting content to other repositories.</p>

<p>The goal in this section is to access the AKS cluster locally. So I created this script:<br />
<a href="https://raw.githubusercontent.com/schmittnieto/AzSHCI/refs/heads/main/scripts/02Day2/12_AKSArcServiceToken.ps1">12_AKSArcServiceToken.ps1</a></p>

<p>This script:</p>

<ul>
  <li>Uses Az CLI and aksarc (installing the extension automatically if missing)</li>
  <li>Retrieves local AKS credentials</li>
  <li>Creates an admin user to manage the cluster</li>
  <li>Generates both a kubeconfig file and a txt file with the token</li>
  <li>Saves everything in the same directory</li>
  <li>Includes an extensive description</li>
  <li>Runs interactively if no parameters are provided</li>
</ul>

<p>When the script finishes, set your kubeconfig environment variable:</p>

<div class="language-powershell highlighter-rouge"><div class="highlight"><pre class="highlight"><code><span class="nv">$</span><span class="nn">env</span><span class="p">:</span><span class="nv">KUBECONFIG</span><span class="w"> </span><span class="o">=</span><span class="w"> </span><span class="s2">"</span><span class="bp">$HOME</span><span class="s2">\.kube\AzSHCI\aks-arc-kube-config"</span><span class="w">
</span></code></pre></div></div>

<p>After that you can manage AKS directly with kubectl.</p>

<p><a href="/assets/img/post/2025-11-29-azure-local-llm/kubeconfig.png" target="_blank">
  <img src="/assets/img/post/2025-11-29-azure-local-llm/kubeconfig.png" alt="Kubeconfig" style="border: 2px solid grey;" />
</a></p>

<p>Now we can proceed with the workloads.</p>

<h3 id="installing-helm">Installing Helm</h3>

<p>We’ll use Helm to deploy the workloads. Helm is a package manager for Kubernetes. It lets you install and update complete applications using charts, which define deployments, services, volumes and configuration. In hybrid environments like AKS on Azure Local, Helm is extremely convenient because it helps you avoid writing raw YAML by hand and makes versioning and updates easier.</p>

<p>Install it using Winget:</p>

<div class="language-powershell highlighter-rouge"><div class="highlight"><pre class="highlight"><code><span class="n">winget</span><span class="w"> </span><span class="nx">install</span><span class="w"> </span><span class="nx">Helm.Helm</span><span class="w">
</span></code></pre></div></div>

<p>With Helm installed, we’re ready for the next part: deploying the LLM and exposing it on the local network.</p>

<h2 id="llm-deployment">LLM Deployment</h2>

<p>Before going into commands, I want to explain why I chose <strong>Ollama</strong> as the base for the LLM. In a hybrid environment like AKS on Azure Local, you want something light, flexible and easy to operate. Ollama fits this perfectly. It’s one of the most popular inference engines in the community, offers a wide variety of ready-to-use models and is extremely simple to work with. It doesn’t require complex dependencies, starts quickly and lets you load models with a single command. This makes it ideal for demos, internal testing or small services running on limited hardware.</p>

<p>In this section we’ll deploy the full stack consisting of Ollama and Open WebUI inside the cluster. The goal is to maintain a simple, easy-to-manage architecture while still having the flexibility to run lightweight models in a controlled environment.</p>

<p>Below I explain each command step by step and what it means for the overall setup.</p>

<h3 id="create-the-namespace">Create the namespace</h3>

<div class="language-powershell highlighter-rouge"><div class="highlight"><pre class="highlight"><code><span class="n">kubectl</span><span class="w"> </span><span class="nx">create</span><span class="w"> </span><span class="nx">namespace</span><span class="w"> </span><span class="nx">slm</span><span class="w">
</span></code></pre></div></div>

<p>This creates a dedicated namespace called <strong>slm</strong>. It keeps all LLM-related components isolated, making it easier to manage, clean up or extend later.</p>

<h3 id="add-helm-repositories">Add Helm repositories</h3>

<div class="language-powershell highlighter-rouge"><div class="highlight"><pre class="highlight"><code><span class="n">helm</span><span class="w"> </span><span class="nx">repo</span><span class="w"> </span><span class="nx">add</span><span class="w"> </span><span class="nx">otwld</span><span class="w"> </span><span class="nx">https://helm.otwld.com/</span><span class="w">
</span><span class="n">helm</span><span class="w"> </span><span class="nx">repo</span><span class="w"> </span><span class="nx">add</span><span class="w"> </span><span class="nx">open-webui</span><span class="w"> </span><span class="nx">https://helm.openwebui.com/</span><span class="w">
</span><span class="n">helm</span><span class="w"> </span><span class="nx">repo</span><span class="w"> </span><span class="nx">update</span><span class="w">
</span></code></pre></div></div>

<p>These are the official repositories for Ollama and Open WebUI.</p>

<h3 id="deploy-ollama-as-an-internal-service">Deploy Ollama as an internal service</h3>

<div class="language-powershell highlighter-rouge"><div class="highlight"><pre class="highlight"><code><span class="n">helm</span><span class="w"> </span><span class="nx">install</span><span class="w"> </span><span class="nx">ollama</span><span class="w"> </span><span class="nx">otwld/ollama</span><span class="w"> </span><span class="se">`
</span><span class="w">  </span><span class="nt">--namespace</span><span class="w"> </span><span class="nx">slm</span><span class="w"> </span><span class="se">`
</span><span class="w">  </span><span class="nt">--set</span><span class="w"> </span><span class="nx">service.type</span><span class="o">=</span><span class="n">ClusterIP</span><span class="w"> </span><span class="se">`
</span><span class="w">  </span><span class="nt">--set</span><span class="w"> </span><span class="nx">ollama.port</span><span class="o">=</span><span class="mi">11434</span><span class="w"> </span><span class="err">`</span><span class="w">
  </span><span class="nt">--set</span><span class="w"> </span><span class="n">persistentVolume.enabled</span><span class="o">=</span><span class="n">true</span><span class="w"> </span><span class="se">`
</span><span class="w">  </span><span class="nt">--set</span><span class="w"> </span><span class="nx">persistentVolume.size</span><span class="o">=</span><span class="mi">20</span><span class="n">Gi</span><span class="w"> </span><span class="se">`
</span><span class="w">  </span><span class="nt">--set</span><span class="w"> </span><span class="nx">ollama.models.pull</span><span class="p">[</span><span class="mi">0</span><span class="p">]</span><span class="o">=</span><span class="n">phi4-mini:latest</span><span class="w"> </span><span class="se">`
</span><span class="w">  </span><span class="nt">--set</span><span class="w"> </span><span class="nx">ollama.models.run</span><span class="p">[</span><span class="mi">0</span><span class="p">]</span><span class="o">=</span><span class="n">phi4-mini:latest</span><span class="w"> </span><span class="se">`
</span><span class="w">  </span><span class="nt">--set</span><span class="w"> </span><span class="nx">resources.requests.cpu</span><span class="o">=</span><span class="s2">"2"</span><span class="w"> </span><span class="err">`</span><span class="w">
  </span><span class="nt">--set</span><span class="w"> </span><span class="n">resources.requests.memory</span><span class="o">=</span><span class="s2">"2Gi"</span><span class="w"> </span><span class="err">`</span><span class="w">
  </span><span class="nt">--set</span><span class="w"> </span><span class="n">resources.limits.cpu</span><span class="o">=</span><span class="s2">"4"</span><span class="w"> </span><span class="err">`</span><span class="w">
  </span><span class="nt">--set</span><span class="w"> </span><span class="n">resources.limits.memory</span><span class="o">=</span><span class="s2">"4Gi"</span><span class="w">
</span></code></pre></div></div>

<p>Key points:</p>

<ul>
  <li><strong>ClusterIP</strong> keeps the service internal</li>
  <li><strong>Port 11434</strong> is the default Ollama API port</li>
  <li><strong>20 Gi persistent volume</strong> ensures models don’t have to be re-downloaded</li>
  <li><strong>phi4-mini:latest</strong> is pulled and launched automatically</li>
  <li>Resource requests and limits prevent the node from being overloaded</li>
</ul>

<p>Check the pods:</p>

<div class="language-powershell highlighter-rouge"><div class="highlight"><pre class="highlight"><code><span class="n">kubectl</span><span class="w"> </span><span class="nx">get</span><span class="w"> </span><span class="nx">pods</span><span class="w"> </span><span class="nt">-n</span><span class="w"> </span><span class="nx">slm</span><span class="w">
</span></code></pre></div></div>

<h3 id="deploy-open-webui-as-a-loadbalancer">Deploy Open WebUI as a LoadBalancer</h3>

<div class="language-powershell highlighter-rouge"><div class="highlight"><pre class="highlight"><code><span class="n">helm</span><span class="w"> </span><span class="nx">install</span><span class="w"> </span><span class="nx">openwebui</span><span class="w"> </span><span class="nx">open-webui/open-webui</span><span class="w"> </span><span class="se">`
</span><span class="w">  </span><span class="nt">--namespace</span><span class="w"> </span><span class="nx">slm</span><span class="w"> </span><span class="se">`
</span><span class="w">  </span><span class="nt">--set</span><span class="w"> </span><span class="nx">service.type</span><span class="o">=</span><span class="n">LoadBalancer</span><span class="w"> </span><span class="se">`
</span><span class="w">  </span><span class="nt">--set</span><span class="w"> </span><span class="nx">ollama.enabled</span><span class="o">=</span><span class="n">false</span><span class="w"> </span><span class="se">`
</span><span class="w">  </span><span class="nt">--set</span><span class="w"> </span><span class="nx">ollamaUrls</span><span class="p">[</span><span class="mi">0</span><span class="p">]</span><span class="o">=</span><span class="s2">"http://ollama.slm.svc.cluster.local:11434"</span><span class="w"> </span><span class="err">`</span><span class="w">
  </span><span class="nt">--set</span><span class="w"> </span><span class="n">persistence.enabled</span><span class="o">=</span><span class="n">true</span><span class="w"> </span><span class="se">`
</span><span class="w">  </span><span class="nt">--set</span><span class="w"> </span><span class="nx">persistence.size</span><span class="o">=</span><span class="mi">5</span><span class="n">Gi</span><span class="w">
</span></code></pre></div></div>

<p>Key points:</p>

<ul>
  <li>Exposed via MetalLB</li>
  <li>Connects internally to Ollama</li>
  <li>5 Gi persistence for settings and local data</li>
  <li>You can define a static IP by adding <code class="language-plaintext highlighter-rouge">--set loadBalancerIP=&lt;your-ip&gt;</code></li>
</ul>

<p>Check pods again:</p>

<div class="language-powershell highlighter-rouge"><div class="highlight"><pre class="highlight"><code><span class="n">kubectl</span><span class="w"> </span><span class="nx">get</span><span class="w"> </span><span class="nx">pods</span><span class="w"> </span><span class="nt">-n</span><span class="w"> </span><span class="nx">slm</span><span class="w">
</span></code></pre></div></div>

<h3 id="final-result">Final result</h3>

<p>Retrieve the external IP:</p>

<div class="language-powershell highlighter-rouge"><div class="highlight"><pre class="highlight"><code><span class="n">kubectl</span><span class="w"> </span><span class="nx">get</span><span class="w"> </span><span class="nx">svc</span><span class="w"> </span><span class="nt">-n</span><span class="w"> </span><span class="nx">slm</span><span class="w">
</span></code></pre></div></div>

<p><a href="/assets/img/post/2025-11-29-azure-local-llm/extipwebui.png" target="_blank">
  <img src="/assets/img/post/2025-11-29-azure-local-llm/extipwebui.png" alt="External IP from WebUI" style="border: 2px solid grey;" />
</a></p>

<p>You can now create an admin user and start using the deployed LLM:</p>

<p><a href="/assets/img/post/2025-11-29-azure-local-llm/LLMAKS.gif" target="_blank">
  <img src="/assets/img/post/2025-11-29-azure-local-llm/LLMAKS.gif" alt="Testing OpenWebUI and Ollama in Azure Local AKS" style="border: 2px solid grey;" />
</a></p>

<p>Here are the token-per-second results. Not great, but considering everything is running triple-nested (laptop → Azure Local → AKS) with 4 vCPUs, it’s actually not bad:</p>

<p><a href="/assets/img/post/2025-11-29-azure-local-llm/tokenspersecond.png" target="_blank">
  <img src="/assets/img/post/2025-11-29-azure-local-llm/tokenspersecond.png" alt="Tokens per Second using Ollama in Azure Local AKS" style="border: 2px solid grey;" />
</a></p>

<p>With these two deployments you now have:</p>

<ul>
  <li>A running LLM engine (Ollama) inside the cluster, only accessible internally</li>
  <li>A modern UI (Open WebUI) exposed via MetalLB</li>
  <li>Persistent storage for both models and daily usage</li>
  <li>A clean namespace (<code class="language-plaintext highlighter-rouge">slm</code>) ready for future additions</li>
</ul>

<p>This stack is a great foundation for experimenting in a hybrid AKS environment, adding observability or even scaling to more nodes.</p>

<h2 id="conclusion">Conclusion</h2>

<p>With this setup you now have a functional environment capable of running lightweight language models inside an AKS cluster on Azure Local. Helm simplifies the deployment of Ollama and Open WebUI and gives you a stable base for further experimentation. Even though this lab runs on limited resources, the approach is perfectly valid for learning more about AKS and understanding how to integrate AI workloads in a hybrid environment.</p>

<p>From here, you can try more models, add observability, integrate GitOps workflows or even move to solutions like KAITO if you get access to a GPU.</p>]]></content><author><name>Cristian Schmitt Nieto</name></author><category term="Blog" /><category term="Azure Local" /><category term="AKS" /><category term="LLM" /><category term="Helm" /><summary type="html"><![CDATA[A detailed walkthrough of deploying lightweight LLMs on AKS inside an Azure Local environment.]]></summary></entry><entry><title type="html">Azure Local Deep Insights Workbook</title><link href="https://schmitt-nieto.com/blog/azure-local-deep-insights-workbook/" rel="alternate" type="text/html" title="Azure Local Deep Insights Workbook" /><published>2025-10-31T00:00:00+01:00</published><updated>2025-10-31T00:00:00+01:00</updated><id>https://schmitt-nieto.com/blog/azure-local-deep-insights-workbook</id><content type="html" xml:base="https://schmitt-nieto.com/blog/azure-local-deep-insights-workbook/"><![CDATA[<h2 id="introduction">Introduction</h2>

<p>Welcome back to the Azure Local series. Today I want to cover a topic that comes up often with customers: observability for Azure Local. Many organizations already use on premises monitoring like Checkmk or PRTG. Integrating clusters into those tools is possible, but it usually adds moving parts such as privileged WMI from a PAW to the cluster and that can become brittle.</p>

<p>Microsoft ships a basic workbook under <strong>Monitoring &gt; Insights</strong> on the Azure Local resource. It does a good job for cluster and node level views like CPU, RAM, Storage and Network. What it does not show is a deeper look at the <strong>guest VMs</strong>.</p>

<p>So I built <strong>Azure Local Deep Insights</strong>, a workbook that reuses the Insights pipeline and adds extra signals. The goal is to give you a single place to understand cluster health and guest VM behavior without touching the cluster from the inside. Everything runs from the Azure portal.</p>

<h2 id="what-the-workbook-looks-like">What the workbook looks like</h2>

<p>The following snapshot is from <strong>Monday 27.10.2025</strong>, taken during an upgrade from <strong>2509</strong> to <strong>2510</strong>. You can see how <strong>Arc Resource Bridge</strong> moved to a fresh VM during the process.</p>

<p><a href="/assets/img/post/2025-10-31-azure-local-deep-insights/AzureLocalWorkBookDemo.gif" target="_blank">
  <img src="/assets/img/post/2025-10-31-azure-local-deep-insights/AzureLocalWorkBookDemo.gif" alt="Azure Local Deep Insights Workbook demo" style="border: 2px solid grey;" />
</a></p>

<h2 id="one-click-deployment">One click deployment</h2>

<p>You can deploy the workbook with the button below. The template expects Insights to be configured on the cluster. We will adjust its Data Collection Rule in the next section.</p>

<p><a href="https://portal.azure.com/#create/Microsoft.Template/uri/https%3A%2F%2Fschmitt-nieto.com%2Fassets%2Fimg%2Fpost%2F2025-10-31-azure-local-deep-insights%2FAzureLocalDeepInsights.json"><img src="https://aka.ms/deploytoazurebutton" alt="Deploy to Azure" /></a></p>

<p>Prefer direct code instead of the button?</p>

<ul>
  <li>
    <p>If you want the <strong>gallery template code</strong> as a <code class="language-plaintext highlighter-rouge">.workbook</code> file, use this link:<br />
<a href="https://schmitt-nieto.com/assets/img/post/2025-10-31-azure-local-deep-insights/AzureLocalDeepInsights.workbook">https://schmitt-nieto.com/assets/img/post/2025-10-31-azure-local-deep-insights/AzureLocalDeepInsights.workbook</a></p>
  </li>
  <li>
    <p>If you want the <strong>raw JSON</strong> for <strong>manual deployment</strong>, use this link:<br />
<a href="https://schmitt-nieto.com/assets/img/post/2025-10-31-azure-local-deep-insights/AzureLocalDeepInsights.json">https://schmitt-nieto.com/assets/img/post/2025-10-31-azure-local-deep-insights/AzureLocalDeepInsights.json</a></p>
  </li>
</ul>

<h2 id="prerequisites">Prerequisites</h2>

<ul>
  <li>Azure Local resource enabled with <strong>Monitoring &gt; Insights</strong></li>
  <li>A <strong>Log Analytics Workspace</strong> dedicated to Azure Local data or shared by policy</li>
  <li>Permission to create or update a <strong>Data Collection Rule</strong> for the cluster</li>
</ul>

<h2 id="enable-insights-on-the-cluster">Enable Insights on the cluster</h2>

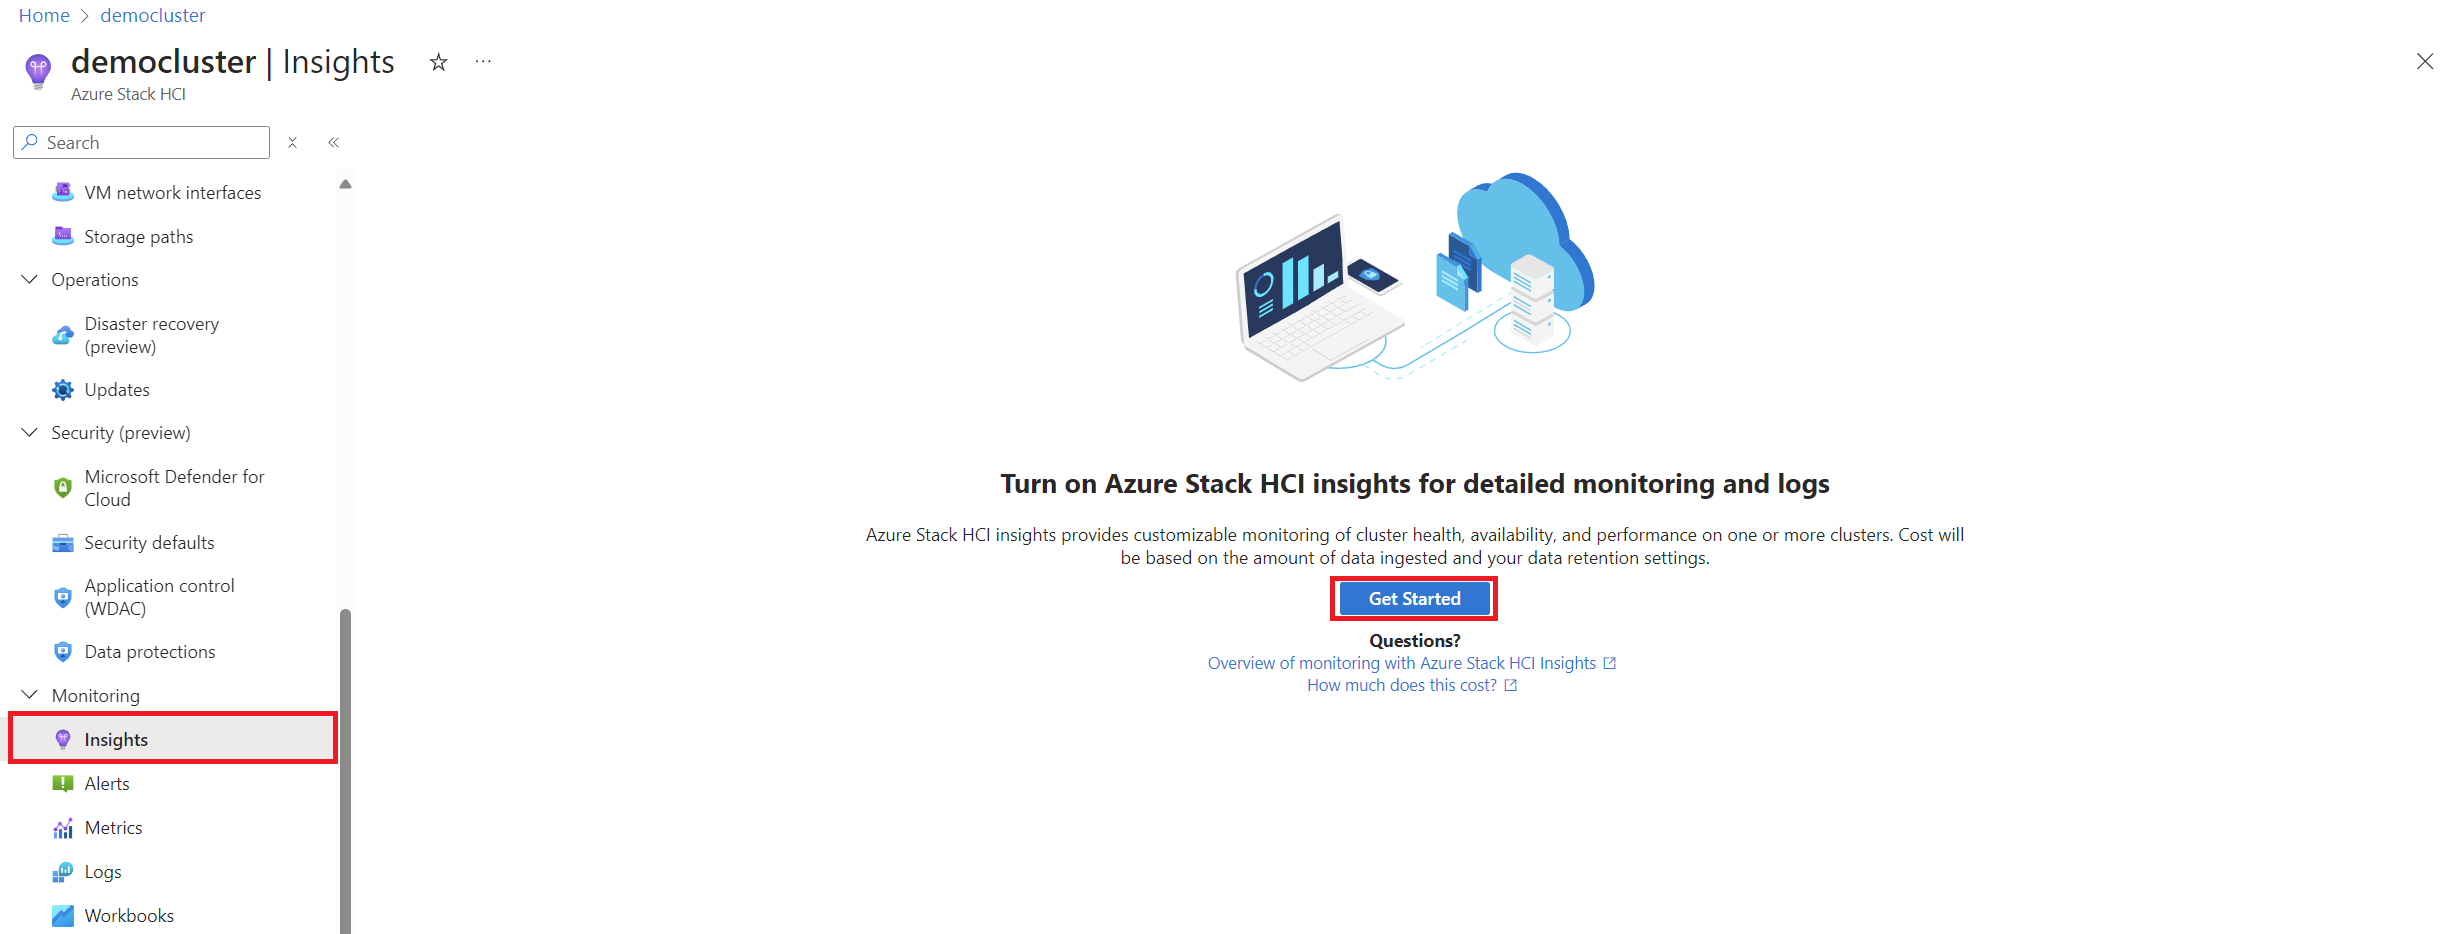
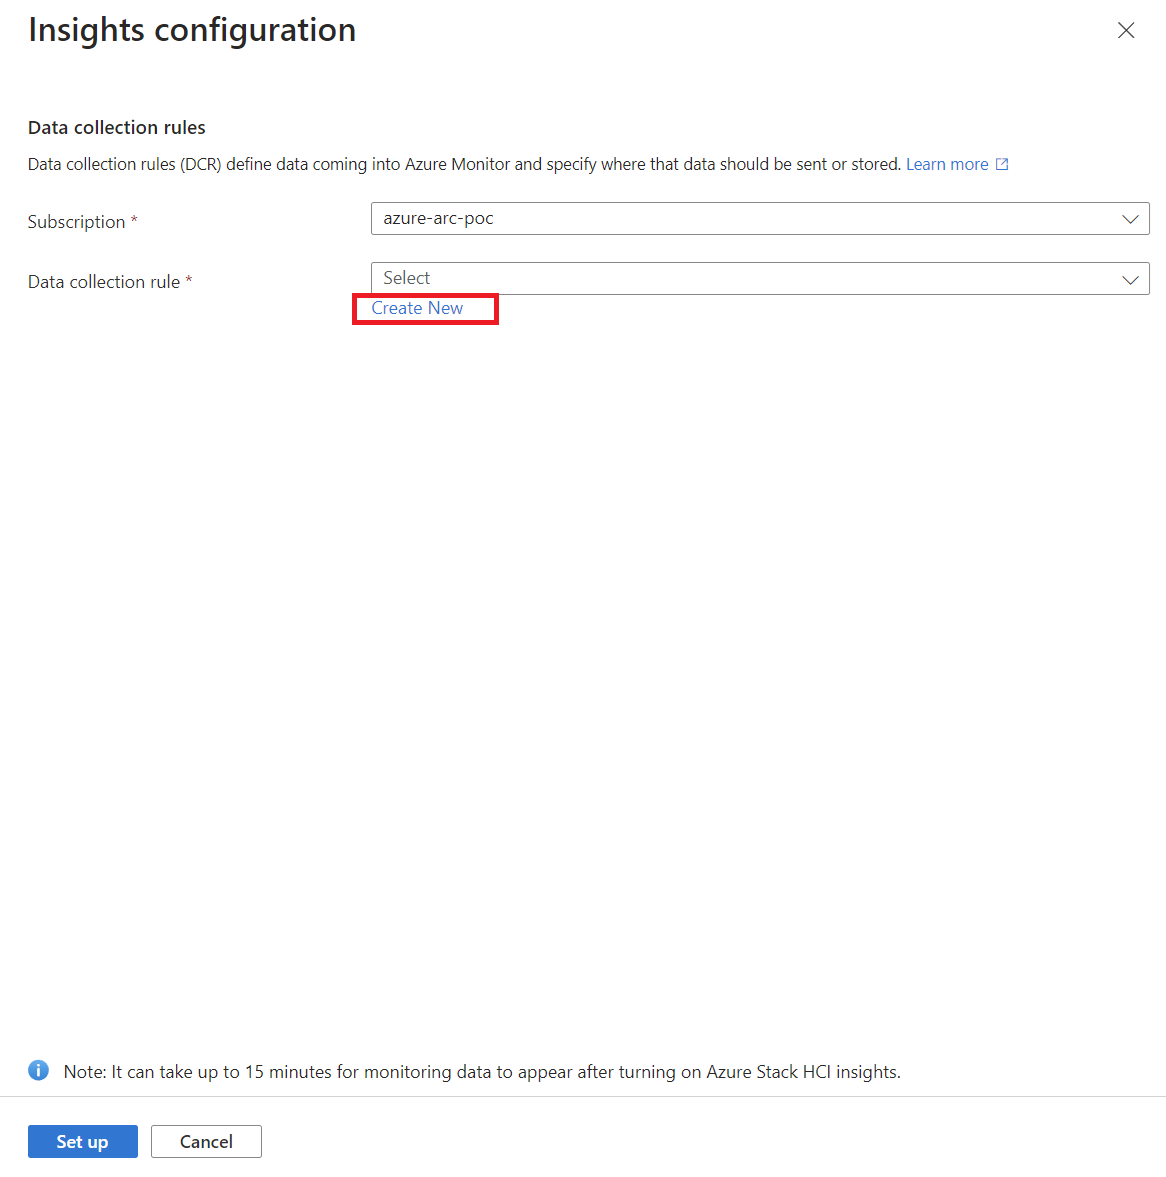
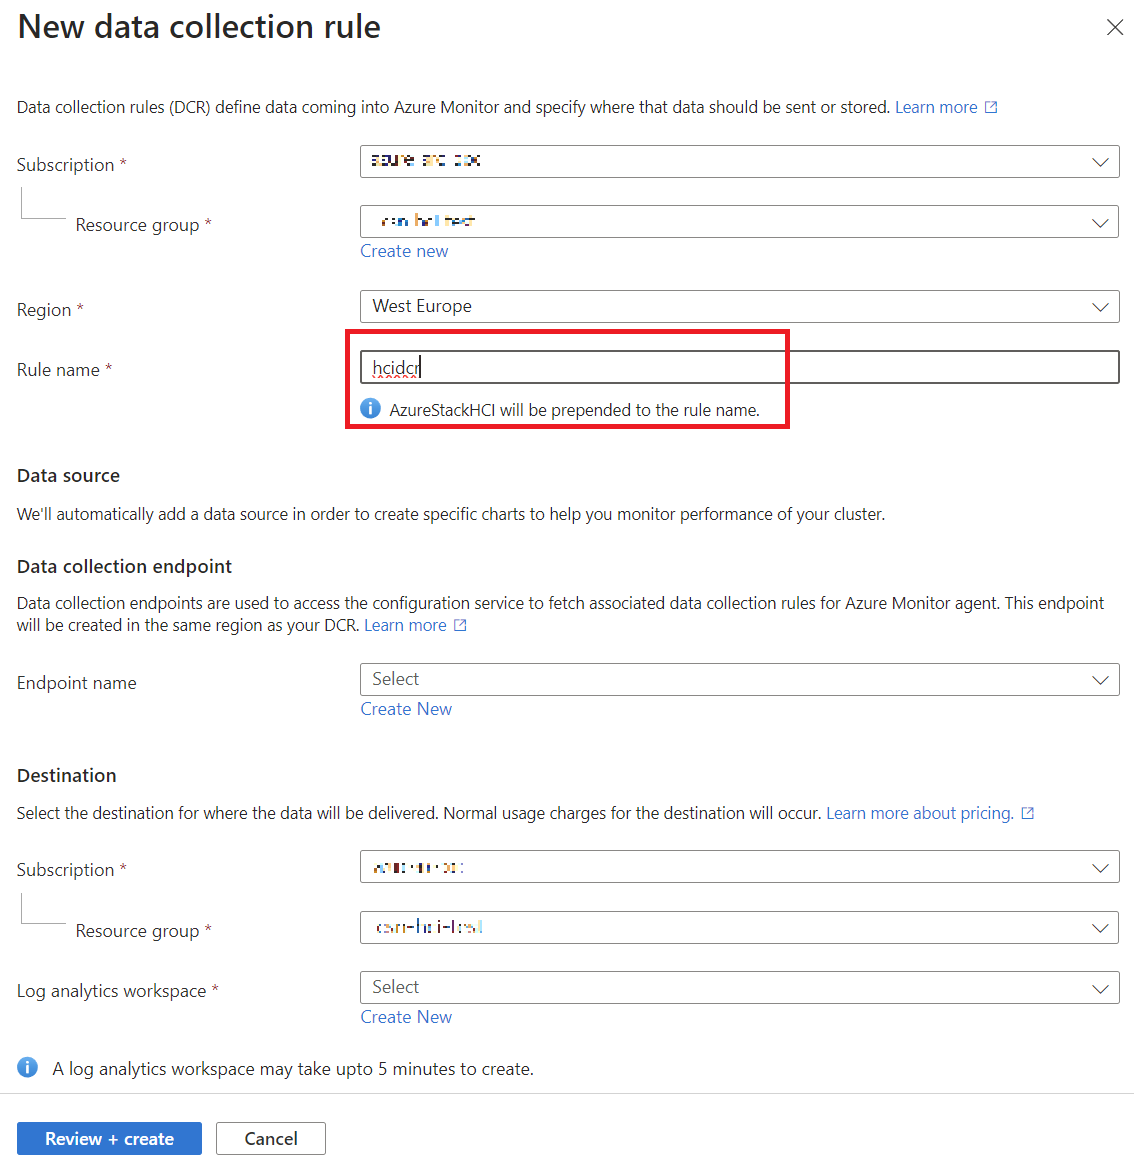
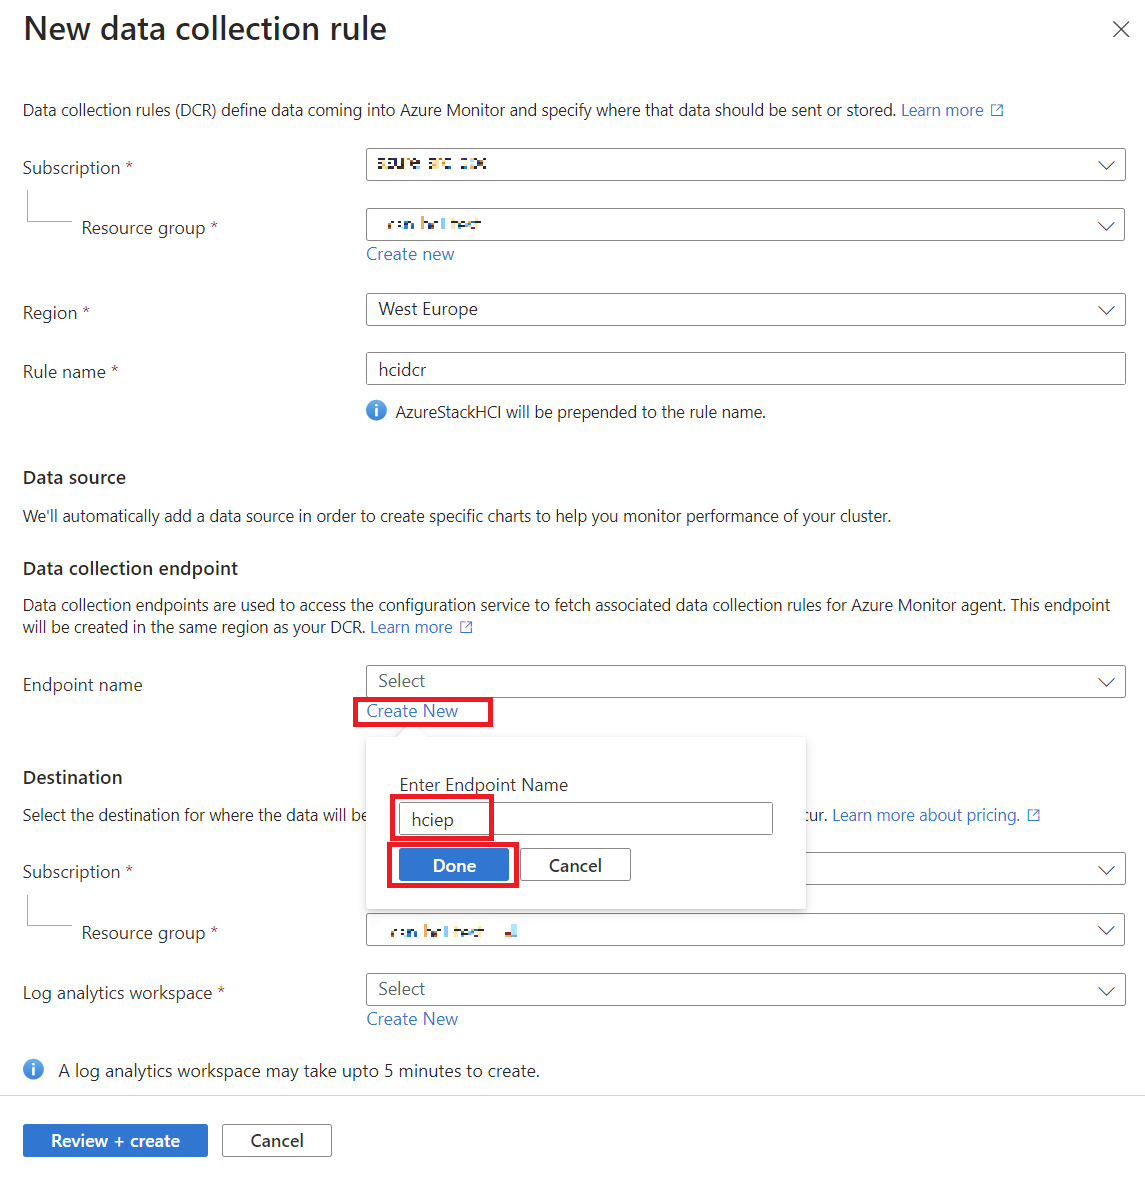
<p>Open <strong>Monitoring &gt; Insights</strong>, select <strong>Get started</strong>, then create:</p>

<ul>
  <li>A <strong>Data Collection Rule</strong></li>
  <li>A <strong>DCR endpoint name</strong></li>
  <li>A <strong>Log Analytics Workspace</strong></li>
</ul>

<p>If you already use Insights you can keep your existing workspace and rule.</p>

<p><a href="/assets/img/post/2025-10-31-azure-local-deep-insights/InsightsGetStarted.webp" target="_blank">
  <img src="/assets/img/post/2025-10-31-azure-local-deep-insights/InsightsGetStarted.webp" alt="Get started with Insights" style="border: 2px solid grey;" />
</a></p>

<p><a href="/assets/img/post/2025-10-31-azure-local-deep-insights/NewDataCollectionRule.webp" target="_blank">
  <img src="/assets/img/post/2025-10-31-azure-local-deep-insights/NewDataCollectionRule.webp" alt="Create Data Collection Rule" style="border: 2px solid grey;" />
</a></p>

<p><a href="/assets/img/post/2025-10-31-azure-local-deep-insights/InsightsGetStarted2.webp" target="_blank">
  <img src="/assets/img/post/2025-10-31-azure-local-deep-insights/InsightsGetStarted2.webp" alt="Get started with Insights" style="border: 2px solid grey;" />
</a></p>

<p>Once created, agents install on each node and a basic set of signals starts to flow. Initial ingestion can take about fifteen minutes. The default rule includes a few performance counters and event logs. The workbook extends this to include VM level views.</p>

<h2 id="extend-the-data-collection-rule">Extend the Data Collection Rule</h2>

<p>To power the VM states and per VM performance, add the following data sources to the <strong>existing</strong> DCR. A <strong>60 second</strong> sample rate works well in practice. It keeps costs low while keeping charts responsive.</p>

<h3 id="windows-event-logs-for-vm-state">Windows Event Logs for VM state</h3>

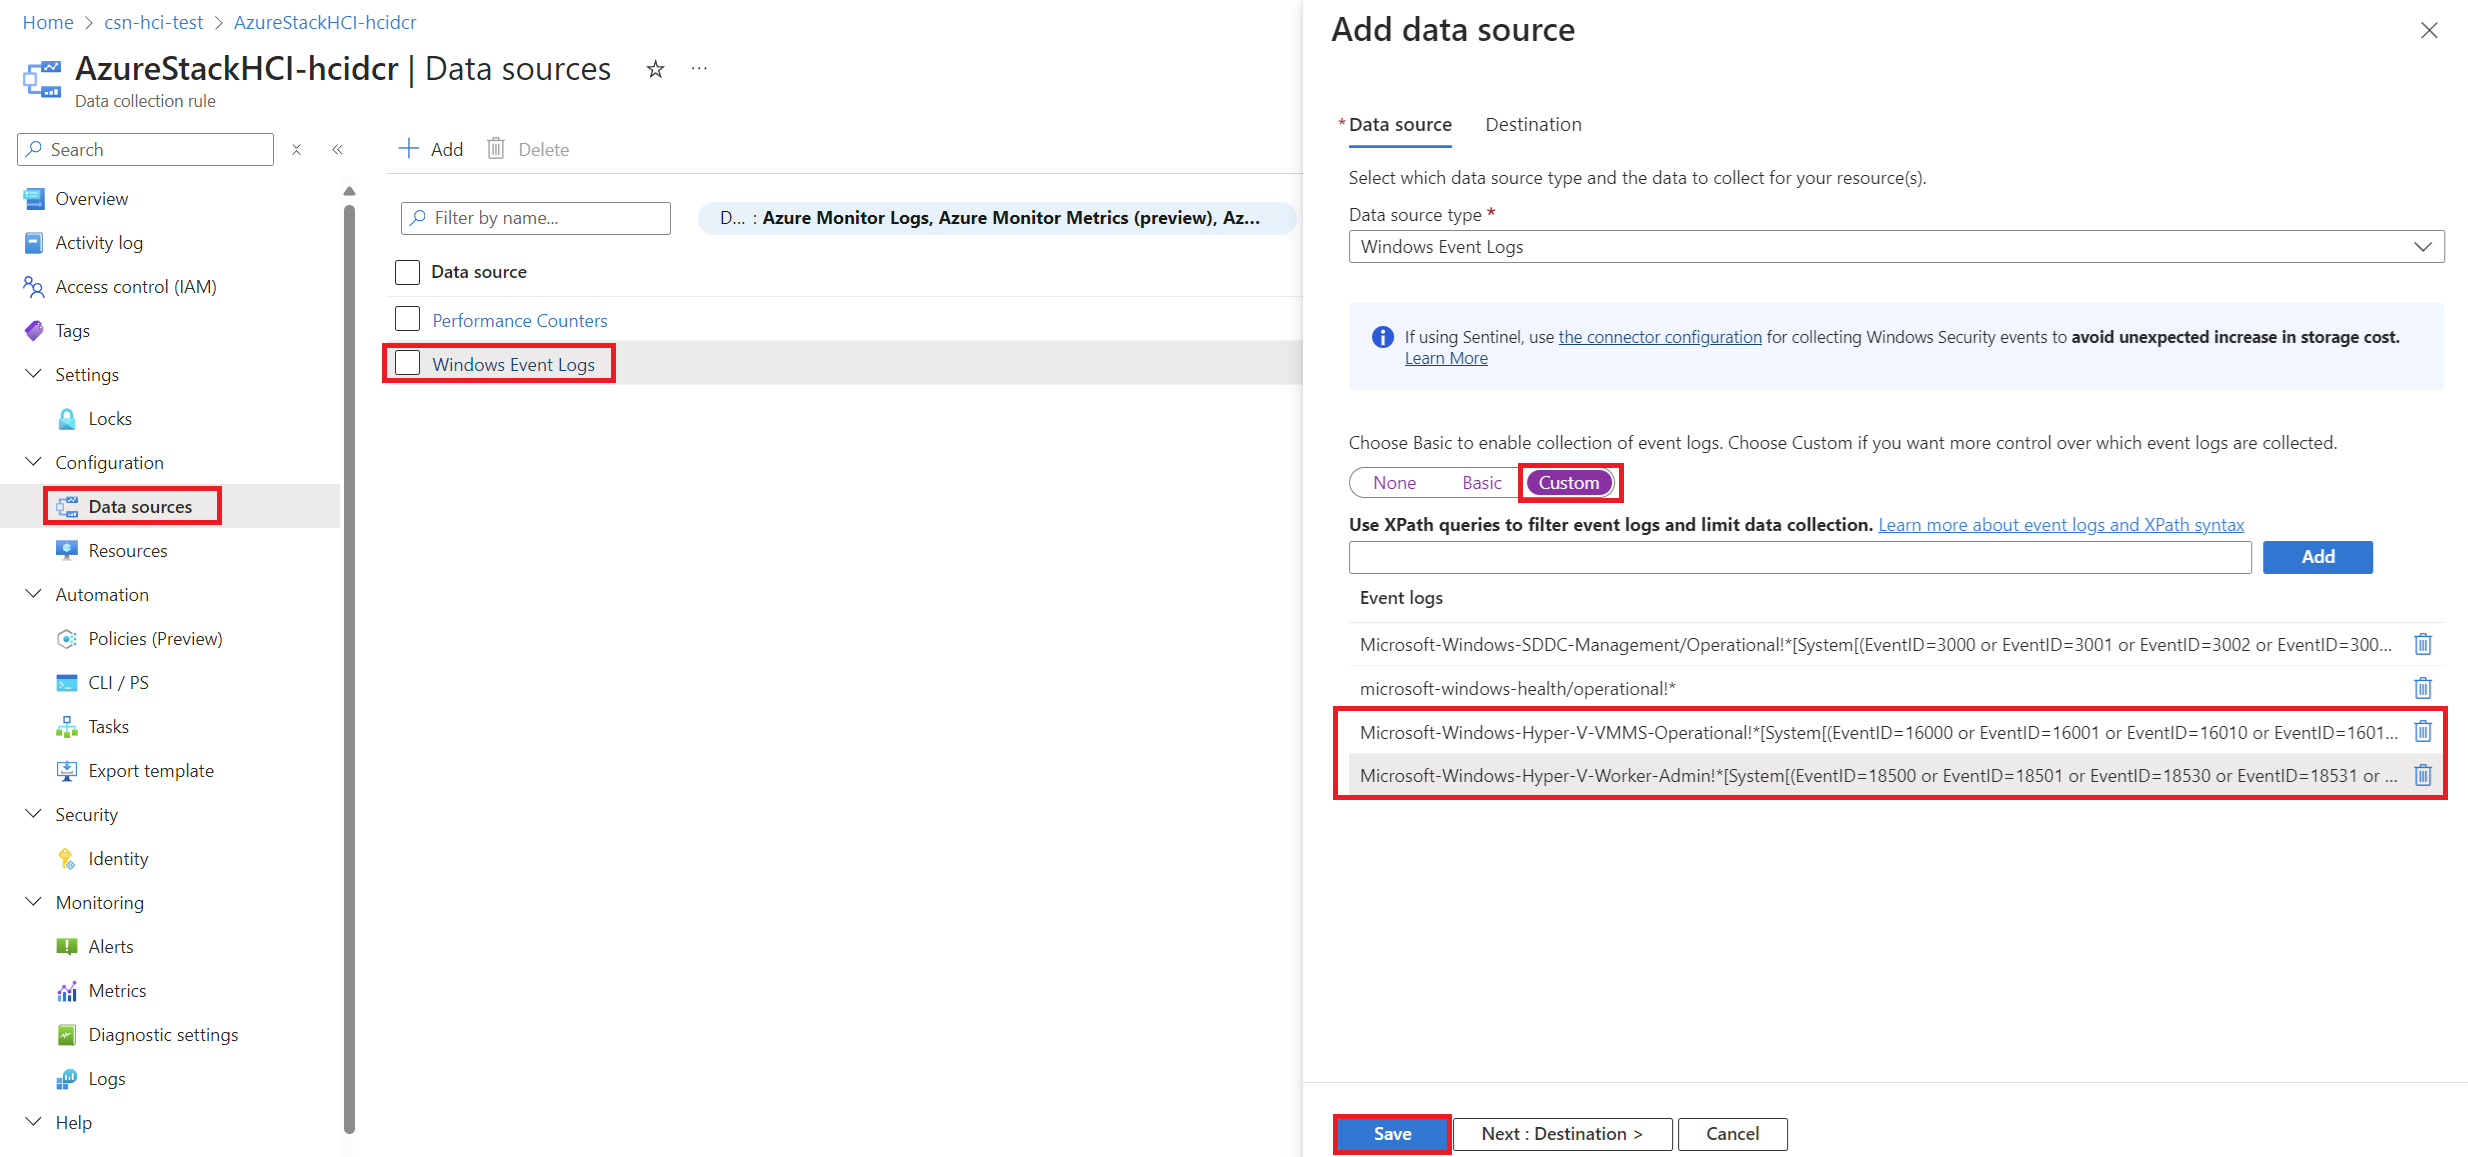
<p>In your DCR open <strong>Data sources &gt; Windows Event Logs &gt; Custom</strong> and add both filters below.</p>

<div class="language-text highlighter-rouge"><div class="highlight"><pre class="highlight"><code>Microsoft-Windows-Hyper-V-Worker-Admin![System[(EventID=18500 or EventID=18502 or EventID=18504 or EventID=18510 or EventID=18512 or EventID=18514 or EventID=18516 or EventID=18518 or EventID=18596 or EventID=18601)]]
</code></pre></div></div>

<div class="language-text highlighter-rouge"><div class="highlight"><pre class="highlight"><code>Microsoft-Windows-Hyper-V-VMMS-Admin![System[(EventID=13002 or EventID=13003)]]
</code></pre></div></div>

<p><a href="/assets/img/post/2025-10-31-azure-local-deep-insights/WindowsEventlogs.webp" target="_blank">
  <img src="/assets/img/post/2025-10-31-azure-local-deep-insights/WindowsEventlogs.webp" alt="Windows Event Logs in DCR" style="border: 2px solid grey;" />
</a></p>

<p>These events capture VM lifecycle from the Hyper-V view. The workbook uses them to build a timeline of <strong>Running</strong>, <strong>Off</strong>, <strong>Saved</strong>, <strong>Paused</strong>, <strong>Deleted</strong>, <strong>Created</strong> and more.</p>

<h3 id="performance-counters-for-cpu">Performance counters for CPU</h3>

<p>In your DCR open <strong>Data sources &gt; Performance Counters &gt; Custom</strong> and add the counters below to chart per VM CPU and hypervisor time.</p>

<div class="language-text highlighter-rouge"><div class="highlight"><pre class="highlight"><code>\Hyper-V Hypervisor Virtual Processor()% Guest Run Time
\Hyper-V Hypervisor Virtual Processor()% Total Run Time
\Hyper-V Hypervisor Virtual Processor(*)% Hypervisor Run Time
\Hyper-V Hypervisor Logical Processor(_Total)% Total Run Time
</code></pre></div></div>

<p><a href="/assets/img/post/2025-10-31-azure-local-deep-insights/CPUPerformanceCounters.webp" target="_blank">
  <img src="/assets/img/post/2025-10-31-azure-local-deep-insights/CPUPerformanceCounters.webp" alt="CPU performance counters" style="border: 2px solid grey;" />
</a></p>

<h3 id="performance-counters-for-network">Performance counters for Network</h3>

<div class="language-text highlighter-rouge"><div class="highlight"><pre class="highlight"><code>\Hyper-V Virtual Network Adapter(*)\Bytes Received/sec
\Hyper-V Virtual Network Adapter(*)\Bytes Sent/sec
\Hyper-V Virtual Switch(*)\Bytes Received/sec
\Hyper-V Virtual Switch(*)\Bytes Sent/sec
</code></pre></div></div>

<p><a href="/assets/img/post/2025-10-31-azure-local-deep-insights/NetworkPerformanceCounters.webp" target="_blank">
  <img src="/assets/img/post/2025-10-31-azure-local-deep-insights/NetworkPerformanceCounters.webp" alt="Network performance counters" style="border: 2px solid grey;" />
</a></p>

<h3 id="performance-counters-for-memory">Performance counters for Memory</h3>

<div class="language-text highlighter-rouge"><div class="highlight"><pre class="highlight"><code>\Hyper-V Dynamic Memory VM(*)\Guest Available Memory
\Hyper-V Dynamic Memory VM(*)\Guest Visible Physical Memory
</code></pre></div></div>

<p><a href="/assets/img/post/2025-10-31-azure-local-deep-insights/RAMPerformanceCounters.webp" target="_blank">
  <img src="/assets/img/post/2025-10-31-azure-local-deep-insights/RAMPerformanceCounters.webp" alt="Memory performance counters" style="border: 2px solid grey;" />
</a></p>

<p>I plan to add more counters over time. When that happens I will update the workbook introduction and this post.</p>

<h2 id="cross-check-with-vmfleet">Cross check with VMFleet</h2>

<p>If you are new to <strong>VMFleet</strong>, it is a handy PowerShell module to view cluster state from a single dashboard.</p>

<p>Run the following from a machine that can reach the cluster and with a user that has administrative rights.</p>

<div class="language-powershell highlighter-rouge"><div class="highlight"><pre class="highlight"><code><span class="n">Install-Module</span><span class="w"> </span><span class="nt">-Name</span><span class="w"> </span><span class="s2">"VMFleet"</span><span class="w">
</span><span class="n">Import-Module</span><span class="w"> </span><span class="nx">VMFleet</span><span class="w">
</span><span class="n">Watch-FleetCluster</span><span class="w"> </span><span class="nt">-Cluster</span><span class="w"> </span><span class="err">&lt;</span><span class="nx">ClusterName</span><span class="err">&gt;</span><span class="w"> </span><span class="nt">-Sets</span><span class="w"> </span><span class="o">*</span><span class="w">
</span></code></pre></div></div>

<p><a href="/assets/img/post/2025-10-31-azure-local-deep-insights/VMFleet.webp" target="_blank">
  <img src="/assets/img/post/2025-10-31-azure-local-deep-insights/VMFleet.webp" alt="VMFleet dashboard" style="border: 2px solid grey;" />
</a></p>

<p>The VMFleet view is a great way to validate what you see in the workbook and get a live insights from what´s happening in the cluster.</p>

<h2 id="workbook-layout">Workbook layout</h2>

<p>The workbook ships with the following sections:</p>

<ul>
  <li><strong>Overview</strong><br />
Quick health and Workbook information.</li>
  <li><strong>VM States</strong><br />
Timeline and counts based on Hyper-V events. Filter by host and time.</li>
  <li><strong>CPU</strong><br />
Per VM and per host charts using guest and hypervisor run time.</li>
  <li><strong>Storage</strong><br />
Capacity and trends from Insights data.</li>
  <li><strong>Network</strong><br />
Per VM and per switch throughput.</li>
  <li><strong>RAM</strong><br />
Guest Available and Guest Visible memory for density planning.</li>
</ul>

<h2 id="version-indicator">Version indicator</h2>

<p>The workbook includes a simple image based version hint. If you see <strong>Current Version</strong> in green, you are on the latest release. If you see <strong>Need Update</strong> in blue, there is a newer build with fixes or features.</p>

<p><a href="/assets/img/post/2025-10-31-azure-local-deep-insights/current-version.webp" target="_blank">
  <img src="/assets/img/post/2025-10-31-azure-local-deep-insights/current-version.webp" alt="Current Version" style="border: 2px solid grey; width: 20%; height: auto;" />
</a></p>

<p><a href="/assets/img/post/2025-10-31-azure-local-deep-insights/need-update.webp" target="_blank">
  <img src="/assets/img/post/2025-10-31-azure-local-deep-insights/need-update.webp" alt="Need Update" style="border: 2px solid grey; width: 20%; height: auto;" />
</a></p>

<h2 id="roadmap">Roadmap</h2>

<p>Planned additions include <strong>AKS</strong> and <strong>AVD</strong> views that reuse the same pipeline. Priority depends on adoption, reported issues, and spare time for development.</p>

<h2 id="changelog">Changelog</h2>

<table>
  <thead>
    <tr>
      <th>Version</th>
      <th>Features</th>
    </tr>
  </thead>
  <tbody>
    <tr>
      <td>1.0.0</td>
      <td>Initial release with sections Overview, VM States, CPU, Storage, Network, and RAM</td>
    </tr>
  </tbody>
</table>]]></content><author><name>Cristian Schmitt Nieto</name></author><category term="Blog" /><category term="Azure Stack HCI" /><category term="Azure Local" /><category term="Monitoring" /><category term="Workbook" /><summary type="html"><![CDATA[A practical workbook for Azure Local that extends Insights with guest VM visibility, richer performance counters, and easy deployment.]]></summary></entry><entry><title type="html">Awesome Azure Local</title><link href="https://schmitt-nieto.com/blog/awesome-azure-local/" rel="alternate" type="text/html" title="Awesome Azure Local" /><published>2025-08-09T00:00:00+02:00</published><updated>2026-04-23T00:00:00+02:00</updated><id>https://schmitt-nieto.com/blog/awesome-azure-local</id><content type="html" xml:base="https://schmitt-nieto.com/blog/awesome-azure-local/"><![CDATA[<h2 id="introduction">Introduction</h2>

<p>Azure Local brings Azure services into your data center with a consistent control plane. This page collects the docs, guides, and labs I use when planning and operating Azure Local environments. It mirrors my public GitHub list so you can search it directly on this site and keep track of updates.</p>

<p>GitHub source: <a href="https://github.com/schmittnieto/awesome-azure-local">https://github.com/schmittnieto/awesome-azure-local</a></p>

<p><strong>Who is this for</strong></p>
<ul>
  <li>Cloud architects and platform engineers designing hybrid setups</li>
  <li>AVD administrators building or running desktops on Azure Local</li>
  <li>Operations teams that want proven references for day to day work</li>
</ul>

<p><strong>What you will find</strong></p>
<ul>
  <li>Official documentation and learning paths</li>
  <li>AVD on Azure Local</li>
  <li>AKS on Azure Local</li>
  <li>OEM notes and reference designs</li>
  <li>Tools, scripts, and community write ups</li>
</ul>

<p><strong>How to use it</strong></p>
<ul>
  <li>Use the table of contents to jump to a topic</li>
  <li>Press Ctrl F to search within the page</li>
  <li>Open links in a new tab to keep your place</li>
</ul>

<p><em>If you spot a gap or a broken link, open an issue or pull request in the GitHub repo <a href="https://github.com/schmittnieto/awesome-azure-local/issues/new/choose">link</a>.</em></p>

<!-- AWESOMEAZURELOCAL:START -->

<h2 id="official">Official</h2>
<p><em>Only official links published or maintained by Microsoft or Azure.</em></p>

<h3 id="whats-new-in-azure-local-version-2604">What’s new in Azure Local (version 2604)</h3>

<p><a href="https://learn.microsoft.com/en-us/azure/azure-local/whats-new?view=azloc-2604">What’s new in hyperconverged deployments of Azure Local?</a></p>

<p><strong>Version:</strong> 12.2604.1003.209<br />
<strong>Release date:</strong> April 2026</p>

<p>A major release focused on disaggregated deployments, SAN, VM management, deployment speed and broader Azure portal improvements.</p>

<h4 id="platform-and-os">Platform and OS</h4>
<ul>
  <li>Unified operating system across <strong>all new and existing deployments</strong>.</li>
  <li>New baseline OS version <strong>26100.32690</strong>, aligned with Windows Server 2025.</li>
  <li>Integrated System and Premier Solution hardware ship with the OS preinstalled and validated.</li>
  <li>Requires drivers compatible with OS <strong>26100.32690</strong> or Windows Server 2025.</li>
</ul>

<h4 id="runtime-updates">Runtime updates</h4>
<ul>
  <li>Platform updated to <strong>.NET 8.0.26</strong> for both .NET Runtime and ASP.NET Core.</li>
  <li>Also includes <strong>.NET 10.0.6</strong> for both .NET Runtime and ASP.NET Core.</li>
</ul>

<h4 id="aks-and-kubernetes">AKS and Kubernetes</h4>
<ul>
  <li>Supports Kubernetes versions <strong>1.31.x, 1.32.x, and 1.33.x</strong>.</li>
  <li><strong>Kubernetes 1.30 is no longer supported</strong>.</li>
  <li><strong>KMS v2</strong> is included and <strong>KMS v1 will be deprecated</strong>, so cluster redeployment planning is recommended.</li>
  <li>AKS clusters should be validated on a supported Kubernetes version before upgrading Azure Local.</li>
</ul>

<h4 id="storage-and-deployment-architecture">Storage and deployment architecture</h4>
<ul>
  <li><strong>Disaggregated deployments</strong> now supported, allowing Azure Local to use <strong>SAN-only storage</strong>.</li>
  <li><strong>SAN support is now Generally Available (GA)</strong> and can be used alongside Storage Spaces Direct.</li>
  <li>Enables independent scaling of compute and storage, including clusters beyond <strong>16 nodes</strong>.</li>
</ul>

<h4 id="identity-and-deployment">Identity and deployment</h4>
<ul>
  <li><strong>Local identity with Key Vault is now Generally Available (GA)</strong>.</li>
  <li><strong>Domain join prior to deployment</strong> is now supported.</li>
  <li><strong>Update settings management</strong> is now available, giving administrators more control over how updates are applied.</li>
</ul>

<h4 id="deployment-and-validation-improvements">Deployment and validation improvements</h4>
<ul>
  <li><strong>Validation time reduced by up to 50%</strong> during deployment and update workflows.</li>
  <li>Validation can now <strong>resume from the point of failure</strong> within a three-hour window.</li>
  <li>Deployment time is now more consistent for clusters up to <strong>8 nodes</strong>, with overall improvements of up to <strong>40%</strong>.</li>
</ul>

<h4 id="cluster-and-vm-improvements">Cluster and VM improvements</h4>
<ul>
  <li><strong>Rack aware clustering</strong> now supports deployments using local identity with Azure Key Vault.</li>
  <li><strong>GPU acceleration for Azure Local VMs is now Generally Available (GA)</strong>.</li>
  <li>Supports attaching and detaching <strong>full GPUs (DDA)</strong> or <strong>GPU partitions (GPU-P)</strong> during VM creation or as a Day-2 operation.</li>
</ul>

<h4 id="azure-portal-experience">Azure portal experience</h4>
<ul>
  <li>Enhanced <strong>data disk management</strong> with richer cluster-level disk views and the ability to attach existing disks directly from the VM view.</li>
  <li>Improved <strong>Azure Marketplace image navigation</strong> with a full-page view for image selection.</li>
  <li><strong>Graceful restart is now the default</strong> for Azure Local VMs, with an option to bypass shutdown using <code class="language-plaintext highlighter-rouge">--skip-shutdown</code>.</li>
  <li><strong>SDN management can now be enabled or disabled per network interface</strong>, using the <code class="language-plaintext highlighter-rouge">--bypass-sdn-policies</code> flag.</li>
</ul>

<h4 id="reliability">Reliability</h4>
<ul>
  <li>Includes multiple reliability improvements and general bug fixes across deployment, update, and day-to-day operations.</li>
</ul>

<h3 id="azure-local">Azure Local</h3>

<ul>
  <li><a href="https://azure.com/hci">Azure Local Product Page</a><br />
Official product page for Azure Local on the Azure website.</li>
  <li><a href="https://learn.microsoft.com/en-us/azure/azure-local/overview">What is Azure Local (Microsoft Docs)</a><br />
Introduction to Azure Local (formerly Azure Stack HCI) and its core components.</li>
  <li><a href="https://learn.microsoft.com/en-us/azure/azure-local/whats-new">What is new in Azure Local (Microsoft Docs)</a><br />
Lists the latest features and improvements available in Azure Local.</li>
  <li><a href="https://learn.microsoft.com/en-us/azure/azure-local/deploy/deployment-introduction">Azure Local Deployment (Microsoft Docs)</a><br />
First article in a series that describes how to deploy Azure Local.</li>
  <li><a href="https://learn.microsoft.com/en-us/azure/azure-local/deploy/enable-external-storage?view=azloc-2604&amp;tabs=Dell-PowerStore">External SAN Storage for Azure Local (Microsoft Docs)</a><br />
GA support for external Fibre Channel SAN storage in Azure Local 2604 and later, including MPIO, cluster validation, CSV integration, and Storage Path configuration.</li>
  <li><a href="https://azure.microsoft.com/en-us/pricing/details/azure-local/">Azure Local Pricing</a><br />
Overview of licensing options, cost model, and subscription details.</li>
  <li><a href="https://azurelocalsolutions.azure.microsoft.com/#/catalog">Azure Local Hardware Catalog</a><br />
Certified hardware from Microsoft partners.</li>
  <li><a href="https://azurelocalsolutions.azure.microsoft.com/#/sizer">Azure Local Sizer</a><br />
Tool that estimates hardware requirements based on selected parameters.</li>
  <li><a href="https://learn.microsoft.com/en-us/windows-server/get-started/azure-hybrid-benefit?tabs=azure-local#getting-azure-hybrid-benefit">Azure Hybrid Benefit on Azure Local (Microsoft Docs)</a><br />
Link describing the contractual requirements for using Azure Hybrid Benefit with Azure Local.</li>
  <li><a href="https://azurelocalsolutions.azure.microsoft.com/#/Learn">Azure Local Solutions Category</a><br />
Overview of Azure Local solution types, outlining the differences between Validated Systems, Integrated Systems, and Premier solution.</li>
  <li><a href="https://learn.microsoft.com/en-us/azure/azure-local/security-book/overview">Azure Local Security Book (Microsoft Docs)</a><br />
The Azure Local security book discusses in detail the built-in security layers found in Azure Local, from core to cloud.</li>
  <li><a href="https://techcommunity.microsoft.com/blog/AzureArchitectureBlog/optimize-azure-local-using-insights-from-a-well-architected-review-assessment/4458433">Optimize Azure Local using insights from a Well-Architected Review Assessment</a><br />
Guidance on evaluating Azure Local environments with the Well-Architected Framework assessment to identify risks, measure maturity, and improve architecture quality.</li>
  <li><a href="https://learn.microsoft.com/en-us/azure/architecture/hybrid/azure-local-baseline">Azure Local Baseline Architecture</a><br />
Baseline reference architecture providing workload-agnostic guidance for configuring Azure Local 2311 and later, ensuring a reliable platform for highly available virtualized and containerized workloads.</li>
  <li><a href="https://learn.microsoft.com/en-us/azure/well-architected/service-guides/azure-local">Architecture Best Practices for Azure Local</a><br />
Guidance aligned with the Azure Well-Architected Framework that outlines architectural recommendations for Azure Local and Azure Arc, supporting hybrid and edge deployments across validated hardware.</li>
  <li><a href="https://learn.microsoft.com/en-us/azure/azure-local/concepts/rack-aware-cluster-overview">Rack Aware Cluster (Microsoft Docs)</a><br />
This article provides an overview of the Azure Local rack aware clustering feature, including its benefits, use cases, supported configurations, and deployment requirements. Applies only to new deployments of Azure Local.</li>
  <li><a href="https://learn.microsoft.com/en-us/azure/azure-local/concepts/sdn-overview">SDN enabled by Arc on Azure Local (Microsoft Docs)</a><br />
This article explains Software Defined Networking (SDN) enabled by Azure Arc on Azure Local. It describes SDN management methods, guidance on when to use each approach, and outlines supported and unsupported SDN scenarios.</li>
  <li><a href="https://techcommunity.microsoft.com/blog/azurearcblog/what%E2%80%99s-new-in-azure-local-cloud-infrastructure-for-distributed-locations-enabled/4469773">What’s new in Azure Local for distributed locations (Tech Community)</a><br />
Summary of Azure Ignite 2025 announcements highlighting SAN support (Preview), rack aware clustering (Preview), NVIDIA RTX PRO 6000 Blackwell Server Edition GPU support (GA), Azure Local for larger deployments (Preview), network segmentation (GA) and local identity with Azure Key Vault (Preview).</li>
  <li><a href="https://learn.microsoft.com/en-us/azure/azure-local/deploy/about-private-endpoints">Private Endpoints on Azure Local (Microsoft Docs)</a><br />
Overview of Azure Private Endpoints on Azure Local, including supported and unsupported scenarios, connectivity requirements, and key considerations for secure access to Azure services from on-premises environments.</li>
</ul>

<h3 id="avd">AVD</h3>

<ul>
  <li><a href="https://learn.microsoft.com/en-us/azure/virtual-desktop/">Azure Virtual Desktop documentation (Microsoft Docs)</a><br />
Complete documentation for deploying and managing Azure Virtual Desktop.</li>
  <li><a href="https://learn.microsoft.com/en-us/azure/virtual-desktop/deploy-azure-virtual-desktop">Deploying AVD on Azure Local (Microsoft Docs)</a><br />
Step-by-step guide for running Azure Virtual Desktop in an Azure Local environment.</li>
  <li><a href="https://azure.microsoft.com/en-us/pricing/details/virtual-desktop/">AVD on Azure Local pricing</a><br />
To view pricing for Azure Virtual Desktop on Azure Local, open the “Pricing overview tab” (the rate is currently “<em>$0.01 per virtual core per hour</em>”).</li>
</ul>

<h3 id="aks">AKS</h3>

<ul>
  <li><a href="https://learn.microsoft.com/en-us/azure/aks/aksarc/cluster-architecture">Architecture overview for AKS on Azure Local (Microsoft Docs)</a><br />
Architecture overview for running AKS clusters on Azure Local.</li>
  <li><a href="https://learn.microsoft.com/en-us/azure/aks/aksarc/aks-create-clusters-portal">AKS Deployment on Azure Local (Microsoft Docs)</a><br />
How to create a Kubernetes cluster in the Azure portal; clusters are Azure Arc-connected by default.</li>
  <li><a href="https://learn.microsoft.com/en-us/azure/azure-arc/data/managed-instance-overview">SQL Managed Instance enabled by Azure Arc (Microsoft Docs)</a><br />
Azure SQL Managed Instance that runs on your infrastructure of choice through Arc Data Services inside an AKS cluster.</li>
  <li><a href="https://learn.microsoft.com/en-us/azure/aks/aksarc/deploy-ai-model?tabs=portal">KAITO - Kubernetes AI toolchain operator (Microsoft Docs)</a><br />
This article describes how to deploy an AI model on AKS enabled by Azure Arc with the Kubernetes AI toolchain operator (KAITO).</li>
  <li><a href="https://learn.microsoft.com/en-us/azure/architecture/example-scenario/hybrid/aks-baseline">Azure Kubernetes Service (AKS) Baseline Architecture for AKS on Azure Local</a><br />
Scenario describing how to design and implement a baseline architecture for Azure Kubernetes Service (AKS) running on Azure Local.</li>
  <li><a href="https://learn.microsoft.com/en-us/azure/architecture/example-scenario/hybrid/aks-hybrid-azure-local">Deploy and operate apps with AKS enabled by Azure Arc on Azure Local</a><br />
Recommendations for building an app deployment pipeline for containerized workloads using AKS enabled by Azure Arc on Azure Local, with guidance for GitOps-based operations.</li>
  <li><a href="https://learn.microsoft.com/en-us/azure/aks/aksarc/scale-requirements">AKS on Azure Local scale requirements</a><br />
This article describes the minimum and maximum supported scale limits for AKS on Azure Local clusters and node pools.</li>
</ul>

<h3 id="backup-and-disaster-recovery">Backup and Disaster Recovery</h3>

<ul>
  <li><a href="https://learn.microsoft.com/en-us/azure/backup/back-up-azure-stack-hyperconverged-infrastructure-virtual-machines">Back up Azure Local virtual machines with Azure Backup Server (Microsoft Docs)</a><br />
How to back up virtual machines on Azure Local by using Microsoft Azure Backup Server.</li>
  <li><a href="https://learn.microsoft.com/en-us/azure/azure-local/manage/azure-site-recovery">Azure Site Recovery on Azure Local (preview) (Microsoft Docs)</a><br />
Guide to protect Windows and Linux workloads on Azure Local during a disaster.</li>
</ul>

<h3 id="github-repositories">GitHub Repositories</h3>

<ul>
  <li><a href="https://jumpstart.azure.com/azure_jumpstart_localbox/getting_started">Jumpstart Local Box</a> <br />
LocalBox is a turnkey solution that provides a complete sandbox for exploring Azure Local capabilities and hybrid cloud integration in a virtualized environment (hosted on Azure).</li>
  <li><a href="https://github.com/microsoft/azure_arc">Arc Jumpstart source code</a><br />
Source for Arc Jumpstart automation scripts and tools, supporting the official documentation site.</li>
  <li><a href="https://github.com/Azure/AzureLocal-Supportability">Azure Local Supportability Forum</a><br />
Central repository for troubleshooting guides, known issues, and feedback used by support teams and the community.</li>
  <li><a href="https://github.com/Azure-Samples/AzureLocal">Azure Local sample repository</a><br />
Samples covering SDN training, security baselines, and alternate OS image download links such as the <a href="https://github.com/Azure-Samples/AzureLocal/blob/main/os-image/os-image-tracking-table.md">OS image tracking table</a>.</li>
  <li><a href="https://github.com/microsoft/MSLab">MSLab</a><br />
Scripts and resources to create nested Hyper-V labs, ideal for testing Azure Local in a virtual environment.</li>
</ul>

<hr />

<h2 id="oems">OEMs</h2>
<p><em>Resources from key original equipment manufacturers with dedicated Azure Local content.</em></p>

<h3 id="sbe">SBE</h3>

<ul>
  <li><a href="https://aka.ms/AzureStackSBEUpdate/DellEMC">Dell Azure Local SBE Updates</a><br />
Main entry point for Dell firmware and driver update bundles validated for Azure Local.</li>
  <li><a href="https://aka.ms/AzureStackSBEUpdate/Lenovo">Lenovo Azure Local SBE Updates</a><br />
Main entry point for Lenovo firmware and driver update bundles validated for Azure Local.</li>
  <li><a href="https://aka.ms/AzureStackSBEUpdate/HPE">HPE Azure Local SBE Updates</a><br />
Main entry point for HPE firmware and driver update bundles validated for Azure Local.</li>
</ul>

<h3 id="dell">Dell</h3>

<ul>
  <li><a href="https://www.dell.com/en-us/shop/ax-system-for-azure-local/sf/ax-system-for-azure-local">Dell - Azure Local Landing Page</a><br />
Dell landing page for Azure Local.</li>
  <li><a href="https://infohub.delltechnologies.com/de-de/t/guides-azure-stack-hci-os-24h2-or-ws-2025-and-later/">Dell - Deployment Guides for Azure Local</a><br />
Technical guides for Dell AX System for Azure Local or Dell AX System for Windows Server with operating system version 24H2 or Windows Server 2025 and later.</li>
  <li><a href="https://github.com/DellGEOS/AzureLocalHOLs">Dell - Azure Local Hands on Labs (GitHub)</a><br />
Detailed guides on building a lab for Azure Local, tips, and deep dives.</li>
  <li><a href="https://dell.github.io/azurestack-docs/docs/hci/">Dell - Dell Technologies Solutions for Microsoft Azure - Azure Local</a><br />
Website backed by the Dell GitHub repository that lists supported versions and architectural guidance for Azure Local.</li>
  <li><a href="https://infohub.delltechnologies.com/t/microsoft-hci-solutions-from-dell-technologies-1/">Dell - Azure Local InfoHub</a><br />
Main page that aggregates the Dell Azure Local resources mentioned above.</li>
  <li><a href="https://www.dell.com/support/kbdoc/en-us/000224407/dell-for-microsoft-azure-stack-hci-ax-hardware-updates-release-notes">Dell - SBE Page</a><br />
Page for managing firmware and driver updates on Dell hardware.</li>
  <li><a href="https://www.delltechnologies.com/asset/en-us/products/converged-infrastructure/technical-support/reliable-performance-at-scale-white-paper.pdf">Dell - External Storage with PowerFlex for Azure Local (White Paper)</a><br />
White paper explaining the possibility and results of adding external storage to Azure Local as Cluster Storage using Dell PowerFlex (currently the only supported option).</li>
  <li><a href="https://www.dell.com/support/kbdoc/en-us/000195872/how-to-expand-a-csv-in-ps-and-wac">Dell - How to Expand a CSV in PowerShell and Windows Admin Center</a><br />
Guide explaining how to expand a Cluster Shared Volume (CSV) or Virtual Disk in Storage Spaces Direct (S2D) using PowerShell and Windows Admin Center.</li>
</ul>

<h3 id="hpe">HPE</h3>

<ul>
  <li><a href="https://www.hpe.com/us/en/alliance/microsoft/azurelocal.html">HPE - Azure Local Landing Page</a><br />
HPE landing page for Azure Local.</li>
  <li><a href="https://support.hpe.com/hpesc/public/docDisplay?docId=sd00006156en_us&amp;docLocale=en_US">HPE - ProLiant for Azure Local Integrated Systems User Guide</a><br />
Management guide for HPE ProLiant for Azure Local, aimed at administrators who install, manage, and troubleshoot servers.</li>
  <li><a href="https://www.hpe.com/psnow/doc/a50008245enw">HPE - Solutions for Azure Local - Deployment Guide</a><br />
Technical white paper with solution guidelines and example configurations for Azure Local HCI on HPE ProLiant, Alletra, and Edgeline servers.</li>
  <li><a href="https://myenterpriselicense.hpe.com/cwp-ui/product-details/SBE_UPDATES/-/sw_free">HPE - SBE Page</a><br />
Page for managing firmware and driver updates on HPE hardware.</li>
  <li><a href="https://support.hpe.com/hpesc/public/docDisplay?docId=sd00003953en_us&amp;page=GUID-86C4BE9C-0B69-4596-B333-69D099B3DC65.html">HPE - ProLiant for Azure Local Firmware and Software Compatibility Guide</a><br />
A list of components, drivers and their status for system installation, especially useful for Validated Systems.</li>
  <li><a href="https://community.hpe.com/t5/alliances/elevating-innovation-hpe-proliant-dl380-server-premier-solution/ba-p/7257651">HPE - DL380 now part of Premier Solution category</a><br />
Announcement confirming that HPE ProLiant DL380 systems are now included in the <strong>Azure Local Premier Solution</strong> category, expanding supported configurations for enterprise and AI workloads.</li>
</ul>

<h3 id="lenovo">Lenovo</h3>

<ul>
  <li><a href="https://www.lenovo.com/us/en/resources/streams/microsoft-azure-stack-hci">Lenovo - Azure Local Landing Page</a><br />
Lenovo landing page for Azure Local.</li>
  <li><a href="https://pubs.lenovo.com/thinkagile-mx/">Lenovo - ThinkAgile MX Series for Microsoft Azure Local</a><br />
Installation and deployment guides for Azure Local and related services on Lenovo hardware.</li>
  <li><a href="https://pubs.lenovo.com/thinkagile-mx/de/mx_sbe">Lenovo - SBE Page</a><br />
Page for managing firmware and driver updates on Lenovo hardware.</li>
</ul>

<h3 id="dataon">DataON</h3>

<ul>
  <li><a href="https://www.dataonstorage.com/azurestackhci/">DataON - Azure Local Landing Page</a><br />
DataON landing page for Azure Local.</li>
  <li><a href="https://dataon.io/knowledge-base-categories/azure-stack-hci/">DataON - Azure Local Knowledge Base</a><br />
Extensive knowledge base with articles covering many Azure Local services and components.</li>
  <li><a href="https://dataon.io/dataon-quick-reference-guides/">DataON - Azure Local Quick Reference Guide</a><br />
Set of reference guides that compare Azure Local solutions and services.</li>
  <li><a href="https://dataon.io/apply-updates-to-your-azure-stack-hci-cluster-with-the-solution-builder-extension-sbe/">DataON - SBE Page</a><br />
Page for managing firmware and driver updates on DataON Hardware.</li>
</ul>

<h3 id="fujitsu">Fujitsu</h3>

<ul>
  <li><a href="https://www.fujitsu.com/de/products/computing/integrated-systems/azure-stack-hci.html">Fujitsu - Azure Local Landing Page</a><br />
Fujitsu landing page for Azure Local with product information and references.</li>
  <li><a href="https://docs.ts.fujitsu.com/dl.aspx?id=6c594a34-97fa-46b4-a0e8-1a78887524e9">Fujitsu - Azure Local Infographic</a><br />
Infographic that summarizes the Azure Local solution from Fujitsu.</li>
</ul>

<hr />

<h2 id="third-party">Third Party</h2>

<p><em>Independent vendors offering backup or AVD management solutions for Azure Local environments.</em></p>

<h3 id="backup-management">Backup Management</h3>

<p><em>Software commonly used to perform backups of Azure Local infrastructure.</em></p>

<h4 id="veeam">Veeam</h4>

<ul>
  <li><a href="https://www.veeam.com/kb4047">Veeam - Veeam Support for Azure Stack HCI</a><br />
Documentation covering backup, restore, and replication of virtual machines on the initial Azure Stack HCI by Veeam Backup &amp; Replication.</li>
  <li><a href="https://community.veeam.com/blogs-and-podcasts-57/guide-vbr-step-by-step-configure-azure-stack-hci-os-azure-local-backup-10827">Veeam - VBR step by step configure Azure Stack HCI OS - Azure Local Backup</a><br />
Community article offering a deeper technical implementation of Veeam Backup for Azure Local.</li>
</ul>

<h4 id="commvault">Commvault</h4>

<ul>
  <li><a href="https://documentation.commvault.com/11.42/essential/azure_local.html">Commvault - Azure Local Configuration and Documentation</a><br />
Guide to install and configure Commvault for protecting workloads on Azure Local.</li>
  <li><a href="https://www.commvault.com/download-pdf/536787">Commvault - Blueprint for Azure Local (PDF)</a><br />
Document explaining core concepts and Commvault capabilities for backing up Azure Local infrastructure.</li>
</ul>

<h3 id="avd-management">AVD Management</h3>

<p><em>Software used to manage Azure Virtual Desktop infrastructure on Azure Local.</em></p>

<h4 id="nerdio">Nerdio</h4>

<ul>
  <li><a href="https://getnerdio.com/azure-local/">Nerdio - Azure Local Landing Page</a><br />
Objective overview of Azure Local, covering architecture, edge scenarios, security, connectivity, and pricing.</li>
  <li><a href="https://nmehelp.getnerdio.com/hc/en-us/articles/34054417281165-How-can-I-integrate-AVD-resources-provisioned-to-Azure-Local-Stack-HCI-with-Nerdio-Manager">Nerdio - Integrate AVD resources provisioned to Azure Local with Nerdio Manager</a><br />
Guide to integrate existing AVD infrastructure on Azure Local into Nerdio Manager for simpler management.</li>
  <li><a href="https://nmehelp.getnerdio.com/hc/en-us/articles/25499377328909-AVD-for-Azure-Local-and-Nerdio-Manager">Nerdio - AVD for Azure Local and Nerdio Manager</a><br />
How to configure Nerdio to manage tasks on Azure Local, including golden images and host pool configuration.</li>
</ul>

<h4 id="hydra-by-login-vsi">Hydra by Login VSI</h4>

<ul>
  <li><a href="https://euc.loginvsi.com/hydra-by-login-vsi">Hydra - Landing Page</a><br />
Hydra product overview from Login VSI.</li>
  <li><a href="https://blog.itprocloud.de/AVD-Hydra-For-Azure-Stack-HCI-Deplyoment-Management/">Hydra - Imaging, Rollout and Manage Azure Virtual Desktop on Azure Local</a><br />
Article by Marcel Meurer on configuring Hydra for Azure Local.</li>
</ul>

<h4 id="citrix">Citrix</h4>

<ul>
  <li><a href="https://docs.citrix.com/en-us/citrix-virtual-apps-desktops/2507-ltsr/install-configure/connections/connection-azure-local">Citrix Virtual Desktop / App - Connecting Azure Local</a><br />
As of August 22, 2025, Citrix has published a guide on how to use Citrix Virtual Desktop and Apps with Azure Local.</li>
</ul>

<h3 id="sizing">Sizing</h3>

<p><em>Tools to estimate Azure Local sizing and choose the right hardware.</em></p>

<h4 id="acuutech">Acuutech</h4>
<ul>
  <li><a href="https://www.acuutech.com/azurelocal/">Acuutech - Azure Local Landing Page</a><br />
Objective overview of Azure Local, covering architecture, edge scenarios, security, connectivity and pricing.</li>
  <li><a href="https://www.acuutech.com/scopesys/">Acuutech - Scopesys Azure Local Sizing Tool</a><br />
Make the design, configuration and ordering of Azure Local or Windows Server solutions easy, by removing the technical complexity associated with scoping Azure Local or Windows Server environments.</li>
</ul>

<hr />

<h2 id="community">Community</h2>

<p><em>Resources that do not come from Microsoft, OEMs, or the vendors listed in the Third Party section.</em></p>

<h3 id="blog">Blog</h3>

<p><em>To avoid an excessive list, only entire blogs are referenced, not individual posts.</em></p>

<ul>
  <li><a href="https://schmitt-nieto.com/tags/#azure-local">schmitt-nieto.com</a><br />
Yes, naming my own blog first is bad form, but here I share hands-on content about Azure Local implementation and management.</li>
  <li><a href="https://hybridcore.ca/posts/adopting-azlocal-vms/">hybridcore.ca</a><br />
Blog by <a href="https://www.linkedin.com/in/rtiberiu/">Tiberiu Radu</a>  featuring, in my opinion, the best article on how to adopt (indirectly migrate) a VM from Hyper-V to Azure Local.</li>
  <li><a href="https://www.darifer.net/index.php/category/azure-local/">darifer.net</a><br />
Blog by <a href="https://www.linkedin.com/in/davidriverafer">David Rivera</a> with detailed posts in Spanish on Azure Local, covering version upgrades, deployment and comparisons with Windows Server.</li>
  <li><a href="https://mikemdm.de/tag/azure-local/">mikemdm.de</a><br />
Blog by MVP <a href="https://www.linkedin.com/in/michael-meier-ba3b72210/">Michael Meier</a> covering the topic Azure Local and AVD Labs.</li>
  <li><a href="https://blog.graa.dev/tags/azure-local/">blog.graa.dev</a><br />
Blog by MVP <a href="https://www.linkedin.com/in/erikgraa/">Erik Grina Raassum</a> focused on Azure Local and PowerShell implementations.</li>
  <li><a href="https://jtpedersen.com/">jtpedersen.com</a><br />
Blog by MVP <a href="https://www.linkedin.com/in/jan-tore-pedersen-4863a82/">Jan-Tore Pedersen</a> covering Azure Local troubleshooting and insights.</li>
  <li><a href="https://www.azurelab.blog/">azurelab.blog</a><br />
Italian-language blog by <a href="https://www.linkedin.com/in/pandolfino/">Luigi Pandolfino (MVP)</a> and others about Azure Local and related topics.</li>
  <li><a href="https://www.chkja.dk/">chkja.dk</a><br />
Blog by <a href="https://www.linkedin.com/in/christoffer-klarskov-jakobsen-7b168266/">Christoffer Klarskov Jakobsen</a> featuring Azure Local implementations.</li>
  <li><a href="https://thisismydemo.cloud/tags/azure-local/">thisismydemo.cloud</a><br />
Blog by MVP <a href="https://www.linkedin.com/in/kristopherjturner/">Kristopher Turner</a> on Azure Local and infrastructure solutions.</li>
  <li><a href="https://francescomolfese.it/en/">francescomolfese.it</a><br />
Blog by MVP <a href="https://www.linkedin.com/in/francescomolfese/">Francesco Molfese</a> focused on Azure Local and IaC.</li>
  <li><a href="https://www.auxiliumtechtalk.com/home/categories/azure-local">auxiliumtechtalk.com</a><br />
Blog by <a href="https://www.linkedin.com/in/alyn-p-0989975b/">Alyn Peden</a> discussing real-world Azure Local scenarios.</li>
  <li><a href="https://jakewalsh.co.uk/tag/azure-local/">jakewalsh.co.uk</a><br />
Blog by MVP <a href="https://www.linkedin.com/in/jakewalsh90/">Jake Walsh</a> on Azure Local implementations.</li>
  <li><a href="https://www.silviodibenedetto.com/">silviodibenedetto.com</a><br />
Blog by MVP <a href="https://www.linkedin.com/in/silviodibenedetto/">Silvio Di Benedetto</a> on Azure Local and related topics.</li>
  <li><a href="https://www.hciharrison.com/">hciharrison.com</a><br />
Blog by MVP <a href="https://www.linkedin.com/in/lee-harrison-749b7215/">Lee Harrison</a> covering all things Azure Local.</li>
  <li><a href="https://kennylowe.org/">kennylowe.org</a><br />
Blog by MVP <a href="https://www.linkedin.com/in/kennylowe1/">Kenny Lowe</a> on Azure Local and infrastructure.</li>
  <li><a href="https://www.erniecosta.com/blog/">erniecosta.com</a><br />
Blog by MVP <a href="https://www.linkedin.com/in/erniecosta/">Ernie Costa</a> focusing on Azure Local, Storage Spaces Direct and services.</li>
  <li><a href="https://www.thomasmaurer.ch/">thomasmaurer.ch</a><br />
Blog by former Microsoft employee <a href="https://www.linkedin.com/in/thomasmaurer2/">Thomas Maurer</a> (Principal Program Manager &amp; Chief Evangelist for Azure Hybrid) covering a wide range of Azure services, including Azure Local.</li>
  <li><a href="https://www.gettothe.cloud/">gettothe.cloud</a><br />
Blog by <a href="https://www.linkedin.com/in/aterneuzen">Alex ter Neuzen</a> focused mainly on AVD, Azure Local and IaC. I highly recommend reading it.</li>
  <li><a href="https://azurelocal.cloud/">azurelocal.cloud</a><br />
New website by MVP <a href="https://www.linkedin.com/in/kristopherjturner">Kristopher Turner</a> with scripts, deployments and Azure Local guidance. In my view, it is currently one of the best IaC resources in the Azure Local space.</li>
</ul>

<h3 id="linkedin">LinkedIn</h3>

<p><em>Most day-to-day news on Azure Local arrives first on LinkedIn. Here are two profiles worth following.</em></p>

<ul>
  <li><a href="https://www.linkedin.com/in/darrylvanderpeijl/">Darryl van der Peijl</a><br />
One of the most active MVPs posting news and technical content. He also runs the <a href="https://www.linkedin.com/newsletters/7094952705042841602/">Azure Local Insider</a> newsletter, which I recommend.</li>
  <li><a href="https://www.linkedin.com/in/dinobordonaro/">Dino Bordonaro</a><br />
The MVP who brought me into this space. Practical content, including the article <em><a href="https://www.linkedin.com/pulse/why-expensive-azure-local-hardware-becomes-datacenter-dino-bordonaro-mw0ie/">Why Expensive Azure Local Hardware Becomes Datacenter Decoration (7 Mistakes That Turn Investment Into Inventory)</a></em>.</li>
  <li><a href="https://www.linkedin.com/in/svenlangenfeld/">Sven Langenfeld</a><br />
Former Microsoft Senior Azure Local Commercial Sales Specialist (DACH) who leads a large Azure Local community across technical and business topics. Founder of the LinkedIn group <a href="https://www.linkedin.com/groups/12885745/">Azure Local Tech Talk</a>.</li>
  <li><a href="https://www.linkedin.com/in/manfredhelber/">Manfred Helber</a><br />
Germany-based MVP active in community events and live streams.</li>
  <li><a href="https://www.linkedin.com/in/karl-wester-ebbinghaus-a41507153/">Karl Wester-Ebbinghaus</a><br />
Germany-based MVP who contributes extensively to the Azure Local Tech Talk channel.</li>
  <li><a href="https://www.linkedin.com/in/florianklaffenbach/">Flo Fox</a><br />
Former Microsoft Senior Technical Program Manager (Azure Risk) who runs the Hybrid Friends YouTube channel.</li>
</ul>

<h3 id="youtube">YouTube</h3>

<p><em>Channels that focus primarily on Azure Local rather than hosting only an occasional video.</em></p>

<ul>
  <li><a href="https://youtube.com/@alexanderortha8490">Azure Hybrid Insider</a><br />
YouTube channel managed by Alexander Ortha, focused on Azure Arc, Azure Local, and hybrid integrations across Azure.</li>
  <li><a href="https://www.youtube.com/@thehybridfriends">The Hybrid Friends</a><br />
Practical use cases and deep dives in the Azure Local space.</li>
  <li><a href="https://www.youtube.com/@ManfredHelber">Manfred Helber</a><br />
German- and English-language channel by MVP Manfred Helber featuring <em>Azure Local Show</em>, a weekly update on Azure Local news.</li>
  <li><a href="https://www.youtube.com/@CarstenRachfahl">Carsten Rachfall</a><br />
German-language channel by MVP Carsten Rachfall streaming Azure Local and Azure Virtual Desktop implementations.</li>
  <li><a href="https://youtube.com/playlist?list=PLJBGLF8tZlXNPqodqi33xXokfBH3gd4yx&amp;si=ZByGRqDkgJlFnyRu">I am IT Geek - Shabaz Darr</a><br />
Practical use cases by MVP Shabaz Darr covering topics like Azure Arc and Hybrid Kubernetes.</li>
</ul>

<h3 id="github-repos--tools">Github Repos &amp; Tools</h3>

<ul>
  <li><a href="https://github.com/schmittnieto/AzSHCI">schmittnieto - AzSHCI (GitHub)</a> <br />
This repository brings together multiple scripts, each with its own purpose and structure, allowing you to spin up a fully functioning Azure Local environment quickly.</li>
  <li><a href="https://github.com/bfrankMS/AzureLocal_AzStackHCI">bfrankMS - AzureLocal_AzStackHCI (GitHub)</a><br />
Azure Local repository with findings on automating installations of HCI, AKS, and AVD.</li>
  <li><a href="https://github.com/jonathan-vella/azure-local-sizing-guides">Azure Local Sizing Guides (GitHub)</a><br />
Azure Local Sizing Guides provides comprehensive documentation, best practices, and tools for deploying and managing Azure services, such as AKS, AVD, and Arc-enabled SQL Managed Instance, on Azure Local. This repository is maintained by <a href="https://www.linkedin.com/in/jonathanvella/">Jonathan Vella</a>, Senior Cloud Solution Architect at Microsoft.</li>
  <li><a href="https://techcommunity.microsoft.com/blog/windowsservernewsandbestpractices/introducing-the-vm-conversion-tool-in-windows-admin-center-%E2%80%93-public-preview/4446604">VMWare to Hyper-V VM Conversion tool in Windows Admin Center (Tool)</a><br />
This agentless, cost-free tool streamlines the conversion of virtual machines from VMware to Windows Server with Hyper-V.</li>
  <li><a href="https://s2d-calculator.com/">S2D Capacity Calculator (Tool)</a><br />
Use this Storage Spaces Direct Calculator to estimate storage capacity, resiliency, and hardware requirements for your Storage Spaces Direct (S2D) deployment.</li>
  <li><a href="https://schmitt-nieto.com/azurelocal-calculator/">Azure Local Calculator (Tool)</a><br />
A calculator currently focused mainly on pricing, since storage is covered by S2D Calculator and CPU is a separate track; created by me and available open source at <a href="https://github.com/schmittnieto/AzureLocal-Calculator">Azure Local Calculator</a>.</li>
  <li><a href="https://www.linkedin.com/posts/drazen-nikolic-816906142_avd-microsoft-azurevirtualdesktop-ugcPost-7364022385827557376-NEle">AVD - FSLogix Profile Status (Tool)</a><br />
After the deprecation of FXTray, it became difficult to check the status of FSLogix profiles. With this PowerShell script, it is once again possible to verify profile status in a simple and centralized way.</li>
  <li><a href="https://azure.github.io/odinforazurelocal/">Odin for Azure Local (Tool)</a><br />
Odin, inspired by the Norse god of strategy and architecture, is an Optimal Deployment and Infrastructure Navigator for Azure Local. It provides a decision-tree interface to help select the appropriate Azure Local deployment type and instance design based on validated architecture and network configuration guidance.</li>
  <li><a href="https://techcommunity.microsoft.com/blog/azurearchitectureblog/azure-local-lens-workbook%e2%80%94deep-insights-at-scale-in-minutes/4490608?WT.mc_id=AZ-MVP-5001191">Azure Local LENS Workbook (Tool)</a><br />
A community-driven Azure Workbook that delivers deep insights into the status, compliance, and operational trends of large Azure Local fleets in minutes.</li>
  <li><a href="https://github.com/GetToThe-Cloud/Website">GetToThe-Cloud - Website (GitHub)</a><br />
Source repository for the GetToThe.Cloud website, including the scripts used across the site, such as Terraform-based examples and other deployment resources.</li>
</ul>

<h3 id="chats--channels">Chats &amp; Channels</h3>

<ul>
  <li><a href="https://aka.ms/azurelocal-slack">Azure Local Slack Channel</a><br />
Slack channel (the real Community) managed by Darryl van der Peijl that provides community support for all Azure Local questions.</li>
</ul>

<h3 id="trainings">Trainings</h3>
<ul>
  <li><a href="https://learn.microsoft.com/en-us/training/paths/azure-local-accreditation-2025/">Azure Local Accreditation 2025</a><br />
Part of the official Microsoft Learn documentation, this training path helps you get in touch with Azure Local and its core capabilities.</li>
  <li><a href="https://360.articulate.com/review/content/6c4554d6-8ccc-4b9b-bc6b-328c7429efce/review">Azure Local Training</a> <br />
Training module covering how to deploy and register Azure Local using OEM licenses, among other key topics.</li>
</ul>

<h3 id="events">Events</h3>

<table>
  <thead>
    <tr>
      <th>Name</th>
      <th>Description</th>
      <th>Price</th>
      <th>Remote</th>
      <th>Date</th>
    </tr>
  </thead>
  <tbody>
    <tr>
      <td><del><a href="https://www.controlup.com/de/avd-techfest-2025/">AVD Tech Fest - Berlin (Germany)</a></del></td>
      <td>Community-driven event focused on Azure Virtual Desktop and Azure Local integration.</td>
      <td><del>99 €</del></td>
      <td><del>No</del></td>
      <td><del>September 10-11, 2025</del></td>
    </tr>
    <tr>
      <td><del><a href="https://register.ignite.microsoft.com/">Microsoft Ignite - San Francisco (USA)</a></del></td>
      <td>Flagship Microsoft conference featuring hybrid cloud and Azure Local sessions.</td>
      <td>2325 $</td>
      <td>Yes (Digital pass are <strong>Free</strong>)</td>
      <td>November 17-21, 2025</td>
    </tr>
    <tr>
      <td><del><a href="https://ignite.microsoft.com/en-US/sessions/BRK147?source=sessions">Microsoft Ignite 2025 - Breakout Session BRK147</a></del></td>
      <td>Discover what’s new in Azure Local, see a live demo, and hear from a customer modernizing operations and enabling AI in a regulated environment.</td>
      <td>Included in Ignite pass</td>
      <td>Yes</td>
      <td>November 18, 2025</td>
    </tr>
    <tr>
      <td><del><a href="https://www.manfredhelber.de/hybrit-conference-2025/">HybrIT - Würzburg (Germany)</a></del></td>
      <td>Two-day conference in <strong>German</strong> on Microsoft hybrid infrastructure (Windows Server, Azure Local, and Azure Arc).</td>
      <td>299€ / 599 €</td>
      <td>No</td>
      <td>November 26-27, 2025</td>
    </tr>
    <tr>
      <td><del><a href="https://connect.mc2mc.be/agenda/">MC2MC - Antwerp (Belgium)</a></del></td>
      <td>MC2MC Connect is a dynamic, full-day event for tech professionals, enthusiasts, and IT decision-makers, centered on three core Microsoft focus areas: Cloud / Hybrid, Endpoint &amp; Security, Compliance and Identity</td>
      <td>137,81€ / 162,14 €</td>
      <td>No</td>
      <td>February 05, 2026</td>
    </tr>
    <tr>
      <td><del><a href="https://expertslive.de/">Experts Live Germany 2026 - Leipzig (Germany)</a></del></td>
      <td>Community conference bringing together the German-speaking IT community around Microsoft Cloud &amp; AI, On-Premises, Hybrid, Workplace and Security. Includes sessions, demos, discussions with MVPs and Microsoft experts, plus optional deep-dive workshops.</td>
      <td>€249–€499 (net, depending on ticket type)</td>
      <td>No</td>
      <td>March 3–4, 2026</td>
    </tr>
    <tr>
      <td><a href="https://techcommunity.microsoft.com/event/windowsserver-events/windows-server-summit-2026/4501032">Windows Server Summit 2026</a></td>
      <td>Free virtual event covering Windows Server 2025 in practice, networking updates, server management roadmap and tooling, hybrid scenarios with Azure Arc, and an early look at Windows Server vNext.</td>
      <td>Free</td>
      <td>Yes</td>
      <td>May 11–13, 2026</td>
    </tr>
    <tr>
      <td><a href="https://www.cdc-germany.de/">CDC Germany 2026 - Hanau (Germany)</a></td>
      <td>Two-day Cloud &amp; Datacenter Conference focused on real-world Microsoft infrastructure topics such as Azure Local, Windows Server, Hyper-V and Hybrid Cloud.</td>
      <td>€499–€999 (net, depending on ticket type)</td>
      <td>No</td>
      <td>September 30 – October 1, 2026</td>
    </tr>
  </tbody>
</table>

<!-- AWESOMEAZURELOCAL:END -->]]></content><author><name>Cristian Schmitt Nieto</name></author><category term="Blog" /><category term="Github" /><category term="Azure Stack HCI" /><category term="Azure Local" /><summary type="html"><![CDATA[Curated catalog of Azure Local (formerly Azure Stack HCI), AVD and AKS with official and community resources updated regularly.]]></summary></entry><entry><title type="html">Nerdio Scripted Actions: Windows Scripts</title><link href="https://schmitt-nieto.com/blog/nerdio-scripted-actions-windows-scripts/" rel="alternate" type="text/html" title="Nerdio Scripted Actions: Windows Scripts" /><published>2025-05-17T00:00:00+02:00</published><updated>2025-05-17T00:00:00+02:00</updated><id>https://schmitt-nieto.com/blog/nerdio-scripted-actions-windows-scripts</id><content type="html" xml:base="https://schmitt-nieto.com/blog/nerdio-scripted-actions-windows-scripts/"><![CDATA[<h2 id="introduction">Introduction</h2>

<p>Welcome to a new post! Today I’m diving into a topic I’ve discussed with countless colleagues in the Azure Virtual Desktop (AVD) community: <strong>Nerdio Scripted Actions</strong>, and in particular <strong>Windows Scripts</strong>. When I chat with fellow IT pros about how they handle AVD deployments, some lean on a variation of <a href="https://github.com/Azure/avdaccelerator">AVD Accelerator</a>, others use tools like <a href="https://getnerdio.com/">Nerdio</a> or <a href="https://www.itprocloud.com/Hydra/">Hydra</a>, and many stick with native deployment and management.</p>

<p>Personally, I avoid debates about which option is “best”, since each has its own niche and use cases. What I can say with confidence is that the projects where I’ve used Nerdio have been incredibly easy to adapt for clients, thanks to its simplicity. One feature that both I and my clients rely on heavily is <a href="https://nmehelp.getnerdio.com/hc/en-us/articles/26124327585421-Scripted-Actions-Overview">Scripted Actions</a>, specifically <a href="https://nmehelp.getnerdio.com/hc/en-us/articles/26124334667149-Scripted-Actions-for-Windows-Scripts">Windows Scripts</a>, which let you automate repetitive tasks in a very straightforward way.</p>

<p>As more scenarios emerge that require AVD without a traditional Active Directory, using scripts to configure session hosts before they even boot up is on the rise, since applying those settings via Intune can take time. With that in mind, I created the GitHub repository “<a href="https://github.com/schmittnieto/nerdio-scripted-actions">nerdio-scripted-actions</a>,” where I’ll be hosting most of the scripts I develop. More on that later!</p>

<h2 id="how-scripted-actions-work">How Scripted Actions Work</h2>

<p>Scripted Actions in Nerdio Manager are PowerShell scripts that run either on Windows VMs (Windows Scripts) or as Azure Runbooks. They let you customize and automate tasks, like installing software, configuring settings, or performing maintenance, at various points in the VM lifecycle.</p>

<p><a href="/assets/img/post/2025-05-17-nerdio-scripted-actions-windows-scripts/diagramm.png" target="_blank">
  <img src="/assets/img/post/2025-05-17-nerdio-scripted-actions-windows-scripts/diagramm.png" alt="Nerdio Scripted Actions" style="border: 2px solid grey;" />
</a></p>

<h3 id="azure-runbooks-in-nerdio">Azure Runbooks in Nerdio</h3>

<p>Azure Runbooks run your PowerShell scripts <em>outside</em> of a VM, leveraging Azure Automation. This is great for tasks that don’t require logging into each machine:</p>

<ul>
  <li>Add data disks to VMs</li>
  <li>Assign or unassign users to personal desktops</li>
  <li>Change OS disk type of stopped VMs</li>
  <li>Shrink FSLogix profiles</li>
  <li>Enable hibernation or OS disk encryption</li>
  <li>Set regional settings</li>
  <li>Create NAT Gateways</li>
  <li>Power on VMs for a specific window</li>
  <li>Update Nerdio Manager or the AVD Agent</li>
</ul>

<h3 id="windows-scripts-in-nerdio">Windows Scripts in Nerdio</h3>

<p>Windows Scripts run <em>inside</em> the VM via the Custom Script Extension. They’re perfect for installing apps, tweaking settings, or running any PowerShell code with admin rights, without interrupting user sessions.</p>

<p><a href="/assets/img/post/2025-05-17-nerdio-scripted-actions-windows-scripts/diagramm-windows.png" target="_blank">
  <img src="/assets/img/post/2025-05-17-nerdio-scripted-actions-windows-scripts/diagramm-windows.png" alt="Nerdio Scripted Actions Windows Scripts" style="border: 2px solid grey;" />
</a></p>

<p>Out of the box, Nerdio provides many ready-to-use scripts, such as:</p>

<ul>
  <li>Installing popular apps via Chocolatey (Chrome, 7zip, VSCode, Adobe Reader…)</li>
  <li>Installing Microsoft 365, Teams, OneDrive</li>
  <li>Enabling clipboard transfer or screen-capture protection</li>
  <li>Applying Windows or AVD performance optimizations</li>
  <li>Installing FSLogix or security agents (e.g., Sophos)</li>
  <li>Granting local admin rights to users</li>
  <li>Running Windows 10/11 updates</li>
  <li>Restarting the AVD Agent or adjusting Sysprep settings</li>
</ul>

<h2 id="where-can-scripted-actions-be-used">Where Can Scripted Actions Be Used?</h2>

<p>Scripted Actions in Nerdio Manager can be applied at various stages of the VM lifecycle:</p>

<ol>
  <li><strong>Desktop Images (Golden Images)</strong>
    <ul>
      <li><strong>Purpose</strong>: Customize and prepare your base images.</li>
      <li><strong>Use Cases</strong>: Install or update applications, apply system optimizations, configure settings before sealing the image.</li>
      <li><strong>Application</strong>: During the “Set as image” process, you can run scripts on the source VM or the clone VM.</li>
      <li><strong>Reference</strong>: <a href="https://nmmhelp.getnerdio.com/hc/en-us/articles/26125609569805-Update-a-Desktop-Image-and-Hosts">Update a Desktop Image and Hosts</a></li>
    </ul>
  </li>
  <li><strong>Host Pool VM Lifecycle Events</strong>
    <ul>
      <li><strong>Purpose</strong>: Automate tasks during VM provisioning and management.</li>
      <li><strong>Use Cases</strong>: Execute scripts when a VM is created, started, stopped, or deleted; install agents or configure settings during VM deployment.</li>
      <li><strong>Application</strong>: Assign scripts to specific VM lifecycle events within a host pool.</li>
      <li><strong>Reference</strong>: <a href="https://nmmhelp.getnerdio.com/hc/en-us/articles/26125616197901-Overview-of-Scripted-Actions">Overview of Scripted Actions</a></li>
    </ul>
  </li>
  <li><strong>Re-imaging Hosts</strong>
    <ul>
      <li><strong>Purpose</strong>: Apply updates or changes across existing session hosts.</li>
      <li><strong>Use Cases</strong>: Re-apply configurations or software installations; ensure consistency across all hosts after updating the base image.</li>
      <li><strong>Application</strong>: During the re-image process, scripts can execute to apply necessary changes.</li>
      <li><strong>Reference</strong>: <a href="https://nmmhelp.getnerdio.com/hc/en-us/articles/26125609569805-Update-a-Desktop-Image-and-Hosts">Update a Desktop Image and Hosts</a></li>
    </ul>
  </li>
  <li><strong>Manual Execution on Host Pools</strong>
    <ul>
      <li><strong>Purpose</strong>: Perform ad-hoc tasks across multiple VMs.</li>
      <li><strong>Use Cases</strong>: Run maintenance scripts; apply quick fixes or updates without full redeployment.</li>
      <li><strong>Application</strong>: Use the “Run script” option within a host pool to execute scripts on selected VMs.</li>
      <li><strong>Reference</strong>: <a href="https://nmmhelp.getnerdio.com/hc/en-us/articles/26125616197901-Overview-of-Scripted-Actions">Overview of Scripted Actions</a></li>
    </ul>
  </li>
  <li><strong>Scheduled Tasks</strong>
    <ul>
      <li><strong>Purpose</strong>: Automate recurring maintenance or updates.</li>
      <li><strong>Use Cases</strong>: Schedule regular updates or clean-up tasks; automate routine maintenance scripts.</li>
      <li><strong>Application</strong>: Configure scripts to run on a defined schedule within Nerdio Manager.</li>
      <li><strong>Reference</strong>: <a href="https://nmmhelp.getnerdio.com/hc/en-us/community/posts/4416937676429-Tips-And-Tricks-Keeping-your-Image-Current-with-Windows-Updates-Automatically">Keeping your Image Current with Windows Updates Automatically</a></li>
    </ul>
  </li>
</ol>

<h2 id="scripted-action-groups-in-nerdio-manager">Scripted Action Groups in Nerdio Manager</h2>

<p>Scripted Action Groups let you combine multiple scripted actions (Windows Scripts or Azure Runbooks) into one reusable group. These groups simplify automation by allowing a set of scripts to execute in sequence during tasks like VM provisioning or image updates.</p>

<h3 id="key-features">Key Features</h3>

<ul>
  <li>
    <p><strong>Sequential Execution</strong><br />
Scripts within a group run one after another in the defined order, you can rearrange them with drag &amp; drop.</p>
  </li>
  <li>
    <p><strong>Reusability</strong><br />
Apply the same group to multiple scenarios to reduce manual effort and ensure consistency.</p>
  </li>
  <li>
    <p><strong>Tag Support</strong><br />
Assign tags to groups for better organization and filtering.</p>
  </li>
</ul>

<h3 id="limitations">Limitations</h3>

<ul>
  <li><strong>Maximum of 20 Scripts per Group</strong></li>
  <li><strong>No Nesting</strong>: You cannot include one group inside another.</li>
  <li><strong>Flat Execution</strong>: The system treats each script individually; order matters.</li>
</ul>

<h2 id="my-scripted-actions-repository">My Scripted Actions Repository</h2>

<p>To help you get started with Nerdio Scripted Actions, I’ve curated a dedicated GitHub repo at <a href="https://github.com/schmittnieto/nerdio-scripted-actions">nerdio-scripted-actions</a>. Inside, you’ll find a growing collection of PowerShell scripts designed for everything from image customization to day-to-day host-pool tasks.</p>

<p>Nerdio maintains its own library under <a href="https://github.com/Get-Nerdio/NMW/tree/main/scripted-actions">NMW Scripted Actions</a>, many of which are drawn from Microsoft’s <a href="https://github.com/Azure/RDS-Templates/tree/master/CustomImageTemplateScripts">RDS-Templates</a> project. To illustrate, here are two complementary scripts:</p>

<ul>
  <li><strong>Install language packs.ps1</strong> (Nerdio): <a href="https://github.com/Get-Nerdio/NMW/blob/main/scripted-actions/custom-image-template-scripts/Install%20language%20packs.ps1">Install language packs.ps1</a></li>
  <li><strong>InstallLanguagePacks.ps1</strong> (RDS-Templates): <a href="https://github.com/Azure/RDS-Templates/blob/master/CustomImageTemplateScripts/CustomImageTemplateScripts_2024-03-27/InstallLanguagePacks.ps1">InstallLanguagePacks.ps1</a></li>
</ul>

<p>The Nerdio script begins with a standardized header that defines metadata and user-input variables. For example:</p>

<div class="language-powershell highlighter-rouge"><div class="highlight"><pre class="highlight"><code><span class="cm">&lt;#
  Author: Akash Chawla
  Source: https://github.com/Azure/RDS-Templates/tree/master/CustomImageTemplateScripts/CustomImageTemplateScripts_2024-03-27
#&gt;</span><span class="w">

</span><span class="c">#description: Install language packs</span><span class="w">
</span><span class="c">#execution mode: Individual</span><span class="w">
</span><span class="c">#tags: Microsoft, Custom Image Template Scripts</span><span class="w">
</span><span class="cm">&lt;#variables:
{
  "LanguageList": {
    "Description": "Select any additional languages to be added",
    "DisplayName": "Languages"
  }
}
#&gt;</span><span class="w">
</span></code></pre></div></div>

<p>In the <strong>variables</strong> section, you define the fields that end users will interact with, here, a simple language picker:</p>

<p><a href="/assets/img/post/2025-05-17-nerdio-scripted-actions-windows-scripts/variables.png" target="_blank">
  <img src="/assets/img/post/2025-05-17-nerdio-scripted-actions-windows-scripts/variables.png" alt="Nerdio Scripted Actions Variables" style="border: 2px solid grey;" />
</a></p>

<p>By hosting these scripts in your own repo, you gain full control over versioning, customizations and integration with Nerdio’s “Script repositories” feature, making your AVD automation both transparent and repeatable.</p>

<h3 id="integrating-the-repository-in-nerdio">Integrating the Repository in Nerdio</h3>

<ol>
  <li>
    <p>Go to <strong>Settings &gt; Environment &gt; Integrations &gt; Script repositories</strong>:</p>

    <p><a href="/assets/img/post/2025-05-17-nerdio-scripted-actions-windows-scripts/integration01.png" target="_blank">
  <img src="/assets/img/post/2025-05-17-nerdio-scripted-actions-windows-scripts/integration01.png" alt="Adding a custom repository to Scripted Actions 01" style="border: 2px solid grey;" />
</a></p>
  </li>
  <li>
    <p>Add the repository URL and select folders to sync:</p>

    <p><a href="/assets/img/post/2025-05-17-nerdio-scripted-actions-windows-scripts/integration02.png" target="_blank">
  <img src="/assets/img/post/2025-05-17-nerdio-scripted-actions-windows-scripts/integration02.png" alt="Adding a custom repository to Scripted Actions 02" style="border: 2px solid grey;" />
</a></p>
  </li>
  <li>
    <p>Verify the scripts under <strong>Scripted Actions &gt; Windows Scripts &gt; Filter By Source</strong>:</p>

    <p><a href="/assets/img/post/2025-05-17-nerdio-scripted-actions-windows-scripts/integration03.png" target="_blank">
  <img src="/assets/img/post/2025-05-17-nerdio-scripted-actions-windows-scripts/integration03.png" alt="Adding a custom repository to Scripted Actions 03" style="border: 2px solid grey;" />
</a></p>
  </li>
</ol>

<h3 id="my-scripts">My Scripts</h3>

<p>Currently, the repository shows three scripts, with three more in development. Here’s what you’ll find today:</p>

<ul>
  <li>
    <p><strong>Hide or Unhide Drives in File Explorer</strong><br />
Hide one or more drives (e.g., “C,D,E”) from File Explorer to simplify the UI. Users can still access them, it just cleans up the view. You can also revert the change without re-entering drive letters.
 <a href="/assets/img/post/2025-05-17-nerdio-scripted-actions-windows-scripts/script01.png" target="_blank">
   <img src="/assets/img/post/2025-05-17-nerdio-scripted-actions-windows-scripts/script01.png" alt="Hide or Unhide Drives in File Explorer" style="border: 2px solid grey;" />
 </a></p>
  </li>
  <li>
    <p><strong>Disable Office Updates Task</strong><br />
Prevent <code class="language-plaintext highlighter-rouge">SDXHelper.exe</code> from running in multi-user environments. This script disables, or re-enables, the Office update task on session hosts.
 <a href="/assets/img/post/2025-05-17-nerdio-scripted-actions-windows-scripts/script02.png" target="_blank">
   <img src="/assets/img/post/2025-05-17-nerdio-scripted-actions-windows-scripts/script02.png" alt="Disable Office Updates Task" style="border: 2px solid grey;" />
 </a></p>
  </li>
  <li>
    <p><strong>OneDrive Remote App Configuration</strong><br />
Apply the settings required to run OneDrive in AVD Remote App pools (<a href="https://learn.microsoft.com/azure/virtual-desktop/onedrive-remoteapp">Microsoft documentation</a>). This script also supports reverting the changes.
 <a href="/assets/img/post/2025-05-17-nerdio-scripted-actions-windows-scripts/script03.png" target="_blank">
   <img src="/assets/img/post/2025-05-17-nerdio-scripted-actions-windows-scripts/script03.png" alt="OneDrive Remote App Configuration" style="border: 2px solid grey;" />
 </a></p>
  </li>
</ul>

<h3 id="running-my-scripts-independently-of-nerdio">Running My Scripts Independently of Nerdio</h3>

<p>If you need to test or apply these scripts on a Windows VM without connecting to Nerdio Manager, you can execute them directly. This method is handy for quick troubleshooting or one-off tasks:</p>

<ol>
  <li><strong>Download</strong> the desired <code class="language-plaintext highlighter-rouge">.ps1</code> file from the GitHub repo to your local machine.</li>
  <li><strong>Open</strong> PowerShell as an Administrator.</li>
  <li><strong>Bypass</strong> the execution policy and run the script. For example, to hide drives “C” and “D”:</li>
</ol>

<div class="language-powershell highlighter-rouge"><div class="highlight"><pre class="highlight"><code><span class="n">Set-ExecutionPolicy</span><span class="w"> </span><span class="nx">Bypass</span><span class="w"> </span><span class="nt">-Scope</span><span class="w"> </span><span class="nx">Process</span><span class="w"> </span><span class="nt">-Force</span><span class="w">
</span><span class="o">.</span><span class="n">\HideDrives.ps1</span><span class="w"> </span><span class="nt">-Action</span><span class="w"> </span><span class="nx">Hide</span><span class="w"> </span><span class="nt">-DrivesToHide</span><span class="w"> </span><span class="s2">"C,D"</span><span class="w">
</span></code></pre></div></div>

<p>That’s it, your script will run immediately, just as it would within Nerdio’s framework.</p>

<h3 id="how-to-collaborate">How to Collaborate</h3>

<p>I’ll keep this repo updated as new requests and use cases come up. I’m also working on integrating my scripts into the official Nerdio repository via this <a href="https://github.com/Get-Nerdio/NMW/pull/40">pull request</a>. If you want to contribute:</p>

<ul>
  <li>Open an <strong>Issue</strong> on the repo: <a href="https://github.com/schmittnieto/nerdio-scripted-actions/issues">https://github.com/schmittnieto/nerdio-scripted-actions/issues</a></li>
  <li>Fork the repo and submit a <strong>Pull Request</strong> with your scripts</li>
  <li>Not comfortable on GitHub? Feel free to reach out to me on LinkedIn and we can collaborate privately.</li>
</ul>

<h2 id="conclusion">Conclusion</h2>

<p>Nerdio Scripted Actions, especially Windows Scripts, can significantly streamline your AVD deployments by automating everything from app installation to configuration tweaks. Whether you’re customizing golden images, automating host pool events, or running ad-hoc maintenance, these scripts give you the flexibility and control you need. I hope you find my repository helpful, and I’m eager to see what you build with it. Feel free to dive in, suggest enhancements, or share your own scripts!</p>

<p><strong>Links Used in This Article</strong></p>

<table>
  <thead>
    <tr>
      <th>Name</th>
      <th>URL</th>
    </tr>
  </thead>
  <tbody>
    <tr>
      <td>AVD Accelerator</td>
      <td>https://github.com/Azure/avdaccelerator</td>
    </tr>
    <tr>
      <td>Nerdio</td>
      <td>https://getnerdio.com/</td>
    </tr>
    <tr>
      <td>Hydra</td>
      <td>https://www.itprocloud.com/Hydra/</td>
    </tr>
    <tr>
      <td>Scripted Actions Overview</td>
      <td>https://nmehelp.getnerdio.com/hc/en-us/articles/26124327585421-Scripted-Actions-Overview</td>
    </tr>
    <tr>
      <td>Windows Scripts</td>
      <td>https://nmehelp.getnerdio.com/hc/en-us/articles/26124334667149-Scripted-Actions-for-Windows-Scripts</td>
    </tr>
    <tr>
      <td>nerdio-scripted-actions</td>
      <td>https://github.com/schmittnieto/nerdio-scripted-actions</td>
    </tr>
    <tr>
      <td>NMW Scripted Actions</td>
      <td>https://github.com/Get-Nerdio/NMW/tree/main/scripted-actions</td>
    </tr>
    <tr>
      <td>Install language packs.ps1</td>
      <td>https://github.com/Get-Nerdio/NMW/blob/main/scripted-actions/custom-image-template-scripts/Install%20language%20packs.ps1</td>
    </tr>
    <tr>
      <td>RDS-Templates</td>
      <td>https://github.com/Azure/RDS-Templates/tree/master/CustomImageTemplateScripts/CustomImageTemplateScripts_2024-03-27</td>
    </tr>
    <tr>
      <td>InstallLanguagePacks.ps1 (RDS-Templates)</td>
      <td>https://github.com/Azure/RDS-Templates/blob/master/CustomImageTemplateScripts/CustomImageTemplateScripts_2024-03-27/InstallLanguagePacks.ps1</td>
    </tr>
    <tr>
      <td>Microsoft documentation</td>
      <td>https://learn.microsoft.com/azure/virtual-desktop/onedrive-remoteapp</td>
    </tr>
    <tr>
      <td>Pull request</td>
      <td>https://github.com/Get-Nerdio/NMW/pull/40</td>
    </tr>
    <tr>
      <td>Issues</td>
      <td>https://github.com/schmittnieto/nerdio-scripted-actions/issues</td>
    </tr>
  </tbody>
</table>]]></content><author><name>Cristian Schmitt Nieto</name></author><category term="Blog" /><category term="Azure Virtual Desktop" /><category term="Nerdio" /><category term="Scripted Actions" /><category term="Windows Scripts" /><summary type="html"><![CDATA[Discover how to leverage Nerdio Scripted Actions with Windows Scripts to automate Azure Virtual Desktop deployments.]]></summary></entry><entry><title type="html">Azure Local: Backup and Disaster Recovery</title><link href="https://schmitt-nieto.com/blog/azure-local-backup-and-disaster-recovery/" rel="alternate" type="text/html" title="Azure Local: Backup and Disaster Recovery" /><published>2025-03-29T00:00:00+01:00</published><updated>2025-03-29T00:00:00+01:00</updated><id>https://schmitt-nieto.com/blog/azure-local-backup-and-disaster-recovery</id><content type="html" xml:base="https://schmitt-nieto.com/blog/azure-local-backup-and-disaster-recovery/"><![CDATA[<h2 id="introduction">Introduction</h2>

<p>Welcome to a new article in the Chronicloud Series. In this post, I’ll be addressing a topic that is always a key consideration when using Azure Local: <strong>Backup and Disaster Recovery</strong>.</p>

<p>If you’re accustomed to using infrastructure in Azure and haven’t yet experienced Azure Local, this subject might catch you off guard, since the backup and restore process here is completely different. Azure Local is deployed in your chosen location, whether that’s a data center, your company’s basement, or, in my case, my laptop, and it follows backup and recovery procedures that are almost identical to those used in Onpremises environments like Windows Server 2025, VMware, Nutanix, or similar systems.</p>

<p>This means that, for now, you need an on-premises backup infrastructure to secure your workloads. There is one small exception: <a href="https://learn.microsoft.com/en-us/azure/azure-local/manage/azure-site-recovery?view=azloc-24113">Azure Site Recovery</a>, which is currently in <strong>Preview</strong> and will be discussed later in this article.</p>

<p>Throughout this post, I will explore various backup solutions and possibilities, detailing both their dependencies/requirements and their limitations. Although I won’t implement a full technical backup solution (since my testing infrastructure is too limited for such a setup and would take too long to produce a satisfactory result), I will cover Azure Site Recovery in detail as I have a few specific insights to share.</p>

<p>Additionally, I’ll delve into the topic of hydration, a subject I’ve discussed in previous articles, examining its challenges and current possibilities. In my view, this aspect plays a crucial role in the VM recovery process.</p>

<h2 id="the-challenge-hydration-and-vm-recovery">The Challenge: Hydration and VM Recovery</h2>

<p>For those who aren’t familiar with what I mean by Hydration, I’ll try to explain it simply. Hydration is a process where an Azure Local VM, managed and configured as if it were a Hyper-V VM (e.g. using PowerShell commands, Hyper-V Manager, Cluster Manager, or Windows Admin Center), is transformed into an <a href="https://learn.microsoft.com/en-us/azure/azure-local/manage/azure-arc-vm-management-overview?view=azloc-24112">ARC VM</a>. In other words, it converts a “local” VM into a “hybrid” VM that can be managed from the Azure portal.</p>

<p>Regarding the recovery process and hydration of a VM in Azure Local, here’s what I can say:</p>
<ul>
  <li>If your goal is solely to cover the backup and recovery of VMs within a single Azure Local Cluster, I can confidently state that this is currently achievable through various solutions. Restoring the VM in the cluster returns it to its original state, meaning no hydration is needed because the VM functions normally.</li>
  <li>Conversely, if your objective is to back up and restore across different Azure Local Clusters, there are a couple of limitations and challenges to consider. The primary challenge is restoring an ARC VM in an Azure Local Cluster different from the original.
    <ul>
      <li>Since there isn’t currently a hydration service in Azure Local that allows registering (or re-registering) the VM in a cluster other than the one it was originally set up on, the only thing that gets restored is the VM as a local resource (with its CPU, RAM, storage configuration, etc.).</li>
      <li>This doesn’t mean the VM can’t be used in the new cluster; it will simply operate as a basic Hyper-V VM and won’t have the capabilities of an ARC VM since it can’t utilize the ARC Resource Bridge it was configured with.</li>
    </ul>
  </li>
</ul>

<p>As for when and how a hydration service will be implemented in Azure Local, there’s no current information available about its roadmap or status. Despite the absence of a hydration service, there are a couple of workarounds that can help you implement a local VM as an ARC VM, which I’ll explore in more detail in the next section.</p>

<h3 id="workarounds-for-hydration">Workarounds for Hydration</h3>

<p>Personally, I only know of one “functional” workaround and one “theoretical” workaround. <strong>Neither is supported or documented by Microsoft</strong>; what I’m about to describe isn’t designed or validated by Microsoft, this is simply based on my experience as a provisional measure until the service becomes available.</p>

<p>Let’s start with the functional workaround. This method uses <a href="https://learn.microsoft.com/en-ca/azure/azure-local/migrate/migration-azure-migrate-overview?view=azloc-24113">Azure Migrate (<strong>in preview</strong>)</a> and requires a server running Hyper-V to migrate the VM to Azure Local. The migration process, which I’ll detail in my next blog post (Azure Local: Planning, Sizing &amp; Migration), is as follows:
<a href="/assets/img/post/2025-03-29-azure-local-backup-and-disaster-recovery/azure-migrate-workflow-1.png" target="_blank">
  <img src="/assets/img/post/2025-03-29-azure-local-backup-and-disaster-recovery/azure-migrate-workflow-1.png" alt="Azure Migrate Workflow" style="border: 2px solid grey;" />
</a></p>

<p>This process allows us to migrate the VM from a Hyper-V environment to Azure Local and have it appear as an ARC VM by registering it with the ARC Resource Bridge. However, if the VM we want to “migrate” is actually a restoration of a VM from <em>another Azure Local cluster</em>, a couple of preparatory steps are necessary to ensure it registers correctly in the new cluster. The most important step noted in the <a href="https://learn.microsoft.com/en-ca/azure/azure-local/migrate/migrate-hyperv-requirements?view=azloc-24113#source-hyper-v-requirements">documentation</a> is:</p>
<ul>
  <li>Verify that <strong>none</strong> of the VMs you plan to migrate have the Azure Connected Machine Agent installed. For more information, see <a href="https://learn.microsoft.com/en-ca/azure/azure-local/migrate/migrate-faq?view=azloc-24113">FAQ</a>.</li>
</ul>

<p>In other words, you need to uninstall the “Azure Connected Machine Agent” and, to avoid issues, also remove any existing resource in the Azure Portal previously linked to that VM. There are also certain limitations with this process, such as the MAC address of the network interfaces changing (<a href="https://learn.microsoft.com/en-ca/azure/azure-local/migrate/migrate-faq?view=azloc-24113&amp;tabs=vmware-and-hyper-v-vms#i-use-dhcp-reservation-for-ip-addresses-for-my-source-vms-does-migration-ensure-that-the-mac-address-is-preserved-so-that-my-migrated-vm-can-get-the-same-ip-address">link</a>). This usually isn’t a problem, but it wouldn’t be the first time that an application requires a specific MAC address due to licensing concerns 🥲.</p>

<p>That said, since my goal isn’t to describe in detail how Azure Migrate works (I’ll cover that in my next article), for those eager to understand the process, I recommend a great article by <a href="https://www.linkedin.com/in/kennylowe1/">Kenny Lowe</a> which details the migration of a local VM (located on a cluster node) to an ARC VM <strong>within the same Azure Local cluster</strong>, in other words, performing the hydration process via Azure Migrate: <a href="https://www.kennylowe.org/2024/06/03/migrate-to-hci.html/">Migrating VMs to Azure Stack HCI 23H2</a>.</p>

<p>Once the functional workaround has been discussed, we move on to the theoretical workaround, which I haven’t yet tested and have serious doubts about. The theoretical workaround is based on some responses from users in the following <a href="https://learn.microsoft.com/en-us/answers/questions/2109722/how-do-i-recover-full-vms-in-azure-stack-hci-23h2">post</a>, which states:</p>
<ul>
  <li>You can deploy a new Azure Stack HCI virtual machine in your newly redeployed cluster and then overwrite the existing virtual disk with your backup data.</li>
</ul>

<p>I personally believe this might work <strong>only if the VM wasn’t previously registered with ARC</strong> and assuming that the ARC Resource Bridge would initiate a new onboarding process upon detecting that the VM isn’t “configured correctly” (which it doesn’t). However, as mentioned, this is an approach I haven’t been able to verify, and I remain quite skeptical about its viability when restoring an ARC VM from another Azure Local cluster.</p>

<p>I plan to take some time in the coming weeks to validate the theoretical workaround and, if it proves functional, update this article to reflect my experiences. For now, though, we’ve covered enough on hydration in Azure Local, so let’s move on to the next topic, which should be the main focus of this article: Backup.</p>

<h2 id="backup">Backup</h2>

<p>This is a topic that always gives us headaches but is fundamental to any infrastructure, whether due to hardware issues, physical incidents (floods, fires…), configuration mistakes (deleted files, corrupt VMs…) or security breaches (ransomware). Without a robust backup, you’re really in trouble…</p>

<p>I won’t delve too deeply into the basic concepts of backup and recovery here, as that would make this article excessively long. Instead, I encourage you to explore these fundamentals through a few links from one of the most popular solutions my clients use (Veeam):</p>

<ul>
  <li><a href="https://www.veeam.com/blog/321-backup-rule.html">What is the 3-2-1 backup rule?</a></li>
  <li><a href="https://www.veeam.com/blog/recovery-time-recovery-point-objectives.html">RPO and RTO: What’s the Difference?</a></li>
  <li><a href="https://bp.veeam.com/vbr/">Best Practices: Assess, Design, Build, Operate &amp; Secure</a></li>
  <li><a href="https://www.veeam.com/calculators/simple/vbr/machines">Backup resource calculator</a></li>
  <li><a href="https://bp.veeam.com/security/Design-and-implementation/Hardening/Workgroup_or_Domain.html">Backup servers and repositories should not depend on the infrastructure (e.g. not be part of AD, be on a separate physical server…)</a></li>
</ul>

<p>As I mentioned in the introduction, even though Azure Local is part of Azure’s hybrid infrastructure, it does not include the native Azure Backup service. On reflection, this makes sense, as it would be very difficult, costly, and inefficient to maintain the required RPOs and RTOs by continuously backing up workloads solely over the Internet (WAN).</p>

<p>There is an approach that comes close to this, which we’ll cover later, called Azure Site Recovery (ASR). This means that if you design an Azure Local solution, you also need to design or adapt your backup strategy. In the sections that follow, I’ll discuss a couple of solutions for the various workloads that can be implemented in Azure Local, along with their dependencies, advantages, and benefits.</p>

<h3 id="host">Host</h3>

<p>Although, in theory, you could back up the hosts (while, of course, avoiding the Cluster Shared Volume), <strong>I do not recommend this practice</strong> since it is not one of Microsoft’s recommended best practices. In case one of the nodes suffers hardware damage, there is some excellent <a href="https://learn.microsoft.com/en-us/azure/azure-local/manage/repair-server?view=azloc-24113">documentation</a> that outlines the node repair process:
<a href="/assets/img/post/2025-03-29-azure-local-backup-and-disaster-recovery/repair-server-workflow-2.png" target="_blank">
  <img src="/assets/img/post/2025-03-29-azure-local-backup-and-disaster-recovery/repair-server-workflow-2.png" alt="Azure Migrate Workflow" style="border: 2px solid grey;" />
</a></p>

<p>That said, this guide does not apply to single-node servers. This is the only case where, besides backing up the workloads, I would recommend backing up the node itself (without needing to back up C:\ClusterStorage, as it is redundant). A failure here would constitute a “Disaster Recovery” scenario, and if we want to maintain the ARC VMs and the entire configured infrastructure, it could be a possible method to achieve that.</p>

<p>While I personally wouldn’t back up the entire nodes of a cluster, there are certain folders on each node that I like to keep copies of, and these are:</p>
<ul>
  <li>C:\ProgramData\AzureConnectedMachineAgent\Log</li>
  <li>C:\MASLogs</li>
  <li>C:\Agents</li>
  <li>C:\CloudContent</li>
  <li>C:\CloudDeployment</li>
  <li>C:\ClusterStorage\Infrastructure_1\ArcHci</li>
</ul>

<p>The last folder ideally should not be backed up, but since it contains the log of the last time the ARC Resource Bridge was provisioned in the event of Disaster Recovery and a cluster rebuild, it may contain relevant information.</p>

<h3 id="vms">VMs</h3>

<p>Since VMs are the primary workload in Azure Local (at least in my experience), there are several options for creating backups. Of the solutions I’ll present below, I want to highlight that they are just two of the <a href="https://learn.microsoft.com/en-us/azure/azure-local/concepts/utility-applications?view=azloc-24112#partner-spotlight">seven currently available</a> for Azure Local, in other words, when it comes to backing up VMs, you have plenty of choices.</p>

<p>Before diving into the two solutions I will cover, please note that depending on the workload you intend to run, it makes more or less sense to perform backups (as well as to determine the backup frequency, i.e., how many backups of the VM are performed each day). A couple of examples of this would be:</p>
<ul>
  <li><strong>AVD Multiuser Session Host</strong>: Personally, since I usually manage session hosts using Golden Images, I don’t require a backup of the VMs because the valuable data (user profiles and/or data directories) is already secured via the File Server backup.</li>
  <li><strong>SQL Server</strong>: SQL servers, due to the high volume of changes throughout the day, typically have a much more intensive backup configuration compared to other VMs. Common practices in mission-critical servers include backing up transaction logs every 30 minutes, performing incremental backups every hour, and a full backup once a day.</li>
</ul>

<p>All the solutions we will analyze (and indeed all those available) share the same problem when restoring VMs in an ALR (Alternate Location Recovery), that is, in another cluster: the VMs are restored as Hyper-V VMs rather than as ARC VMs, which is something we discussed in the Hydration section.</p>

<h4 id="microsoft-azure-backup-server">Microsoft Azure Backup Server</h4>

<p>Before anything, I want to share the official guide on how to configure <a href="https://learn.microsoft.com/en-us/azure/backup/back-up-azure-stack-hyperconverged-infrastructure-virtual-machines">Azure Local Backup with Azure Backup Server</a>, which also outlines the supported scenarios.</p>

<p>In my experience, MABS is not one of the most widespread solutions in the market (at least not in Germany 🤔), likely due to its limitations and performance compared to other infrastructure platforms (aside from Azure Local and VMware) and, conversely, the services offered by other solutions. However, it can be a more economically efficient option, as it does not incur additional licensing costs for the backup service, although it should be taken into account that for large data volumes (many terabytes), the cost of storing information in Azure Backup Vaults can be higher compared to other alternatives..</p>

<p>Regarding integration with Azure, MABS integrates natively with hybrid services (storing data in an Azure Backup Vault), which, in my view, simplifies and eases its management.</p>

<p>When it comes to backing up VMs, MABS offers the following features:</p>
<ul>
  <li><strong>Native Hyper-V/Azure Local support</strong>: Backs up VMs in an Azure Local cluster with an agent on each node.</li>
  <li><strong>Host-level backup</strong>: Protects VMs even when stored on local storage, DAS, or CSV (Cluster Shared Volumes).</li>
  <li><strong>Cluster mobility</strong>: Detects live migration; if a VM moves to a different node, MABS continues protecting it on the new host without manual intervention.</li>
  <li><strong>Limitation</strong>: It does not support moving a VM to a different cluster (only within the same cluster).</li>
</ul>

<p>Specific workload limitations/characteristics include:</p>
<ul>
  <li><a href="https://learn.microsoft.com/en-us/azure/backup/active-directory-backup-restore"><strong>Domain Controller</strong></a>: It does not offer granular restoration of individual AD objects from the MABS console (there is no “item level restore” for AD); you would need to recover a System State backup and use AD tools (or the AD Recycle Bin) to restore specific objects.</li>
  <li><a href="https://learn.microsoft.com/en-us/azure/backup/backup-azure-sql-mabs"><strong>SQL Server</strong></a>: SQL backups can be sent to an Azure Recovery Services Vault for long-term retention (up to 99 years), with storage isolated from the local infrastructure. It does not protect databases whose files reside on remote shared resources (SMB), nor certain complex scenarios of Availability Groups with mismatched names.</li>
</ul>

<p>For the proper operation and backup of the aforementioned specific workloads, Guest Agents are required, which slightly increases the complexity of the solution.</p>

<p><strong>Concurrency and parallel processing</strong>: Historically, MABS had restrictions on the number of simultaneous tasks, but in version 4 it supports up to 8 parallel backups/restorations of VMs by default (<a href="https://learn.microsoft.com/en-us/azure/backup/backup-mabs-whats-new-mabs">configurable via settings</a>).</p>

<p><strong>Storage efficiency</strong>: MABS can leverage Windows Server deduplication on its backup volumes to reduce consumed space (a strategy inherited from System Center DPM). Additionally, it compresses and encrypts the data sent to the Azure Backup Vault.</p>

<p><strong>Load on the protected systems</strong>: MABS, by using agents on each server/VM for certain tasks (for example, agents within VMs for SQL or for the System State of Domain Controllers), can impose CPU/memory usage on the guest systems during the backup window (due to VSS operations, encryption, and data transfer).</p>

<p><strong>File restoration</strong>: It allows restoring individual files or folders to their original or an alternate location. MABS v4 introduced the ability to browse recovery points in Azure without fully downloading them, making it easier to restore specific files from the cloud (<a href="https://learn.microsoft.com/en-us/azure/backup/backup-mabs-whats-new-mabs">link</a>).</p>

<p><strong>Data encryption at rest</strong>: All content backed up in the Recovery Services Vault (in Azure) is encrypted by default with 256-bit AES (<a href="https://learn.microsoft.com/en-us/azure/backup/backup-encryption">link</a>). In on-premise MABS, data stored locally on the backup server can be encrypted using BitLocker or the operating system’s EFS if needed, but <strong>there is no native encryption option in MABS</strong> for that local storage beyond what Windows provides.</p>

<p><strong>Backup immutability (protection against deletion/modification)</strong>: On-premises, MABS does not have an immutability mechanism for its backup disks beyond protecting server access. However, if you use immutability in the Recovery Services Vault and “lock” it, Azure guarantees that no backup can be deleted or altered before its expiration date according to the configured policy (<a href="https://learn.microsoft.com/en-us/azure/backup/whats-new#worm-enabled-immutable-storage-for-recovery-services-vaults-is-now-generally-available">link</a>). This adds a layer of protection against accidental or malicious deletions, even an attacker with access would not be able to delete the current backups.</p>

<p>Given all of this, if you’re starting from a “Green Field approach” and do not have highly specific backup requirements for your workloads, MABS is a solution that maybe fits your scenario. It is a Microsoft solution for a Microsoft product, and despite not having all the features that other backup providers might offer, I believe the features it does provide are more than sufficient to meet your needs.</p>

<h4 id="veeam">Veeam</h4>

<p>Why Veeam? In many of the infrastructures where I’ve implemented Azure Local or Windows Server, a backup solution was already in place, and in my experience, Veeam was the most widely adopted by my clients. I must say it offers certain benefits over MABS in terms of backup and recovery. Like every backup solution for Azure Local, it also encounters the hydration issue, meaning that its use should be evaluated based on its local infrastructure features rather than its Azure integration.</p>

<p>Without getting too lengthy, I’ll summarize the advantages Veeam brings compared to MABS, as well as the supported scenarios and requirements for integrating Veeam in Azure Local. I’ll start with the integration requirements, which are brief and specific:</p>
<ul>
  <li><strong>Integration with Windows Defender Application Control (WDAC) in Azure Local</strong>: One of the main issues I’ve seen in the past is that Veeam couldn’t be integrated into Azure Local because WDAC blocked its use. Using this <a href="https://www.veeam.com/kb4456">article</a>, you can add a supplemental policy to allow Veeam to integrate.</li>
  <li><strong>Requirements and support</strong>: The supported scenarios and requirements are detailed in this <a href="https://www.veeam.com/kb4047">article</a>. They can be summarized as:
    <ul>
      <li><strong>Minimum version of Veeam Backup &amp; Replication for Azure Local (version 25398.X)</strong>: The current minimum supported version is 12.1 (build 12.1.0.2131).</li>
      <li><strong>No support for Azure Arc VM management (Hydration)</strong>: Azure Arc VMs in a “Running” state can be backed up. Upon restore, these VMs become standard Hyper-V workloads. If a VM is restored (and the original is no longer present) within the period that Azure Arc can reconnect (45 days), the Azure Arc connection should persist if restored to the same cluster.</li>
    </ul>
  </li>
</ul>

<p>I also want to mention an issue that may occur in Azure Local Clusters running an older 22H2 version that hasn’t been updated regularly. This is the <a href="https://www.veeam.com/kb4717">“Hyper-V Resilient Change Tracking Performance Issues”</a>, where general Hyper-V OS performance degradation can occur when using a backup solution to export Hyper-V VM snapshots during backup operations. The fix involves installing the Cumulative Update from February 11 and adding the following registry value:</p>
<ul>
  <li><strong>Key Location</strong>: HKLM\SYSTEM\CurrentControlSet\Policies\Microsoft\FeatureManagement\Overrides</li>
  <li><strong>Value Name</strong>: 636159629</li>
  <li><strong>Value Type</strong>: DWORD (32-Bit) Value</li>
  <li><strong>Value Data</strong>: 1</li>
</ul>

<p>Now, let’s examine the supported scenarios and the advantages of Veeam over MABS for backing up on-premises infrastructure:</p>
<ul>
  <li><strong>Support for Hyper-V/Azure Local</strong>: Veeam backs up VMs in local clusters without needing to install agents on each machine, leveraging hypervisor-level integration.</li>
  <li><strong>Host-level backup</strong>: It protects VMs even on local storage, DAS, or CSV (Cluster Shared Volumes), ensuring continuity in environments with distributed storage.</li>
  <li><strong>Cluster mobility</strong>: Veeam automatically detects VM movements (Live Migration) and continues applying backup policies without manual intervention.</li>
  <li><strong>Additional functionality</strong>: It includes Instant VM Recovery, which allows you to boot a virtual machine directly from the backup, significantly reducing restoration times.</li>
  <li><strong>Support for additional platforms</strong>: Veeam supports backups for Proxmox, Nutanix, Oracle, and Red Hat in addition to Azure Local and VMware (<a href="https://helpcenter.veeam.com/docs/backup/vsphere/platform_support.html?ver=120">link</a>).</li>
  <li>
    <p><strong>Live Migration</strong>: Although VMs won’t be rehydrated in the new cluster, locally (as Hyper-V VMs) it is possible to move VMs between clusters while retaining the backup. In fact, you can even move VMs from other platforms (e.g., VMware) via <a href="https://www.veeam.com/blog/hyper-v-migration-simplify-moving-workloads.html">Instant Recovery</a>. That said, I personally <strong>do not recommend this approach if the goal is to migrate to Azure Local</strong>, as it would forfeit the possibility of integrating the VM as an Arc VM, a process that can be achieved with Azure Migrate, which I’ll cover in my next blog post. Here’s a schematic of the process:
<a href="/assets/img/post/2025-03-29-azure-local-backup-and-disaster-recovery/Veeam-instant-recovery.png" target="_blank">
<img src="/assets/img/post/2025-03-29-azure-local-backup-and-disaster-recovery/Veeam-instant-recovery.png" alt="Azure Migrate Workflow" style="border: 2px solid grey;" />
</a></p>
  </li>
  <li><strong>Workload-specific features</strong>:
    <ul>
      <li><strong>Domain Controller</strong>: Veeam protects domain controllers through its integration with VSS, ensuring consistent backups. With Veeam Explorer for Active Directory, you can perform granular restores of individual objects, making it easy to recover specific users or groups without restoring the entire system.</li>
      <li><strong>SQL Server</strong>: Veeam natively backs up SQL databases using Application-Aware Processing, ensuring data consistency during backups. It also allows sending backups to cloud repositories (e.g., Azure Blob Storage) for long-term retention. In complex scenarios (like Always On Availability Groups or databases with files on remote shared resources), specific configuration adjustments may be necessary for complete protection.</li>
    </ul>
  </li>
  <li><strong>Concurrency and parallel processing</strong>: Veeam is designed for high-demand environments, enabling multiple backup and restore tasks to run in parallel. Thanks to its distributed architecture, with scalable backup proxies and repositories, it efficiently manages large volumes of data in line with the available infrastructure capacity.</li>
  <li><strong>Storage efficiency</strong>: Veeam applies deduplication and compression techniques at the job level, significantly reducing backup storage space. It also offers the option to integrate external deduplication appliances, further optimizing storage usage, especially in environments with high data volumes or frequent changes.</li>
  <li><strong>Data encryption at rest</strong>: Veeam natively encrypts backup files using AES 256-bit (<a href="https://bp.veeam.com/vbr/Support/S_Encryption/overview.html">link</a>), ensuring that stored information, whether in local repositories or in the cloud, remains protected. This option is set at the job or repository level, providing added security against unauthorized access.</li>
  <li><strong>Backup immutability (protection against deletion/modification)</strong>: Recent versions of Veeam offer options to configure immutable repositories to protect against unauthorized deletions or modifications. This is achievable both in local repositories (using Linux systems with immutable attributes) and in cloud storage environments, leveraging the immutability features of Azure Blob Storage.</li>
</ul>

<p>Not everything is an advantage, so here are additional factors to consider when deciding on a backup infrastructure:</p>
<ul>
  <li><strong>No use of Azure Backup Vaults</strong>: Although you can configure Azure Blob Storage as the backup storage, Veeam does not use vaults natively. This means the solution isn’t integrated with Azure out-of-the-box and requires an additional management portal to handle or verify backups. Personally, I’m a fan of the configurations possible with <a href="https://helpcenter.veeam.com/docs/one/monitor/backup_alarms.html?ver=120">Veeam Backup Monitoring &amp; Replication Alarms</a>, so I don’t see this as a major limitation.</li>
  <li><strong>Know-How</strong>: While Veeam is user-friendly, integrating it into a new infrastructure requires specific prior knowledge, a topic that could easily fill 10 blog posts 😅. Veeam backs up infrastructures more effectively and efficiently, but there is an initial learning curve. They even offer a specialized certification program for experts that covers these topics in depth (<a href="https://www.veeam.com/support/training/vmce-certification.html">link</a>).</li>
  <li><strong>Licensing Costs</strong>: I won’t commit to a specific number as costs vary per infrastructure, but you can calculate expenses using their <a href="https://www.veeam.com/solutions/small-business/pricing-calculator.html">pricing calculator</a>. Compared to MABS, depending on the amount of data to back up, Veeam can be a much more expensive option.</li>
  <li><strong>Additional Infrastructure</strong>: Although Veeam can be configured with an infrastructure similar to MABS, leveraging its full potential might require designing additional infrastructure, which can incur extra monetary and operational costs.</li>
</ul>

<p>Taking all these points into account, I conclude that Veeam is a more advanced, focused, and specialized backup solution that offers many more options than MABS, though it does come with additional costs that must be planned for in advance. In my experience, especially in the German market, if a client has on-premises infrastructure and a backup system, it is very likely to be Veeam.</p>

<h3 id="trusted-launch-vms">Trusted launch VMs</h3>

<p>After covering the VMs workload in the previous section, a new question arises: how are Trusted launch VMs backed up and restored? The main difference compared to standard Azure Local VMs is the following:<br />
Trusted Launch VMs in Azure Local environments differ from standard VMs because they use a dedicated key to secure the state of the VM guest, including the virtual TPM state when it is not active. This key is kept safe in a local key vault located on the same Azure Local system as the VM. Additionally, the guest state of a Trusted Launch VM is saved in two separate files: one file contains the guest state and the other contains the runtime state. As a result, any backup or restoration process for a Trusted Launch VM must include all VM files along with the protection key.</p>

<p>I want to highlight the following message from Microsoft’s documentation regarding <a href="https://learn.microsoft.com/en-us/azure/azure-local/manage/trusted-launch-vm-overview?view=azloc-24113#backup-and-disaster-recovery-considerations">Backup and Restore of Trusted launch VMs</a>:</p>

<blockquote>
  <p>Backup and disaster recovery tooling support: Currently, <strong>Trusted launch for Azure Local VMs do not support any third-party or Microsoft-owned backup and disaster recovery tools</strong>, including but not limited to, Azure Backup, Azure Site Recovery, Veeam, and Commvault. If there arises a need to move a Trusted launch for Azure Local TVM to an alternate cluster, see the manual process <a href="https://learn.microsoft.com/en-us/azure/azure-local/manage/trusted-launch-vm-import-key?view=azloc-24113">Manual backup and recovery of Trusted launch for Azure Local VMs</a> to manage all the necessary files and VM protection key to ensure that the VM can be successfully restored.</p>
</blockquote>

<p>Because of this, before deploying a Trusted Launch VM, you need to consider how to back it up, as the current solution is neither elegant nor integrated into standard backup solutions. My main advice is that if you require Trusted Launch VMs, make sure to set up an automation (for example, a PowerShell script that saves the results of the manual process into a CSV which is then backed up) to ensure they are properly secured. Otherwise, you might end up with backups that cannot be used, and as they say, a backup that cannot be restored is as good as having no backup at all (even worse, since you’re wasting space and resources 😅).</p>

<p>With that in mind, the manual backup and restore process is detailed perfectly in the following summary.</p>

<h4 id="manual-backup-and-recovery-of-trusted-launch-vms">Manual backup and recovery of Trusted launch VMs</h4>

<p><strong>Overview</strong><br />
Trusted Launch Arc VMs use a VM Guest State Protection (GSP) key stored in a local key vault to secure the VM guest state (including the vTPM state). The guest state is divided into two files: VM Guest State (VMGS) and VM Runtime State (VMRS). Losing the GSP key prevents the VM from booting, so it’s essential to back up both the VM files and the GSP key regularly.</p>

<p><strong>Manual Backup Process</strong></p>

<ol>
  <li>
    <p><strong>Export the VM Files</strong><br />
Use <code class="language-plaintext highlighter-rouge">Export-VM</code> to back up all VM files (VMGS and VMRS).</p>
  </li>
  <li>
    <p><strong>Back Up the GSP Key</strong></p>
    <ul>
      <li><em>On the Azure Local system with the backup key vault:</em><br />
Create a wrapping key and download its PEM file by running:
        <div class="language-powershell highlighter-rouge"><div class="highlight"><pre class="highlight"><code><span class="n">New-MocKey</span><span class="w"> </span><span class="nt">-name</span><span class="w"> </span><span class="nx">wrappingKey</span><span class="w"> </span><span class="nt">-group</span><span class="w"> </span><span class="nx">AzureStackHostAttestation</span><span class="w"> </span><span class="nt">-keyvaultName</span><span class="w"> </span><span class="nx">AzureStackTvmKeyVault</span><span class="w"> </span><span class="nt">-type</span><span class="w"> </span><span class="nx">RSA</span><span class="w"> </span><span class="nt">-size</span><span class="w"> </span><span class="nx">2048</span><span class="w">
</span></code></pre></div>        </div>
        <div class="language-powershell highlighter-rouge"><div class="highlight"><pre class="highlight"><code><span class="n">Get-MocKeyPublicKey</span><span class="w"> </span><span class="nt">-name</span><span class="w"> </span><span class="nx">wrappingKey</span><span class="w"> </span><span class="nt">-group</span><span class="w"> </span><span class="nx">AzureStackHostAttestation</span><span class="w"> </span><span class="nt">-keyvaultName</span><span class="w"> </span><span class="nx">AzureStackTvmKeyVault</span><span class="w"> </span><span class="nt">-outputFile</span><span class="w"> </span><span class="nx">wrappingKey.pem</span><span class="w">
</span></code></pre></div>        </div>
      </li>
      <li><em>On the Azure Local system hosting the VM:</em><br />
Copy the PEM file, verify the VM owner node, and retrieve the VM ID:
        <div class="language-powershell highlighter-rouge"><div class="highlight"><pre class="highlight"><code><span class="n">Get-ClusterGroup</span><span class="w"> </span><span class="err">&lt;</span><span class="nx">VM</span><span class="w"> </span><span class="nx">name</span><span class="err">&gt;</span><span class="w">
</span></code></pre></div>        </div>
        <div class="language-powershell highlighter-rouge"><div class="highlight"><pre class="highlight"><code><span class="p">(</span><span class="n">Get-VM</span><span class="w"> </span><span class="nt">-Name</span><span class="w"> </span><span class="err">&lt;</span><span class="nx">VM</span><span class="w"> </span><span class="nx">name</span><span class="err">&gt;</span><span class="p">)</span><span class="o">.</span><span class="nf">vmid</span><span class="w">
</span></code></pre></div>        </div>
        <p>Then, export the GSP key:</p>
        <div class="language-powershell highlighter-rouge"><div class="highlight"><pre class="highlight"><code><span class="n">Export-MocKey</span><span class="w"> </span><span class="nt">-name</span><span class="w"> </span><span class="err">&lt;</span><span class="nx">VM</span><span class="w"> </span><span class="nx">ID</span><span class="err">&gt;</span><span class="w"> </span><span class="nt">-wrappingKeyName</span><span class="w"> </span><span class="nx">wrappingKey</span><span class="w"> </span><span class="nt">-wrappingPubKeyFile</span><span class="w"> </span><span class="nx">wrappingKey.pem</span><span class="w"> </span><span class="nt">-outFile</span><span class="w"> </span><span class="err">&lt;</span><span class="nx">VM</span><span class="w"> </span><span class="nx">ID</span><span class="err">&gt;</span><span class="o">.</span><span class="nf">json</span><span class="w"> </span><span class="nt">-group</span><span class="w"> </span><span class="nx">AzureStackHostAttestation</span><span class="w"> </span><span class="nt">-keyvaultName</span><span class="w"> </span><span class="nx">AzureStackTvmKeyVault</span><span class="w"> </span><span class="nt">-size</span><span class="w"> </span><span class="nx">256</span><span class="w">
</span></code></pre></div>        </div>
      </li>
      <li><em>Return to the backup key vault system:</em><br />
Transfer the <code class="language-plaintext highlighter-rouge">&lt;VM ID&gt;</code> and <code class="language-plaintext highlighter-rouge">&lt;VM ID&gt;.json</code> files, and import the GSP key:
        <div class="language-powershell highlighter-rouge"><div class="highlight"><pre class="highlight"><code><span class="n">Import-MocKey</span><span class="w"> </span><span class="nt">-name</span><span class="w"> </span><span class="err">&lt;</span><span class="nx">VM</span><span class="w"> </span><span class="nx">ID</span><span class="err">&gt;</span><span class="w"> </span><span class="nt">-importKeyFile</span><span class="w"> </span><span class="err">&lt;</span><span class="nx">VM</span><span class="w"> </span><span class="nx">ID</span><span class="err">&gt;</span><span class="o">.</span><span class="nf">json</span><span class="w"> </span><span class="nt">-group</span><span class="w"> </span><span class="nx">AzureStackHostAttestation</span><span class="w"> </span><span class="nt">-keyvaultName</span><span class="w"> </span><span class="nx">AzureStackTvmKeyVault</span><span class="w"> </span><span class="nt">-type</span><span class="w"> </span><span class="nx">AES</span><span class="w"> </span><span class="nt">-size</span><span class="w"> </span><span class="nx">256</span><span class="w">
</span></code></pre></div>        </div>
      </li>
    </ul>
  </li>
</ol>

<p><strong>Manual Restore Process</strong></p>

<ol>
  <li><strong>Prepare the Target System</strong><br />
On the Azure Local system where you want to restore the VM, create a new wrapping key and download its PEM file:
    <div class="language-powershell highlighter-rouge"><div class="highlight"><pre class="highlight"><code><span class="w">  </span><span class="n">New-MocKey</span><span class="w"> </span><span class="nt">-name</span><span class="w"> </span><span class="nx">wrappingKey</span><span class="w"> </span><span class="nt">-group</span><span class="w"> </span><span class="nx">AzureStackHostAttestation</span><span class="w"> </span><span class="nt">-keyvaultName</span><span class="w"> </span><span class="nx">AzureStackTvmKeyVault</span><span class="w"> </span><span class="nt">-type</span><span class="w"> </span><span class="nx">RSA</span><span class="w"> </span><span class="nt">-size</span><span class="w"> </span><span class="nx">2048</span><span class="w">
</span></code></pre></div>    </div>
    <div class="language-powershell highlighter-rouge"><div class="highlight"><pre class="highlight"><code><span class="w">  </span><span class="n">Get-MocKeyPublicKey</span><span class="w"> </span><span class="nt">-name</span><span class="w"> </span><span class="nx">wrappingKey</span><span class="w"> </span><span class="nt">-group</span><span class="w"> </span><span class="nx">AzureStackHostAttestation</span><span class="w"> </span><span class="nt">-keyvaultName</span><span class="w"> </span><span class="nx">AzureStackTvmKeyVault</span><span class="w"> </span><span class="nt">-outputFile</span><span class="w"> </span><span class="nx">wrappingKey.pem</span><span class="w">
</span></code></pre></div>    </div>
  </li>
  <li><strong>Export the GSP Key from the Backup</strong><br />
On the system with the backup key vault, copy the PEM file to the target system. Then, obtain the VM ID (from the VM’s config file or by executing):
    <div class="language-powershell highlighter-rouge"><div class="highlight"><pre class="highlight"><code><span class="w">  </span><span class="p">(</span><span class="n">Get-VM</span><span class="w"> </span><span class="nt">-Name</span><span class="w"> </span><span class="err">&lt;</span><span class="nx">VM</span><span class="w"> </span><span class="nx">name</span><span class="err">&gt;</span><span class="p">)</span><span class="o">.</span><span class="nf">vmid</span><span class="w">
</span></code></pre></div>    </div>
    <p>Export the GSP key using:</p>
    <div class="language-powershell highlighter-rouge"><div class="highlight"><pre class="highlight"><code><span class="w">  </span><span class="n">Export-MocKey</span><span class="w"> </span><span class="nt">-name</span><span class="w"> </span><span class="err">&lt;</span><span class="nx">VM</span><span class="w"> </span><span class="nx">ID</span><span class="err">&gt;</span><span class="w"> </span><span class="nt">-wrappingKeyName</span><span class="w"> </span><span class="nx">wrappingKey</span><span class="w"> </span><span class="nt">-wrappingPubKeyFile</span><span class="w"> </span><span class="nx">wrappingKey.pem</span><span class="w"> </span><span class="nt">-outFile</span><span class="w"> </span><span class="err">&lt;</span><span class="nx">VM</span><span class="w"> </span><span class="nx">ID</span><span class="err">&gt;</span><span class="o">.</span><span class="nf">json</span><span class="w"> </span><span class="nt">-group</span><span class="w"> </span><span class="nx">AzureStackHostAttestation</span><span class="w"> </span><span class="nt">-keyvaultName</span><span class="w"> </span><span class="nx">AzureStackTvmKeyVault</span><span class="w"> </span><span class="nt">-size</span><span class="w"> </span><span class="nx">256</span><span class="w">
</span></code></pre></div>    </div>
  </li>
  <li><strong>Import the GSP Key on the Target System</strong><br />
On the target system, copy the <code class="language-plaintext highlighter-rouge">&lt;VM ID&gt;</code> and <code class="language-plaintext highlighter-rouge">&lt;VM ID&gt;.json</code> files and import the GSP key:
    <div class="language-powershell highlighter-rouge"><div class="highlight"><pre class="highlight"><code><span class="w">  </span><span class="n">Import-MocKey</span><span class="w"> </span><span class="nt">-name</span><span class="w"> </span><span class="err">&lt;</span><span class="nx">VM</span><span class="w"> </span><span class="nx">ID</span><span class="err">&gt;</span><span class="w"> </span><span class="nt">-importKeyFile</span><span class="w"> </span><span class="err">&lt;</span><span class="nx">VM</span><span class="w"> </span><span class="nx">ID</span><span class="err">&gt;</span><span class="o">.</span><span class="nf">json</span><span class="w"> </span><span class="nt">-group</span><span class="w"> </span><span class="nx">AzureStackHostAttestation</span><span class="w"> </span><span class="nt">-keyvaultName</span><span class="w"> </span><span class="nx">AzureStackTvmKeyVault</span><span class="w"> </span><span class="nt">-type</span><span class="w"> </span><span class="nx">AES</span><span class="w"> </span><span class="nt">-size</span><span class="w"> </span><span class="nx">256</span><span class="w">
</span></code></pre></div>    </div>
  </li>
</ol>

<p><strong>Important:</strong><br />
Ensure that the GSP key is restored on the target system before starting the VM. If the VM is started without the restored key, the system will generate a new GSP key, which may cause errors. In such a case, remove the incorrect key with:</p>
<div class="language-powershell highlighter-rouge"><div class="highlight"><pre class="highlight"><code><span class="n">Remove-MocKey</span><span class="w"> </span><span class="nt">-name</span><span class="w"> </span><span class="err">&lt;</span><span class="nx">vm</span><span class="w"> </span><span class="nx">id</span><span class="err">&gt;</span><span class="w"> </span><span class="nt">-group</span><span class="w"> </span><span class="nx">AzureStackHostAttestation</span><span class="w"> </span><span class="nt">-keyvaultName</span><span class="w"> </span><span class="nx">AzureStackTvmKeyVault</span><span class="w">
</span></code></pre></div></div>

<h3 id="cluster-storage">Cluster Storage</h3>

<p>At this point, let’s focus on Cluster Shared Volumes (CSV). Normally, additional backups of the storage aren’t required if the workloads have already been backed up. However, as I mentioned in the Host Backup section, in certain scenarios it might be useful to back up specific CSV folders. I primarily focus on the Infrastructure folders (especially their logs), and if we use Golden Images for deploying certain workloads that are stored on the CSV, you might also want to back those up.</p>

<p>Another possibility, although I don’t recommend implementing it directly, is that if your cluster is designed solely for AVD usage, you could use one of the CSVs as the storage directory for FSLogix user profiles. I wouldn’t recommend this approach directly because it implies that the cluster is in the same Active Directory as the AVD users, and in turn, it would expose a shared folder within a CSV where users can store their profiles. I am in favor of using Fabric Domains (as I mentioned in the previous article and will discuss further in the next post) that are separate from the main domain. However, I understand that if the only workload is AVD, this implementation might be considered to minimize costs and leverage the storage space and performance of the cluster.</p>

<p>I don’t want to dwell too much on this type of backup, since all backup solutions can cover this function. As noted throughout this post, such a backup is only necessary if CSVs are used for specific workloads, in which case I assume the designer will inform the person responsible for backups to ensure they are properly secured.</p>

<h3 id="key-vault">Key Vault</h3>

<p>The Key Vault required for installing Azure Local is not a typical workload. However, considering that the <a href="https://learn.microsoft.com/en-us/azure/azure-local/deploy/deployment-local-identity-with-key-vault?view=azloc-24113">Azure Local deployment with local identities without the need for Active Directory (currently in preview)</a> makes full use of the Key Vault for cluster operations, it is important to note that this component should be backed up in the future.</p>

<p>Currently, and likely in your case as well, the Key Vault contains only three secrets: the <em>AzureStackLCMUserCredential</em>, the <em>DefaultARBApplication</em>, and the <em>LocalAdminCredential</em>. These are created during installation and are valid for one year from deployment. As mentioned, these are not critical because, in case of errors (for example, if the BitLocker key is needed), they can be resolved using other methods. However, given the upcoming changes, I personally recommend taking a look at this article: <a href="https://learn.microsoft.com/en-us/azure/azure-local/deploy/deployment-local-identity-with-key-vault?view=azloc-24113#recover-a-deleted-key-vault-and-resume-backup">Recover a deleted key vault and resume backup</a>.</p>

<p>The Key Vault backup process is detailed in the following section.</p>

<h4 id="key-vault-backup-process">Key Vault Backup Process</h4>

<p><strong>Overview</strong><br />
This article outlines how to back up individual secrets, keys, and certificates from your Azure Key Vault. The backup creates an offline, encrypted snapshot of each object to protect against loss of access to your key vault.</p>

<p><strong>Key Considerations</strong></p>
<ul>
  <li><strong>Backup Scope:</strong> Each key vault object must be backed up individually; there isn’t an option to back up the entire vault in one operation.</li>
  <li><strong>Version Limits:</strong> Only up to 500 previous versions per object can be backed up. Attempting to back up objects beyond this limit may result in errors.</li>
  <li><strong>Snapshot Nature:</strong> The backup is a point-in-time encrypted blob. Because the blob cannot be decrypted outside of Azure, it must be restored within the same Azure subscription and geographic region.</li>
  <li><strong>Operational Challenges:</strong> Managing multiple backups, logs, and permissions can be complex, especially as secrets rotate or expire.</li>
</ul>

<p><strong>Prerequisites</strong></p>
<ul>
  <li>You need Contributor-level (or higher) permissions on your Azure subscription.</li>
  <li>A primary key vault containing the objects to back up and a secondary key vault where these objects can later be restored are required.</li>
</ul>

<p><strong>Backup and Restore Using the Azure Portal</strong></p>
<ul>
  <li><strong>Backup:</strong>
    <ol>
      <li>Go to your key vault in the Azure portal.</li>
      <li>Select the desired object (secret, key, or certificate) and click <strong>Download Backup</strong>.</li>
      <li>Download and securely store the encrypted blob.</li>
    </ol>
  </li>
  <li><strong>Restore:</strong>
    <ol>
      <li>In your key vault, select the object type and click <strong>Restore Backup</strong>.</li>
      <li>Locate the encrypted blob and confirm to complete the restoration.</li>
    </ol>
  </li>
</ul>

<p><strong>Backup and Restore Using Azure PowerShell</strong></p>

<ol>
  <li><strong>Log in and Set Context:</strong>
    <div class="language-powershell highlighter-rouge"><div class="highlight"><pre class="highlight"><code><span class="n">Connect-AzAccount</span><span class="w">
</span><span class="nx">Set-AzContext</span><span class="w"> </span><span class="nt">-Subscription</span><span class="w"> </span><span class="s1">'{AZURE SUBSCRIPTION ID}'</span><span class="w">
</span></code></pre></div>    </div>
  </li>
  <li><strong>Backup Commands:</strong>
    <ul>
      <li>Back up a certificate:
        <div class="language-powershell highlighter-rouge"><div class="highlight"><pre class="highlight"><code><span class="n">Backup-AzKeyVaultCertificate</span><span class="w"> </span><span class="nt">-VaultName</span><span class="w"> </span><span class="s1">'{Key Vault Name}'</span><span class="w"> </span><span class="nt">-Name</span><span class="w"> </span><span class="s1">'{Certificate Name}'</span><span class="w">
</span></code></pre></div>        </div>
      </li>
      <li>Back up a key:
        <div class="language-powershell highlighter-rouge"><div class="highlight"><pre class="highlight"><code><span class="n">Backup-AzKeyVaultKey</span><span class="w"> </span><span class="nt">-VaultName</span><span class="w"> </span><span class="s1">'{Key Vault Name}'</span><span class="w"> </span><span class="nt">-Name</span><span class="w"> </span><span class="s1">'{Key Name}'</span><span class="w">
</span></code></pre></div>        </div>
      </li>
      <li>Back up a secret:
        <div class="language-powershell highlighter-rouge"><div class="highlight"><pre class="highlight"><code><span class="n">Backup-AzKeyVaultSecret</span><span class="w"> </span><span class="nt">-VaultName</span><span class="w"> </span><span class="s1">'{Key Vault Name}'</span><span class="w"> </span><span class="nt">-Name</span><span class="w"> </span><span class="s1">'{Secret Name}'</span><span class="w">
</span></code></pre></div>        </div>
      </li>
    </ul>
  </li>
  <li><strong>Restore Commands:</strong>
    <ul>
      <li>Restore a certificate:
        <div class="language-powershell highlighter-rouge"><div class="highlight"><pre class="highlight"><code><span class="n">Restore-AzKeyVaultCertificate</span><span class="w"> </span><span class="nt">-VaultName</span><span class="w"> </span><span class="s1">'{Key Vault Name}'</span><span class="w"> </span><span class="nt">-InputFile</span><span class="w"> </span><span class="s1">'{File Path}'</span><span class="w">
</span></code></pre></div>        </div>
      </li>
      <li>Restore a key:
        <div class="language-powershell highlighter-rouge"><div class="highlight"><pre class="highlight"><code><span class="n">Restore-AzKeyVaultKey</span><span class="w"> </span><span class="nt">-VaultName</span><span class="w"> </span><span class="s1">'{Key Vault Name}'</span><span class="w"> </span><span class="nt">-InputFile</span><span class="w"> </span><span class="s1">'{File Path}'</span><span class="w">
</span></code></pre></div>        </div>
      </li>
      <li>Restore a secret:
        <div class="language-powershell highlighter-rouge"><div class="highlight"><pre class="highlight"><code><span class="n">Restore-AzKeyVaultSecret</span><span class="w"> </span><span class="nt">-VaultName</span><span class="w"> </span><span class="s1">'{Key Vault Name}'</span><span class="w"> </span><span class="nt">-InputFile</span><span class="w"> </span><span class="s1">'{File Path}'</span><span class="w">
</span></code></pre></div>        </div>
      </li>
    </ul>
  </li>
</ol>

<h3 id="aks">AKS</h3>

<p>We are now nearing the end of the workloads to be backed up, and of course, we cannot forget AKS Hybrid. Many may wonder why one should back up AKS when, in theory, simply backing up the repository from which AKS is provisioned would suffice. Well, yes and no. I consider the repository as a golden image; if AKS is used in a generalized manner without the need for permanent storage and if the workload itself generates the backup (through copies to external servers or by using backed-up services), then you might not require a backup for AKS since the backup of your repository is more than enough. However, if you are using permanent storage and/or services that require a backup (for example, MongoDB) that are not handled at the application level, then a dedicated backup solution is necessary.</p>

<p>To date, it is not possible to perform native backups of AKS Hybrid in Azure Local, unlike in Azure Public where AKS has its integrated backup service. Therefore, external solutions are required to carry out this process. The only solution I have considered so far is Velero, mainly because there is an article in the documentation (<a href="https://learn.microsoft.com/en-us/azure/aks/aksarc/backup-workload-cluster">Back up, restore workload clusters using Velero</a>) that explains how to do it, although it should be noted that this article applies to <strong>AKS on Azure Local 22H2, AKS on Windows Server</strong>. Since I have not yet integrated Velero in Azure Local 23H2, I cannot say what limitations it may present in the new version of Azure Loca (related to Arc Resource Bridge). Perhaps in the coming weeks, with a bit more time, I will take a closer look at this matter. That said, if your applications have been configured correctly, you likely won’t need to back them up.</p>

<p>There is an excellent guide written by <a href="https://www.linkedin.com/in/alper-can-802781b2/">Alper Can</a> that details the entire backup and restore process in Azure Local using a local backup via Minio Storage installed on an Ubuntu VM. For more information, you can check out the article <a href="https://gist.github.com/plumbery/556914f1b5a51c09a5083bb4254a2c38#backup-azure-stack-hci-aks-aks-hybrid">here</a>.</p>

<h3 id="sql-managed-instances-enabled-by-azure-arc">SQL Managed Instances enabled by Azure Arc</h3>

<p>Although this workload should technically fall under AKS, since it involves Arc Dataservices running within AKS, there is currently no native solution for backing up this workload (or at least I haven’t found adequate information on this topic so far). Therefore, I have decided to dedicate a separate section to it.<br />
Because it is nearly impossible to back up AKS, the Data Controller within it (with its custom location), and then the SQL Managed Instance enabled by Azure Arc, an ordeal in terms of recovery, I have concluded that the most effective, efficient, and straightforward method is to perform a <strong>backup using SQL Server Management Studio</strong>.<br />
Perhaps <a href="https://learn.microsoft.com/en-us/sql/tools/bcp-utility?view=sql-server-ver16&amp;tabs=windows">BCP (Bulk Copy Program)</a> could be used to automate the process, but I personally have no experience with it. From what little I have researched, there are some important considerations:</p>
<ul>
  <li>This method transfers data only. Schema objects such as stored procedures, triggers, and indexes are not transferred and must be handled separately.</li>
  <li>Ensure that the target tables exist in the destination database before importing.</li>
</ul>

<p>Once I have a larger lab where I can run SQL Managed Instances, I will try to find a better solution for this issue (and I will also test Velero). For now, however, you will have to settle with SQL Server Management Studio 😅.</p>

<h4 id="limitations">Limitations</h4>

<p>Based on the only article I have found on this subject in the documentation (<a href="https://learn.microsoft.com/en-us/azure/azure-arc/data/limitations-managed-instance">Limitations of SQL Managed Instance enabled by Azure Arc</a>), here are the limitations of backup in SQL Managed Instances enabled by Azure Arc. Note that I have not been able to find more information on “Automated Backup,” which is why I still consider that the most efficient way to perform the backup is through SQL Server Management Studio.</p>

<p><strong>Backup and Restore Limitations</strong></p>
<ul>
  <li><strong>Automated Backups:</strong>
    <ul>
      <li>User databases using the SIMPLE recovery model aren’t included in backups.</li>
      <li>The system database model is excluded to avoid interfering with administrative operations like creating or deleting databases, which may lock the database during such tasks.</li>
    </ul>
  </li>
  <li><strong>Point-in-Time Restore (PITR):</strong>
    <ul>
      <li>Restoring a database is confined to the same Arc-enabled SQL Managed Instance where the backup was created; cross-instance restores are not supported.</li>
      <li>Renaming databases during a point-in-time restore isn’t supported.</li>
      <li>There is currently no support for restoring databases that have Transparent Data Encryption (TDE) enabled.</li>
      <li>Once a database is deleted, it cannot be restored.</li>
    </ul>
  </li>
</ul>

<p><strong>Other Limitations</strong></p>
<ul>
  <li>Transactional replication is not available.</li>
  <li>Log shipping is blocked.</li>
  <li>Every user database must operate under a full recovery model because they participate in an always-on availability group.</li>
  <li>The instance name for an Azure Arc-enabled SQL Managed Instance must be 15 characters or fewer, including any suffix for instance indexing.</li>
</ul>

<p><strong>Roles and Responsibilities</strong><br />
The responsibilities differ significantly between Azure PaaS services and Azure Arc hybrid services:</p>
<ul>
  <li><strong>Azure PaaS:</strong>
    <ul>
      <li>Microsoft handles the infrastructure, operations, and provides an SLA.</li>
    </ul>
  </li>
  <li><strong>Azure Arc Hybrid Services:</strong>
    <ul>
      <li>While Microsoft supplies the software, customers are responsible for the infrastructure and day-to-day operations. Consequently, Microsoft does not offer an SLA for these services since the underlying infrastructure is customer-managed.</li>
    </ul>
  </li>
</ul>

<h2 id="disaster-recovery">Disaster Recovery</h2>

<p>This is one of the most dreaded events to face, as it means the Azure Local cluster cannot be recovered and you must restore the workloads either on another cluster or directly in Azure using Azure Site Recovery. On the day you need to perform disaster recovery, your least concern should be that the VMs are not Arc VMs, I’ll spare you repeating that no current system can carry out disaster recovery to Azure or another Azure Local cluster while retaining the VMs as Arc VMs.</p>

<p>Regarding the first option (restoring the workloads in a new Azure Local Cluster), I won’t dwell on it since it simply involves restoring the backed-up components described in previous sections.</p>

<p>The second option involves performing backups and restorations using Azure Site Recovery (currently in Preview). This approach allows you to restore VMs in Azure after an incident or a planned event, and once the incident is resolved, to perform a failback, returning the workload to the Azure Local cluster.</p>

<p>For this, let’s delve into the solution in the following section.</p>

<h3 id="azure-site-recovery-preview">Azure Site Recovery (preview)</h3>

<p>Below, I will detail, summarize, and restructure information from the official <a href="https://learn.microsoft.com/en-us/azure/azure-local/manage/azure-site-recovery?view=azloc-24113">documentation</a> on Azure Site Recovery (preview), highlighting key factors to consider when using this service.</p>

<p>We start with the most critical aspect: when you want to use Azure Site Recovery on your cluster, it will install an agent on each node. Because this agent is not “properly signed,” WDAC will block its installation, throwing the error “Microsoft Azure Site Recovery Provider installation has failed with exit code - 1.” To overcome this, you must set WDAC to “Audit” mode. For example, you can run the following command on any node in the cluster:</p>

<div class="language-powershell highlighter-rouge"><div class="highlight"><pre class="highlight"><code><span class="n">Enable-AsWdacPolicy</span><span class="w"> </span><span class="nt">-Mode</span><span class="w"> </span><span class="nx">Audit</span><span class="w">
</span></code></pre></div></div>

<p>Next, we analyze the disaster recovery strategy. The Azure Site Recovery process for Azure Local involves four key stages:</p>
<ul>
  <li><strong>Replication:</strong> The VM’s virtual hard disk (VHD) is copied to an Azure Storage account.</li>
  <li><strong>Failover:</strong> In the event of a disaster, the replicated VM is started in Azure. A test failover can also be run without impacting production.</li>
  <li><strong>Re-protect:</strong> After failover, VMs can be re-replicated back from Azure to your on-premises system.</li>
  <li><strong>Failback:</strong> Finally, you can fail back to your original on-premises environment.</li>
</ul>

<p><strong>Important:</strong> The current integration does not support replication, failover, or failback for Arc resource bridges or Arc VMs (although the latter point is nuanced – they might not officially support it, but it works).</p>

<p>The <a href="https://learn.microsoft.com/en-us/azure/azure-local/manage/azure-site-recovery?view=azloc-24113#step-1-prepare-infrastructure-on-your-target-host">documentation</a> details the installation process and available options, so I won’t go into extensive detail for each step. Instead, here’s a simple guide for configuration:</p>

<ol>
  <li>
    <p><strong>Change WDAC to Audit Mode:</strong><br />
Set WDAC to Audit mode as shown above.
<a href="/assets/img/post/2025-03-29-azure-local-backup-and-disaster-recovery/asr-01.png" target="_blank">
  <img src="/assets/img/post/2025-03-29-azure-local-backup-and-disaster-recovery/asr-01.png" alt="Azure Site Recovery in Azure Local 01" style="border: 2px solid grey;" />
</a></p>
  </li>
  <li>
    <p><strong>Create a Storage Account and VNet:</strong><br />
Create a Storage Account (using LRS and without SoftDelete for cache purposes) and a virtual network for testing ASR failover, where the workloads will be restored.</p>
  </li>
  <li>
    <p><strong>Prepare the Infrastructure:</strong><br />
Create a Vault, a Hyper-V site, and a replication policy (using the default settings in our case). This step installs the ASR extension on the cluster nodes.<br />
 <a href="/assets/img/post/2025-03-29-azure-local-backup-and-disaster-recovery/asr-02.png" target="_blank">
   <img src="/assets/img/post/2025-03-29-azure-local-backup-and-disaster-recovery/asr-02.png" alt="Azure Site Recovery in Azure Local 02" style="border: 2px solid grey;" />
 </a>
 <a href="/assets/img/post/2025-03-29-azure-local-backup-and-disaster-recovery/asr-03.png" target="_blank">
   <img src="/assets/img/post/2025-03-29-azure-local-backup-and-disaster-recovery/asr-03.png" alt="Azure Site Recovery in Azure Local 03" style="border: 2px solid grey;" />
 </a>
 <a href="/assets/img/post/2025-03-29-azure-local-backup-and-disaster-recovery/asr-04.png" target="_blank">
   <img src="/assets/img/post/2025-03-29-azure-local-backup-and-disaster-recovery/asr-04.png" alt="Azure Site Recovery in Azure Local 04" style="border: 2px solid grey;" />
 </a>
 <a href="/assets/img/post/2025-03-29-azure-local-backup-and-disaster-recovery/asr-05.png" target="_blank">
   <img src="/assets/img/post/2025-03-29-azure-local-backup-and-disaster-recovery/asr-05.png" alt="Azure Site Recovery in Azure Local 05" style="border: 2px solid grey;" />
 </a></p>
  </li>
  <li>
    <p><strong>Configure Replication:</strong><br />
Once the extension is installed and the site is configured, proceed to set up replication for your workloads.<br />
 <a href="/assets/img/post/2025-03-29-azure-local-backup-and-disaster-recovery/asr-06.png" target="_blank">
   <img src="/assets/img/post/2025-03-29-azure-local-backup-and-disaster-recovery/asr-06.png" alt="Azure Site Recovery in Azure Local 06" style="border: 2px solid grey;" />
 </a>
 <a href="/assets/img/post/2025-03-29-azure-local-backup-and-disaster-recovery/asr-07.png" target="_blank">
   <img src="/assets/img/post/2025-03-29-azure-local-backup-and-disaster-recovery/asr-07.png" alt="Azure Site Recovery in Azure Local 07" style="border: 2px solid grey;" />
 </a>
 <a href="/assets/img/post/2025-03-29-azure-local-backup-and-disaster-recovery/asr-08.png" target="_blank">
   <img src="/assets/img/post/2025-03-29-azure-local-backup-and-disaster-recovery/asr-08.png" alt="Azure Site Recovery in Azure Local 08" style="border: 2px solid grey;" />
 </a>
 <a href="/assets/img/post/2025-03-29-azure-local-backup-and-disaster-recovery/asr-09.png" target="_blank">
   <img src="/assets/img/post/2025-03-29-azure-local-backup-and-disaster-recovery/asr-09.png" alt="Azure Site Recovery in Azure Local 09" style="border: 2px solid grey;" />
 </a>
 <a href="/assets/img/post/2025-03-29-azure-local-backup-and-disaster-recovery/asr-10.png" target="_blank">
   <img src="/assets/img/post/2025-03-29-azure-local-backup-and-disaster-recovery/asr-10.png" alt="Azure Site Recovery in Azure Local 10" style="border: 2px solid grey;" />
 </a>
 <a href="/assets/img/post/2025-03-29-azure-local-backup-and-disaster-recovery/asr-11.png" target="_blank">
   <img src="/assets/img/post/2025-03-29-azure-local-backup-and-disaster-recovery/asr-11.png" alt="Azure Site Recovery in Azure Local 11" style="border: 2px solid grey;" />
 </a>
 <a href="/assets/img/post/2025-03-29-azure-local-backup-and-disaster-recovery/asr-12.png" target="_blank">
   <img src="/assets/img/post/2025-03-29-azure-local-backup-and-disaster-recovery/asr-12.png" alt="Azure Site Recovery in Azure Local 12" style="border: 2px solid grey;" />
 </a>
 <a href="/assets/img/post/2025-03-29-azure-local-backup-and-disaster-recovery/asr-13.png" target="_blank">
   <img src="/assets/img/post/2025-03-29-azure-local-backup-and-disaster-recovery/asr-13.png" alt="Azure Site Recovery in Azure Local 13" style="border: 2px solid grey;" />
 </a></p>
  </li>
  <li>
    <p><strong>Synchronize the Workloads:</strong><br />
The workload will begin to synchronize. In my test lab (set up on a laptop), this took nearly one hour.<br />
 <a href="/assets/img/post/2025-03-29-azure-local-backup-and-disaster-recovery/asr-14.png" target="_blank">
   <img src="/assets/img/post/2025-03-29-azure-local-backup-and-disaster-recovery/asr-14.png" alt="Azure Site Recovery in Azure Local 14" style="border: 2px solid grey;" />
 </a>
 <a href="/assets/img/post/2025-03-29-azure-local-backup-and-disaster-recovery/asr-15.png" target="_blank">
   <img src="/assets/img/post/2025-03-29-azure-local-backup-and-disaster-recovery/asr-15.png" alt="Azure Site Recovery in Azure Local 15" style="border: 2px solid grey;" />
 </a>
 <a href="/assets/img/post/2025-03-29-azure-local-backup-and-disaster-recovery/asr-16.png" target="_blank">
   <img src="/assets/img/post/2025-03-29-azure-local-backup-and-disaster-recovery/asr-16.png" alt="Azure Site Recovery in Azure Local 16" style="border: 2px solid grey;" />
 </a></p>
  </li>
  <li>
    <p><strong>Perform Failover Operations:</strong><br />
Once synchronization is complete, you can execute both test failovers and regular failovers, moving the workloads from Azure Local to Azure directly.<br />
 <a href="/assets/img/post/2025-03-29-azure-local-backup-and-disaster-recovery/asr-17.png" target="_blank">
   <img src="/assets/img/post/2025-03-29-azure-local-backup-and-disaster-recovery/asr-17.png" alt="Azure Site Recovery in Azure Local 17" style="border: 2px solid grey;" />
 </a>
 <a href="/assets/img/post/2025-03-29-azure-local-backup-and-disaster-recovery/asr-18.png" target="_blank">
   <img src="/assets/img/post/2025-03-29-azure-local-backup-and-disaster-recovery/asr-18.png" alt="Azure Site Recovery in Azure Local 18" style="border: 2px solid grey;" />
 </a></p>
  </li>
</ol>

<p>As you can see, this solution is a viable option if you use Azure Local solely as an edge infrastructure with a few critical workloads that you want to secure and keep operational in case of an incident. It is also suitable for single-node infrastructures, as it allows continued operation if connectivity and resource access requirements are met post-failover. A notable strength is the re-synchronization of workloads after failover and the possibility to fail back to the cluster once it is restored. Personally, I would love to see an automatic failover mechanism triggered by incidents, though I understand that not every disaster recovery scenario needs to operate automatically. I also miss a mechanism that would allow syncing different Azure Local clusters using Azure Site Recovery, but maybe this will be possible in the future.</p>

<p>Since this solution is in Preview, it isn’t supported in production by Microsoft and may present certain challenges (such as the need to set WDAC to Audit mode). Nevertheless, in my view, it can be an alternative for environments where no backup is available or where high workload availability is critical. Keep in mind that for the workloads to function correctly afterward, additional considerations such as connectivity and access (via load balancers, DNS, VPNs, etc.) must be addressed.</p>

<p>With this, I conclude the section on Disaster Recovery using ASR. There are additional points in the <a href="https://learn.microsoft.com/en-us/azure/azure-local/manage/azure-site-recovery?view=azloc-24113">documentation</a> worth reviewing, such as more granular synchronization groups and prioritizing certain workloads.</p>

<h2 id="conclusion">Conclusion</h2>

<p>Much to my regret, this has been an extremely lengthy and somewhat impractical article (at least in terms of lab integration), but I hope you have gained some insights (or at least compared notes) about my experience in this field. If you’d like to add anything or have me correct any points, feel free to contact me directly via LinkedIn.</p>

<p>I hope your experience goes beyond merely configuring a backup, you must test the restores as well. If you don’t test restorations, you can’t be sure your backups work. Given that Azure Local via Arc Bridge is a somewhat complex solution in this regard, I hope you can plan and define the limitations of your backup strategy.</p>

<p>I wish you a very good weekend, and I’m off to work on the next article: Planning, Sizing, and Migration, which will be the final installment of the Chronicloud saga on Azure Local 😊</p>]]></content><author><name>Cristian Schmitt Nieto</name></author><category term="Blog" /><category term="Azure Local" /><category term="Azure Stack HCI" /><category term="Backup" /><category term="Disaster Recovery" /><summary type="html"><![CDATA[Explore Backup & Disaster Recovery in Azure Local: Strategies for VM hydration, on-premises backup options and ASR for Disaster recovery.]]></summary></entry><entry><title type="html">Azure Local: Redundancy</title><link href="https://schmitt-nieto.com/blog/azure-local-redundancy/" rel="alternate" type="text/html" title="Azure Local: Redundancy" /><published>2025-03-01T00:00:00+01:00</published><updated>2025-05-05T00:00:00+02:00</updated><id>https://schmitt-nieto.com/blog/azure-local-redundancy</id><content type="html" xml:base="https://schmitt-nieto.com/blog/azure-local-redundancy/"><![CDATA[<h2 id="introduction">Introduction</h2>

<p>Welcome to a new chapter in the <strong>Chronicloud series</strong>, specifically one of the last articles about <strong>Azure Local</strong>, where we’ll discuss <strong>Redundancy</strong>. Initially, I wanted to include both <strong>backup</strong> and <strong>disaster recovery</strong> in this post, but as I started writing, I realized it was getting huge and unwieldy. Therefore, I decided to separate those topics into their own dedicated article.</p>

<p>The subject of redundancy tends to be tricky when talking with clients, not because they lack interest, but because the complexities and limitations can be daunting. This article might be more technical than usual, so if you’re unfamiliar with any terminology, please reach out to me directly (LinkedIn is great) and I’ll be happy to clarify the concepts.</p>

<p>Because I’m based in Germany, most customers here love having multiple physical data center locations separated by firewall walls, fully independent “rooms” that can operate if one site goes down. This naturally leads to a desire for multi-location redundancy. In the past (with Azure Stack HCI 22H2), that wasn’t a major problem if you only had two sites and no AKS, because a <strong>Stretch Cluster</strong> could usually do the trick. But with Azure Stack HCI 23H2 (now <strong>Azure Local</strong>), the integrated <strong>Resource Bridge</strong> doesn’t support Stretch Clusters, and that has changed the redundancy equation significantly.</p>

<p>In this post, we’ll tackle redundancy from several angles: <strong>nodes</strong> (physical hardware), <strong>storage</strong>, <strong>network</strong> and <strong>Active Directory</strong>. Let’s get started!</p>

<h2 id="redundancy">Redundancy</h2>

<p>I’m splitting the redundancy discussion into three main parts:</p>

<ol>
  <li><strong>Nodes</strong>: Physical node redundancy in the cluster. For instance, if you have three nodes and two fail, you’ll see a potential loss of data and cluster availability.</li>
  <li><strong>Storage</strong>: We’ll look at data resiliency on disks, such as how a two-node cluster might keep operating if one node fails, but if the remaining node’s single disk dies, data might still be lost.</li>
  <li><strong>Other Infrastructure</strong>: Network design (no point having multiple nodes if everything relies on a single switch), multi-location data centers (e.g., rack-aware clusters) and Active Directory design (including why nesting domain controllers in the cluster can be problematic).</li>
</ol>

<p>Throughout, I’ll do some rough capacity and resource calculations using 2 x 1 TB NVMe capacity drives plus 1 TB RAM per node, just as an example.</p>

<h3 id="redundancy-of-the-nodes">Redundancy of the Nodes</h3>

<p>Talking about node redundancy means asking how many nodes a cluster can have (up to 16) and what happens when multiple nodes fail. In theory, if you have “half plus one” of the nodes functioning, and (or) you have a quorum (Azure File Share in the case of Azure Local), the cluster remains “operational”. However, that doesn’t guarantee that your <strong>storage</strong> remains accessible if the data resiliency requirements aren’t met, which is especially true with <strong>three-way mirrors</strong> in clusters of three or more nodes. If enough nodes go down simultaneously, data could become inaccessible or lost.</p>

<p>Personally, I’m not a huge fan of clusters with more than five nodes for Azure Local. The reason is that <strong>Storage Spaces Direct (S2D)</strong> can handle only so many simultaneous node failures while still keeping the data intact, and I prefer to keep things simpler. Let’s walk through some typical node counts:</p>

<h4 id="one-node">One Node</h4>
<p>You can technically run Azure Local with just one node. But it isn’t really a “cluster” since you have zero redundancy. If that single node fails, so does your entire environment. This setup might be simple in terms of CPU/RAM/storage planning, but I wouldn’t recommend it for any production environment that needs high availability. Even a minor node failure or an update problem can lead to downtime that’s tricky to fix.</p>

<h4 id="two-nodes">Two Nodes</h4>
<p>A two-node cluster gives you basic redundancy. If one node dies, the other automatically takes over the workloads, provided you haven’t over-allocated RAM and CPU. For example, if each node has 1 TB of RAM, you might be tempted to run workloads totaling 2 TB of RAM (like 2 VMs with 700 GB RAM allocated). But in a node-failure scenario, you only have 1 TB left to run everything. You’d see workloads failing to start if they collectively need more than 1 TB.</p>

<p>Overcommitting CPU also has consequences. If you had a 1:3 ratio (physical CPU : vCPU) across both nodes, losing one node means your ratio effectively doubles for the surviving node, possibly halving performance. But at least the cluster remains functional.</p>

<h4 id="three-or-more-nodes">Three or More Nodes</h4>
<p>With three nodes, you can leverage <strong>three-way mirror</strong> resiliency for your data, which allows the cluster to keep running if one node fails, even two nodes can fail in clusters that have more than 3 nodes and data still be safe. But if you run out of “mirrored copies” across multiple failures, data can be inaccessible or lost.</p>

<p>Another consideration is resource usage. Suppose each node has 1 TB RAM and you have workloads requiring 2 TB in total, distributed across the three nodes. If one node fails, you have only 2 TB left across two nodes. But if each of those two remaining nodes is already using a large portion of RAM, certain VMs might not be able to start. This is why you need an overprovisioning plan (or “failover capacity plan”) to handle node failures gracefully.</p>

<p>With bigger clusters, more resources are available for workloads, and you get more “hardware-level” redundancy. But S2D is generally tested up to losing two nodes simultaneously. If a third node also fails, you could run into data integrity issues, even though the cluster might still appear to have a majority for quorum. That’s one reason why I tend to keep my Azure Local clusters within a modest node count (like 2 to 5).</p>

<h3 id="redundancy-and-resiliency-in-the-storage">Redundancy and Resiliency in the Storage</h3>

<p>For raw vs. usable storage capacity calculations, I use the S2D calculator by <strong>Cosmos Darwin</strong> (<a href="https://www.linkedin.com/in/cosmosd/">LinkedIn</a>):  <a href="https://aka.ms/s2dcalc">https://aka.ms/s2dcalc</a></p>

<p><strong>Important</strong>: Azure Local requires <strong>a minimum of two capacity drives per node</strong> (<a href="https://learn.microsoft.com/en-us/windows-server/storage/storage-spaces/storage-spaces-direct-hardware-requirements#physical-deployments">hardware requirements</a>). For two nodes, you’ll generally have a <strong>two-way mirror</strong>, and for three or more nodes, a <strong>three-way mirror</strong>. All nodes should have the same number of disks (same capacity and model).</p>

<h4 id="two-node-cluster">Two-Node Cluster</h4>
<p>A two-node cluster with a two-way mirror ensures that if one node fails, the other still hosts the data. When the failed node is restored, the system automatically re-syncs the data. This re-sync can take minutes or hours depending on network bandwidth, RDMA configuration (RoCE/iWARP), and the amount of data that needs to be copied back.</p>

<p>If each node has two 1 TB NVMe disks, that’s 4 TB raw total. However, because it’s mirrored, you only get about 1 TB of usable capacity:</p>

<p><a href="/assets/img/post/2025-03-01-azure-local-redundancy/2nodesS2D.png" target="_blank">
  <img src="/assets/img/post/2025-03-01-azure-local-redundancy/2nodesS2D.png" alt="Two-node S2D example" style="border: 2px solid grey;" />
</a></p>

<h4 id="four-node-cluster">Four-Node Cluster</h4>
<p>With four nodes, you use a <strong>three-way mirror</strong>. This means data is replicated across at least three different nodes, so you can survive up to two node failures at once without losing data. But if a third node fails, you risk losing data consistency.</p>

<p>Re-sync times also get longer with more copies to rebuild. In extreme scenarios involving enormous data volumes, re-syncs could take days, though in my experience it’s usually hours at most. It depends heavily on your network speed, RDMA adapters, and switch capacity.</p>

<p>Microsoft’s fault tolerance documentation for S2D (like <a href="https://learn.microsoft.com/en-us/windows-server/storage/storage-spaces/fault-tolerance">this link</a>) provides some scenarios:</p>
<ul>
  <li>
    <p>Situations where everything stays online (losing more than two drives but at most two servers):
<a href="/assets/img/post/2025-03-01-azure-local-redundancy/S2DOnline1.png" target="_blank">
<img src="/assets/img/post/2025-03-01-azure-local-redundancy/S2DOnline1.png" alt="S2D Online Tolerances" style="border: 2px solid grey;" />
</a></p>
  </li>
  <li>
    <p>Situations where everything goes offline (drives lost in three or more servers at once, or losing three nodes simultaneously):
<a href="/assets/img/post/2025-03-01-azure-local-redundancy/S2DOffline1.png" target="_blank">
<img src="/assets/img/post/2025-03-01-azure-local-redundancy/S2DOffline1.png" alt="S2D Offline Tolerances" style="border: 2px solid grey;" />
</a></p>
  </li>
</ul>

<p>For example, four nodes each with 4 x 1 TB capacity disks gives you 16 TB raw, but effectively only <strong>4 TB usable</strong> under a three-way mirror:</p>

<p><a href="/assets/img/post/2025-03-01-azure-local-redundancy/4nodesS2D.png" target="_blank">
  <img src="/assets/img/post/2025-03-01-azure-local-redundancy/4nodesS2D.png" alt="Four-node S2D example" style="border: 2px solid grey;" />
</a></p>

<p><strong>Volume Counts</strong>: It’s best practice (see <a href="https://learn.microsoft.com/de-de/windows-server/storage/storage-spaces/plan-volumes#choosing-how-many-volumes-to-create">Microsoft’s volume planning guidelines</a>) to match the number of volumes to a multiple of the number of servers. For four servers, create four volumes if you want balanced performance. Each node can “own” one volume’s metadata orchestration.</p>

<h3 id="other-redundancies-in-the-infrastructure">Other Redundancies in the Infrastructure</h3>

<p>We can’t ignore the rest of the infrastructure that supports Azure Local, such as <strong>network design</strong> and <strong>Active Directory</strong> architecture. Let’s briefly discuss these points:</p>

<h4 id="network-redundancies">Network Redundancies</h4>

<p>You can handle Azure Local networking in multiple ways. Some designs feature a <strong>dedicated storage switch</strong> (especially if you have more than four nodes). You might also want to split nodes across physical data center “rooms,” but official multi-site or campus-cluster setups are currently not supported (“Rack Aware Cluster” is in <strong>private preview</strong>).</p>

<h5 id="switches">Switches</h5>
<p>Well, it depends on the number of nodes, your storage traffic design, and your budget. But you <strong>always</strong> need at least <strong>two switches</strong> for management and compute traffic. A single switch would act as a single point of failure, nullifying your otherwise redundant cluster design.</p>

<p>For up to <strong>four nodes</strong>, you can technically go switchless (often called <strong>Direct Attach</strong>) for the storage network, meaning the nodes are cabled directly to each other. I recommend <strong>RDMA</strong> (especially <strong>RoCEv2</strong>). This setup ensures that if one node fails, the remaining ones maintain inter-node connectivity. Personally, though, I consider switchless challenging beyond two nodes, it requires precise configuration, can be tedious to implement (via ARM templates), and is not very flexible (you can’t easily add new nodes or modify them without major rework). Its one advantage is cost savings if your existing switches can’t handle RDMA traffic.
For reference, here’s a link describing that setup in detail:  <a href="https://learn.microsoft.com/en-us/azure/azure-local/plan/four-node-switchless-two-switches-two-links?view=azloc-24113">Four-node switchless, two switches, two links</a></p>

<p>And here’s the official diagram for that cabling method (props to whoever created it!):
<a href="/assets/img/post/2025-03-01-azure-local-redundancy/4nodesSwitchless.png" target="_blank">
  <img src="/assets/img/post/2025-03-01-azure-local-redundancy/4nodesSwitchless.png" alt="Four-node switchless design" style="border: 2px solid grey;" />
</a></p>

<p>In the image, each node has two connections to its neighbors, using six total network ports exclusively for storage. Because most network cards have two ports, you wouldn’t want to use both ports on a single NIC card to connect to the same node. If that NIC card fails, you’d lose the connection to the node entirely. Additionally, note that you can’t easily expand beyond two nodes in a “switchless” scenario, the only supported move is from a single node to a two-node cluster. Anything above two nodes requires a switch, as explained <a href="https://learn.microsoft.com/en-us/azure/azure-local/manage/add-server?view=azloc-24112">here</a>.</p>

<h5 id="multi-location-or-rack-aware">Multi-Location or Rack Aware</h5>

<p>After deciding how many switches to use, you also need to determine how many physical “locations” your cluster needs, e.g., is it all in one data center room, or multiple? Those familiar with the product already know this, but newcomers might be surprised to learn that <strong>Azure Local (starting 23H2) doesn’t support stretch clusters</strong>, meaning nodes should theoretically be in the same rack. I’ll mention a new way to set up Azure Local for two locations (really just two rooms in the same building) called <strong>Rack Aware Cluster</strong>.</p>

<p>In previous versions, you could configure a so-called <strong>stretch cluster</strong> for two sites, provided your round-trip latency didn’t exceed 5 ms (see <a href="https://learn.microsoft.com/en-us/azure/architecture/hybrid/azure-local-dr#use-stretched-clusters-to-implement-automated-disaster-recovery-for-virtualized-workloads-and-file-shares-hosted-on-azure-local">Microsoft docs</a>). However, that’s now invalid because Azure Local 23H2 includes new cluster management elements (like <strong>Azure ARC Resource Bridge</strong>) that don’t support stretch clustering. In my opinion, there’s also no real need to expand clusters this way because Azure Local is more of an <strong>Edge Datacenter</strong> solution, not a typical “full” data center approach. If you want balanced infrastructure across two sites, <strong>Windows Server 2025</strong> might be a better option, or you could split Azure Local into two separate clusters.</p>

<p>Nevertheless, there is a future possibility (currently in private preview) to meet this need, known as <strong>Rack Aware Cluster</strong> (<a href="https://techcommunity.microsoft.com/blog/azurearcblog/evolving-stretch-clustering-for-azure-local/4352751">TechCommunity article</a>). This upcoming feature may include up to eight nodes (four per side). Its advantage is that it could support the ARC Resource Bridge because the nodes reside in the same Layer 2 network. If I ever get the chance, I’ll test it once a public preview is available. For now, we only have a network diagram:</p>

<p><a href="/assets/img/post/2025-03-01-azure-local-redundancy/azurelocalrackaware.png" target="_blank">
  <img src="/assets/img/post/2025-03-01-azure-local-redundancy/azurelocalrackaware.png" alt="Rack Aware preview diagram" style="border: 2px solid grey;" />
</a></p>

<h4 id="active-directory-redundancy">Active Directory Redundancy</h4>

<p>In my opinion, the most controversial part of designing a new Azure Local environment is <strong>Active Directory</strong>, mainly because there’s no official best-practice guidance covering it. 
Starting with Azure Local 23H3, you can integrate Azure Local into your existing Active Directory with minimal effort by following the prep steps in <a href="https://learn.microsoft.com/en-us/azure/azure-local/deploy/deployment-prep-active-directory?view=azloc-24112">this Microsoft doc</a>. Those steps outline the prerequisites for registering Azure Local and creating the cluster. The question is: <strong>Do I use my current corporate AD (with all existing data), or do I spin up a separate AD domain (often called the Fabric Domain) just for Azure Local?</strong></p>

<p>Unsurprisingly, the answer is: <strong>it depends</strong>, it depends on the management model you want and how you plan to operate the cluster. However, in the majority of cases, I recommend creating a dedicated Active Directory domain for Azure Local, so you avoid unexpected permission issues or admins deciding it’s a great idea to apply random GPOs to the solution (I’ve seen some downright bizarre situations arise that were very tough to fix afterwards! 🤣)</p>

<p>Keep in mind that if you create a new Active Directory, it isn’t strictly required to integrate workloads like AVD or AKS. The users relying on those services and the workloads themselves, base their authentication on Entra ID (and, in terms of network, you can just set VLANs to point to whatever domain controllers they specifically need). You should also remember that Azure Local can be managed through Azure RBAC in the portal, making dedicated Fabric Domain accounts largely unnecessary. For now, as long as Azure Local still requires some form of AD domain (the version without AD is apparently coming later this year), my personal recommendation is to stand up a dedicated AD domain for Azure Local.</p>

<p>So, once you decide you want a new AD domain, <strong>where do you host it?</strong> One possibility is to run a domain controller for that new Fabric Domain in a VM outside Azure Local (for example, in your existing infrastructure or even on a laptop if you’re brave 😜). Then you register Azure Local with Azure and add a second domain controller inside the cluster itself. A frequent question is whether you can nest <em>both</em> DCs in the cluster. Theoretically and practically (if we’re being honest), yes (but you shouldn´t), you can migrate the domain controller you used to register Azure Local into the cluster. The problem arises if there’s a cluster wide outage. The cluster tries to start up, but both domain controllers are also part of that same cluster (even the storage!). You hit the classic chicken-and-egg scenario: the cluster can’t come online because there’s no AD available, and AD can’t come online because the cluster is offline.</p>

<p>Because of this, my one ironclad piece of advice is that <strong>no matter what you do (new domain or existing domain), ensure that at least one domain controller remains outside the cluster</strong> and is configured as DNS for the cluster. You can nest the second domain controller in the cluster without issue, or even migrate it in as an ARC VM. (We’ll talk more about that migration flow in future articles.)</p>

<h2 id="conclusion">Conclusion</h2>

<p>Although I shortened some sections, I think this article still provides a clear (and somewhat “simple”) overview of what to consider when designing <strong>Azure Local</strong> with redundancy in mind. I had to omit <strong>backup</strong> and <strong>disaster recovery</strong> to avoid tripling the size, but those will be covered in the next post.</p>

<p>The best advice I can give is: if you’re new to Azure Local, reach out to a trusted consultant or your OEM for guidance before diving in. If you’re set on going solo, join <a href="https://aka.ms/azurelocal-slack">the Azure Local Slack channel</a> and clarify any doubts first. It’s easy to paint yourself into a corner if you’re not aware of certain limitations.</p>

<p>Thank you for reading all the way through! If you have any questions, feel free to ping me on LinkedIn. I’m always happy to help clarify or share insights from my experience.</p>]]></content><author><name>Cristian Schmitt Nieto</name></author><category term="Blog" /><category term="Azure Local" /><category term="Azure Stack HCI" /><category term="Redundancy" /><category term="Azure Virtual Desktop" /><summary type="html"><![CDATA[Explore the different aspects of redundancy within Azure Local, including node resilience, storage durability, network design, and Active Directory considerations.]]></summary></entry><entry><title type="html">Azure Local meets Nerdio</title><link href="https://schmitt-nieto.com/blog/azure-local-nerdio/" rel="alternate" type="text/html" title="Azure Local meets Nerdio" /><published>2025-02-08T00:00:00+01:00</published><updated>2025-02-08T00:00:00+01:00</updated><id>https://schmitt-nieto.com/blog/azure-local-nerdio</id><content type="html" xml:base="https://schmitt-nieto.com/blog/azure-local-nerdio/"><![CDATA[<h2 id="introduction">Introduction</h2>

<p>I decided to write this article outside of my usual Chronicloud series, though it does follow on from the <a href="/blog/azure-stack-hci-azure-virtual-desktop/">Azure Stack HCI: Azure Virtual Desktop</a> post. The reason? Image management for AVD and deploying those images in <strong>Azure Local</strong> can be a real pain point. Currently, the entire process is quite manual, involves tons of steps, and doesn’t offer much flexibility. So, I thought sharing how to use <strong>Nerdio</strong> for this might be helpful.</p>

<p>I was also inspired by attending the Nerdio Micro Hack in Frankfurt last Wednesday (kudos to <strong>Bas van Kaam</strong> (<a href="https://www.linkedin.com/in/basvankaam/">@LinkedIn</a>) and <strong>Bjørn M. Riiber</strong> (<a href="https://www.linkedin.com/in/riibern/">@LinkedIn</a>) for the excellent masterclass). Most attendees seemed to need a solution for running <strong>AVD on-prem</strong>. While it is indeed possible to manage these images without any extra tooling, just a handful of PowerShell scripts and some Azure DevOps pipelines, I find that approach clunky. Nerdio, on the other hand, does a great job by also offering more flexible autoscaling plans and simple scripted tasks that are far easier to configure.</p>

<p>For those unfamiliar with <strong>Nerdio</strong> ( <a href="https://getnerdio.com/">getnerdio.com</a> ), it’s a company that specializes in a simple, straightforward way to manage AVD, Windows 365 Cloud PCs, and Intune (no DevOps overhead or IaC expertise needed). Because I want to specifically focus on the <strong>Azure Local</strong> integration (and there isn’t much up-to-date documentation on this topic), I’m documenting the process here. I won’t be covering the Nerdio installation in your Azure subscription, my friend <strong>Michael Frank</strong> (<a href="https://www.linkedin.com/in/michael-frank-26b86222b/">@LinkedIn</a>) and <strong>Neil McLoughlin</strong> (<a href="https://www.linkedin.com/in/neilmcloughlin/">@LinkedIn</a>) have you covered:</p>

<ul>
  <li>Michael’s blog on how to install Nerdio: <a href="https://michaelsendpoint.com/nerdio/nerdio.html">Blog Link</a></li>
  <li>Neil’s YouTube video on setup and basic config:</li>
</ul>
<iframe width="560" height="315" src="https://www.youtube.com/embed/PwxYiYjCW6s?si=4py_H69BVYps3hGn" title="YouTube video player" frameborder="0" allow="accelerometer; autoplay; clipboard-write; encrypted-media; gyroscope; picture-in-picture; web-share" referrerpolicy="strict-origin-when-cross-origin" allowfullscreen=""></iframe>

<p>I also won’t dive deep into <strong>FSLogix</strong> here. I’ll save that for another article in the Chronicloud series when we talk more about AVD.</p>

<p>The only official documentation I’ve found so far for using Azure Local with Nerdio is:</p>
<ul>
  <li><a href="https://nmehelp.getnerdio.com/hc/en-us/articles/25499377328909-Azure-Stack-HCI-and-Nerdio-Manager">Azure Stack HCI and Nerdio Manager</a></li>
  <li><a href="https://nmehelp.getnerdio.com/hc/en-us/articles/26124280902157-Troubleshoot-Issues-with-Resource-Bridge-in-Azure-Stack-HCI">Troubleshoot Issues with Resource Bridge in Azure Stack HCI</a></li>
</ul>

<p>Below is a diagram illustrating the process for registering Nerdio and deploying AVD on Azure Local through Nerdio:</p>

<p><a href="/assets/img/post/2025-02-08-azure-local-nerdio/NerdioAzureLocalProcess.png" target="_blank">
  <img src="/assets/img/post/2025-02-08-azure-local-nerdio/NerdioAzureLocalProcess.png" alt="Nerdio-Azure Local Integration Process" style="border: 2px solid grey;" />
</a></p>

<p>And here’s a reference architecture of the infrastructure which I´m using:</p>

<p><a href="/assets/img/post/2025-02-08-azure-local-nerdio/NerdioAzureLocalArchitecture.png" target="_blank">
  <img src="/assets/img/post/2025-02-08-azure-local-nerdio/NerdioAzureLocalArchitecture.png" alt="Azure Local Architecture with Nerdio" style="border: 2px solid grey;" />
</a></p>

<h2 id="configuring-nerdio-for-azure-local">Configuring Nerdio for Azure Local</h2>

<p>If you take a look at the earlier documentation, you’ll notice it mentions creating a custom location. This is actually no longer necessary because <strong>Azure Local</strong> now automatically generates a custom location during its deployment process. I believe the existing documentation hasn’t been fully updated to reflect this (and I don’t blame anyone, Azure Local evolves so quickly that staying on top of changes is a challenge, and I face the same issue with my own blog posts).</p>

<p>Before we dive into the configuration, there are a few prerequisites to meet. Thankfully, most of them were already taken care of in the article <a href="/blog/azure-stack-hci-azure-virtual-desktop/">“Azure Stack HCI: Azure Virtual Desktop”</a>:</p>

<ul>
  <li><strong>Install Nerdio Manager</strong>: This should be done using the guides mentioned in the introduction.</li>
  <li>An <strong>Active Directory</strong> for the users who will be using AVD (with identities synced to Microsoft Entra ID).</li>
  <li>A <strong>fully functional Azure Local cluster</strong> (at least 1 node), registered with an Azure subscription that is connected to Nerdio Manager.</li>
  <li><strong>Azure Arc</strong> registration for the Azure Local nodes.</li>
  <li><strong>Resource Bridge</strong> already enabled in Azure Local.</li>
  <li>A <strong>local shared storage path</strong> on the Azure Local cluster for FSLogix profiles.</li>
  <li>The <strong>logical network</strong> and <strong>resource group</strong> where your Azure Local cluster is registered must be linked.</li>
</ul>

<h3 id="registering-resources-in-nerdio">Registering Resources in Nerdio</h3>

<p>Once Nerdio is installed, you’ll need <strong>Owner</strong> permissions on the resources you’re about to register, using the same account that performs the registration in Nerdio. The resources you’ll register are:</p>

<ul>
  <li><strong>Subscription</strong></li>
  <li><strong>Resource Group</strong></li>
  <li><strong>Hybrid Network</strong> (a.k.a. your Logical Network)</li>
</ul>

<p>You can register all of them from the same management window under <strong>Settings &gt; Azure environment</strong>:</p>

<p><a href="/assets/img/post/2025-02-08-azure-local-nerdio/Azureenvironmentconfig.png" target="_blank">
  <img src="/assets/img/post/2025-02-08-azure-local-nerdio/Azureenvironmentconfig.png" alt="Azure Environment Configuration" style="border: 2px solid grey;" />
</a></p>

<p>You’ll also need to connect your <strong>Active Directory</strong> (with a user who has the rights to join machines in the appropriate OU) and specify the <strong>file share</strong> for FSLogix profiles (in my case, a file share hosted on the domain controller(don´t replicate 😅)). This is done in <strong>Settings &gt; Integration</strong>:</p>

<p><a href="/assets/img/post/2025-02-08-azure-local-nerdio/Integrations.png" target="_blank">
  <img src="/assets/img/post/2025-02-08-azure-local-nerdio/Integrations.png" alt="Integration Settings in Nerdio" style="border: 2px solid grey;" />
</a></p>

<h2 id="golden-image">Golden Image</h2>

<p>The process of creating a <strong>Golden Image</strong> was outlined in the introduction, and if you’ve worked with Nerdio before, you’ll find it’s a fairly straightforward process. Here’s my quick rundown:</p>

<ol>
  <li>
    <p><strong>Set up a virtual network (vNet) in Azure</strong> (not your local, logical network). I created a simple vNet in the same Resource Group as my Azure Local cluster, changing only the name. You can do this in the Azure portal.</p>
  </li>
  <li>
    <p><strong>Import the VM image from the Azure gallery</strong> by going to <strong>Desktop Images &gt; Add from Azure library</strong>. Select both the vNet you just created and the Azure image you want to use as your Golden Image. My setup looked like this:</p>
  </li>
</ol>

<p><a href="/assets/img/post/2025-02-08-azure-local-nerdio/GoldenImage01.png" target="_blank">
  <img src="/assets/img/post/2025-02-08-azure-local-nerdio/GoldenImage01.png" alt="Golden Image Setup in Nerdio" style="border: 2px solid grey;" />
</a></p>

<p>Nerdio will then spend about 30 minutes creating a VM based on the parameters you provided. It places that VM in the specified vNet and Resource Group. By default, this VM won’t be accessible from the internet unless you assign it a public IP and configure RDP access in the Azure portal.</p>

<p>Now, you can modify this VM in two ways:</p>
<ul>
  <li><strong>Direct Access</strong>: Connect to the VM (via VPN or public IP) to configure it manually.</li>
  <li><strong>Run Scripts</strong>: One of my favorite features in Nerdio. You can run scripts to install language packs or other software, either on demand or scheduled. (If you’re thinking what I’m thinking, this is perfect for scheduling and automating Windows Updates on your Golden Images!)</li>
</ul>

<p><a href="/assets/img/post/2025-02-08-azure-local-nerdio/GoldenImage02.png" target="_blank">
  <img src="/assets/img/post/2025-02-08-azure-local-nerdio/GoldenImage02.png" alt="Run Scripts in Nerdio" style="border: 2px solid grey;" />
</a></p>

<p><a href="/assets/img/post/2025-02-08-azure-local-nerdio/GoldenImage03.png" target="_blank">
  <img src="/assets/img/post/2025-02-08-azure-local-nerdio/GoldenImage03.png" alt="Script Scheduling in Nerdio" style="border: 2px solid grey;" />
</a></p>

<p>That sets up your base VM to serve as your Golden Image. Next comes the more interesting part: deploying the image into a <strong>Compute Gallery</strong> and syncing (or uploading) it to <strong>Azure Local</strong> so it can be used on your Session Hosts.</p>

<p>You can accomplish this by converting the VM into an Image and syncing it with Azure Local like so:</p>

<p><a href="/assets/img/post/2025-02-08-azure-local-nerdio/GoldenImage04.png" target="_blank">
  <img src="/assets/img/post/2025-02-08-azure-local-nerdio/GoldenImage04.png" alt="Convert to VM Image" style="border: 2px solid grey;" />
</a></p>

<p><a href="/assets/img/post/2025-02-08-azure-local-nerdio/GoldenImage05.png" target="_blank">
  <img src="/assets/img/post/2025-02-08-azure-local-nerdio/GoldenImage05.png" alt="Sync with Azure Local" style="border: 2px solid grey;" />
</a></p>

<p>As you can see in the last screenshot, I’ve enabled <strong>Geographic distribution &amp; Azure compute gallery</strong> because it allows me to pull the image down to Azure Local by selecting my custom location. In my case, I created the Compute Gallery automatically from within Nerdio and selected the custom location <strong>azlfra</strong>. If you wish, you can also configure a schedule so that this process runs automatically the day after Windows Updates are installed on the Golden Image:</p>

<p><a href="/assets/img/post/2025-02-08-azure-local-nerdio/GoldenImage06.png" target="_blank">
  <img src="/assets/img/post/2025-02-08-azure-local-nerdio/GoldenImage06.png" alt="Compute Gallery and Custom Location" style="border: 2px solid grey;" />
</a></p>

<p>It took about 30 minutes for my image to sync. I really appreciate how Nerdio keeps you updated on the entire progress. Here’s what the result looks like:</p>

<p><a href="/assets/img/post/2025-02-08-azure-local-nerdio/GoldenImage07.png" target="_blank">
  <img src="/assets/img/post/2025-02-08-azure-local-nerdio/GoldenImage07.png" alt="Golden Image Sync Result 1" style="border: 2px solid grey;" />
</a></p>

<p><a href="/assets/img/post/2025-02-08-azure-local-nerdio/GoldenImage08.png" target="_blank">
  <img src="/assets/img/post/2025-02-08-azure-local-nerdio/GoldenImage08.png" alt="Golden Image Sync Result 2" style="border: 2px solid grey;" />
</a></p>

<p>And that’s it! You now have a Golden Image you can generate periodically and automatically update through Nerdio. It saves you a ton of time and makes image management much more efficient and user-friendly.</p>

<h2 id="creating-a-workspace">Creating a Workspace</h2>

<p>We now have an image in <strong>Azure Local</strong> that we can use to provision a Session Host. So, what’s next? Since I’m starting from a clean deployment, I’ll create a <strong>Workspace</strong> dedicated to Azure Local, where I’ll implement a “Hybrid host pool”. I use quotes because, realistically, these host pools shouldn’t be mixed between on-prem and cloud (not supported yet), so they’ll reside solely in Azure Local.</p>

<p><a href="/assets/img/post/2025-02-08-azure-local-nerdio/Workspace01.png" target="_blank">
  <img src="/assets/img/post/2025-02-08-azure-local-nerdio/Workspace01.png" alt="Workspace Creation - Step 1" style="border: 2px solid grey;" />
</a></p>

<p><a href="/assets/img/post/2025-02-08-azure-local-nerdio/Workspace02.png" target="_blank">
  <img src="/assets/img/post/2025-02-08-azure-local-nerdio/Workspace02.png" alt="Workspace Creation - Step 2" style="border: 2px solid grey;" />
</a></p>

<p><a href="/assets/img/post/2025-02-08-azure-local-nerdio/Workspace03.png" target="_blank">
  <img src="/assets/img/post/2025-02-08-azure-local-nerdio/Workspace03.png" alt="Workspace Creation - Step 3" style="border: 2px solid grey;" />
</a></p>

<h3 id="adding-a-hybrid-host-pool">Adding a Hybrid Host Pool</h3>

<p>After the Workspace is created, head to <strong>Hybrid host pools</strong> and add a new one. In my case, I chose <strong>Multi user desktop (pooled)</strong>. You’ll need to select the <strong>Active Directory</strong> and <strong>FSLogix profile</strong> you configured under Integrations, pick the <strong>hybrid network</strong> you set up in the Azure Environment settings, and finally select the <strong>Desktop Image</strong> we created earlier. I assigned three users manually via <strong>Quick Assign</strong>, but in a production environment, you’d typically assign users through security groups.</p>

<p><a href="/assets/img/post/2025-02-08-azure-local-nerdio/Workspace04.png" target="_blank">
  <img src="/assets/img/post/2025-02-08-azure-local-nerdio/Workspace04.png" alt="Host Pool Creation - Step 1" style="border: 2px solid grey;" />
</a></p>

<p><a href="/assets/img/post/2025-02-08-azure-local-nerdio/Workspace05.png" target="_blank">
  <img src="/assets/img/post/2025-02-08-azure-local-nerdio/Workspace05.png" alt="Host Pool Creation - Step 2" style="border: 2px solid grey;" />
</a></p>

<h3 id="configuring-autoscaling">Configuring Autoscaling</h3>

<p>Once the host pool is created, you’ll see a prompt to configure <strong>Autoscale</strong>. This differs from “Scaling Plans” in the Azure portal, which mainly handle power management (the dynamic autoscaling feature is still in preview). Nerdio offers a far more robust approach to autoscaling, with several factors to consider:</p>

<ul>
  <li>
    <p><strong>HOST POOL PROPERTIES</strong><br />
Specifies max sessions per Session Host and how load balancing is handled.</p>
  </li>
  <li>
    <p><strong>HOST POOL SIZING</strong><br />
Determines when a Session Host is considered active (based on whether the VM is running or if the AVD agent is available), sets a base capacity for Session Hosts, a minimum capacity, and a “bursting” feature that automatically creates Session Hosts to meet demand.</p>
  </li>
  <li><strong>SCALING LOGIC</strong><br />
Lets you use multiple triggers (in parallel if you wish) to scale in and out Session Hosts. For Azure Local, there are currently only three autoscale triggers:
    <ol>
      <li><strong>Avg active sessions</strong>: Scales out when the average number of active sessions exceeds a predefined value.</li>
      <li><strong>Available sessions</strong>: Maintains a specified number of available hosts by scaling in/out within the limits of Host Pool Sizing and max sessions per host.</li>
      <li><strong>User-driven</strong>: Starts hosts when users connect, then automatically deallocates them after a set time of zero user sessions.</li>
    </ol>
  </li>
  <li>
    <p><strong>ROLLING DRAIN MODE</strong><br />
Lets you create multiple “drain windows” and target a percentage of your hosts to place in drain mode.</p>
  </li>
  <li>
    <p><strong>PRE-STAGE HOSTS</strong><br />
Powers on or creates Session Hosts <strong>before</strong> business hours, avoiding massive logon storms.</p>
  </li>
  <li>
    <p><strong>MESSAGING</strong><br />
Allows you to notify users of maintenance or shutdown periods. Changing the time automatically updates the in-session notification.</p>
  </li>
  <li><strong>AUTO-HEAL BROKEN HOSTS</strong><br />
A “killer feature” of Nerdio. If a Session Host VM isn’t recognized as Available by the AVD service, Nerdio Manager can try repairing it automatically. It performs this auto-heal after all scale-out tasks are finished and things are stable.</li>
</ul>

<p><a href="/assets/img/post/2025-02-08-azure-local-nerdio/Workspace06.png" target="_blank">
  <img src="/assets/img/post/2025-02-08-azure-local-nerdio/Workspace06.png" alt="Autoscaling Configuration - Step 1" style="border: 2px solid grey;" />
</a></p>

<p><a href="/assets/img/post/2025-02-08-azure-local-nerdio/Workspace07.png" target="_blank">
  <img src="/assets/img/post/2025-02-08-azure-local-nerdio/Workspace07.png" alt="Autoscaling Configuration - Step 2" style="border: 2px solid grey;" />
</a></p>

<p>Upon configuring autoscaling, Nerdio provisions a Session Host according to your settings. In my test, the process took roughly <strong>50 minutes</strong> and (to my surprise) completed without any errors. Here’s a snapshot of the provisioning and its final result:</p>

<p><a href="/assets/img/post/2025-02-08-azure-local-nerdio/Workspace08.png" target="_blank">
  <img src="/assets/img/post/2025-02-08-azure-local-nerdio/Workspace08.png" alt="Workspace Provisioning - Step 1" style="border: 2px solid grey;" />
</a></p>

<p><a href="/assets/img/post/2025-02-08-azure-local-nerdio/Workspace09.png" target="_blank">
  <img src="/assets/img/post/2025-02-08-azure-local-nerdio/Workspace09.png" alt="Workspace Provisioning - Step 2" style="border: 2px solid grey;" />
</a></p>

<h3 id="post-deployment-tweaks">Post-Deployment Tweaks</h3>

<p>After the deployment, I realized I forgot to install the <strong>multimedia redirection extension</strong> and enable <strong>RDP Shortpath</strong> in my Golden Image. Ordinarily, I’d have to update the Golden Image and roll out a new deployment. But with Nerdio, I can use <strong>Run Script</strong> to fix these settings directly on the Session Host (or multiple Session Hosts simultaneously via bulk operations). Of course, I’ve also integrated these features into my Golden Image as well, but below are two screenshots showing how I added them directly to the Session Host:</p>

<p><a href="/assets/img/post/2025-02-08-azure-local-nerdio/MultimediaRed.png" target="_blank">
  <img src="/assets/img/post/2025-02-08-azure-local-nerdio/MultimediaRed.png" alt="Multimedia Redirection Script" style="border: 2px solid grey;" />
</a></p>

<p><a href="/assets/img/post/2025-02-08-azure-local-nerdio/RDPShortparth.png" target="_blank">
  <img src="/assets/img/post/2025-02-08-azure-local-nerdio/RDPShortparth.png" alt="RDP Shortpath Script" style="border: 2px solid grey;" />
</a></p>

<p>Once everything was in place, I logged into the Virtual Desktop, and sure enough, it performed exactly as expected:</p>

<p><a href="/assets/img/post/2025-02-08-azure-local-nerdio/Result01.png" target="_blank">
  <img src="/assets/img/post/2025-02-08-azure-local-nerdio/Result01.png" alt="Result - Session Host Running" style="border: 2px solid grey;" />
</a></p>

<p><a href="/assets/img/post/2025-02-08-azure-local-nerdio/Result02.png" target="_blank">
  <img src="/assets/img/post/2025-02-08-azure-local-nerdio/Result02.png" alt="Result - Azure Local AVD" style="border: 2px solid grey;" />
</a></p>

<h2 id="conclusion">Conclusion</h2>

<p>A process that would normally take three to four hours to handle manually can easily be automated with Nerdio in about one or two hours at most. The main advantages come from the ability to <strong>automate</strong> nearly every step, like managing images, generating them automatically after Windows Updates are applied and running scripts to install applications on the fly.</p>

<p>Being able to implement <strong>unconventional autoscaling plans</strong> is another standout factor of this solution. Although I do wish we had a few extra scaling triggers on Azure Local (for CPU and RAM metrics), the current setup is already quite impressive compared to the Standard processes.</p>

<p>Bear in mind, Azure Virtual Desktop on Azure Local is a pay-as-you-go model (you pay for the Session Hosts while they’re running), so Nerdio’s autoscaling capabilities can help optimize costs. Granted, the cost savings aren’t as pronounced as on Azure Public, but the flexibility and ease of management still make it well worth considering.</p>

<p>Personally, I’m impressed by how straightforward and effective Nerdio is in conjunction with Azure Local. While I’m no stranger to Nerdio in general, seeing it work with Azure Local reinforces how viable this combination can be, especially for admins who want a comprehensive solution without needing deep technical knowledge in DevOps or infrastructure as code.</p>]]></content><author><name>Cristian Schmitt Nieto</name></author><category term="Blog" /><category term="Azure Local" /><category term="Azure Stack HCI" /><category term="Nerdio" /><category term="Azure Virtual Desktop" /><category term="AVD" /><summary type="html"><![CDATA[Discover how Nerdio can simplify Azure Virtual Desktop management on Azure Local, from image creation to automated scaling.]]></summary></entry><entry><title type="html">Azure Local: Lifecycle Management</title><link href="https://schmitt-nieto.com/blog/azure-local-lifecycle/" rel="alternate" type="text/html" title="Azure Local: Lifecycle Management" /><published>2025-01-25T00:00:00+01:00</published><updated>2025-01-25T00:00:00+01:00</updated><id>https://schmitt-nieto.com/blog/azure-local-lifecycle</id><content type="html" xml:base="https://schmitt-nieto.com/blog/azure-local-lifecycle/"><![CDATA[<h2 id="introduction">Introduction</h2>

<p>Welcome back to another article about <strong>Azure Local</strong>, our seventh in the series! (It’s starting to shape up quite nicely, isn’t it? 😊). 
This time, we’ll dive into a topic I’ve discussed with several colleagues and one that has sparked a fair share of questions: <strong>Lifecycle Management</strong>. A question that often pops up is whether this process belongs under the umbrella of <a href="/blog/azure-stack-hci-day2"><strong>Day 2 Operations</strong></a> 🤔.</p>

<p>In my opinion (and hey, I could be wrong!), Lifecycle Management deserves its own distinct category within Day 2 Operations. When planning earlier articles, I avoided diving too deep into this area to keep things concise. However, I felt it warranted a dedicated article to give it the attention it truly deserves.</p>

<p>My goal with this post is to walk you through these processes in a clear and straightforward way, helping to demystify some of the perceived complexities around Azure Local Lifecycle Management.</p>

<p>Let’s get started!</p>

<h2 id="updates">Updates</h2>

<p>The update process in Azure Local (starting with version 23H2) is straightforward and easy to manage from an administrative perspective. In this section, I’ll walk you through how this process works, its phases, and the key considerations to keep in mind before applying updates.</p>

<p>Spoiler alert: The information I’m sharing is a mix of official documentation (from Microsoft and some OEMs) and my personal experience since the product launched in February 2024. For the sake of brevity, I won’t dive into specific scenarios like <strong>SDN</strong> or updates for <strong>Stretch Clusters</strong>, and yes, while Stretch Clusters aren’t available in this version, there’s a <strong>Rack-Aware option</strong>, which I also won’t cover here.</p>

<h3 id="azure-local-updates">Azure Local Updates</h3>

<p>I recently updated my Azure Local cluster, and I want to share my experience based on the article <a href="https://learn.microsoft.com/en-us/azure/azure-local/update/about-updates-23h2">About updates for Azure Local 23H2</a>. Here’s everything you need to know to keep your system up to date.</p>

<h4 id="keeping-the-cluster-updated">Keeping the Cluster Updated</h4>

<p>Let’s face it, keeping your system updated is critical, especially with the new Azure Local 23H2 update process. This version introduces the <strong>Lifecycle Manager</strong> (orchestrator), which simplifies how updates are deployed and managed for the OS, agents, services, and even drivers and firmware.</p>

<p>If you’re still running Azure Stack HCI 22H2, be aware that support ends in <strong>May 2025</strong>. I recommend making the move to 23H2 sooner rather than later to ensure your system remains secure and supported.</p>

<h4 id="why-the-new-update-system-is-better">Why the New Update System Is Better</h4>

<p>Here’s what stood out to me during the update process:</p>
<ul>
  <li><strong>Simplified management</strong>: The orchestrator consolidates all updates, from the OS to hardware-specific drivers, into a single workflow.</li>
  <li><strong>Peace of mind</strong>: Automatic health checks run before and during updates, minimizing downtime and avoiding disruptions.</li>
  <li><strong>Resilience</strong>: Any issues during updates are retried and resolved automatically.</li>
  <li><strong>Consistency</strong>: Whether you manage updates locally or through the Azure portal, the experience is intuitive and efficient.</li>
</ul>

<p>The system is designed to make updates easier and save you time. It’s been a significant improvement from previous versions.</p>

<h4 id="whats-included-in-the-updates">What’s Included in the Updates?</h4>

<p>When I updated my cluster, these were the main components:</p>
<ol>
  <li><strong>Azure Stack HCI OS</strong>: Security patches and reliability fixes keep the system stable and productive.</li>
  <li><strong>Agents and Services</strong>: The orchestrator handles updates for core services, including the Azure Connected Machine Agent and Arc Resource Bridge.</li>
  <li><strong>Drivers and Firmware</strong>: If supported by your hardware vendor, these updates are integrated and automatically installed during the same maintenance window.</li>
</ol>

<p>This all-in-one approach means less manual effort and fewer maintenance windows. However, keep in mind that customer workloads are not part of this update process.</p>

<h4 id="update-cadence-you-should-know">Update Cadence You Should Know</h4>

<p>Updates follow a clear schedule:</p>
<ul>
  <li><strong>Monthly updates</strong>: Regular patches for performance and security.</li>
  <li><strong>Baseline updates</strong>: Released quarterly, these include new features and improvements.</li>
  <li><strong>Hotfixes</strong>: Emergency fixes for critical issues.</li>
  <li><strong>Solution Builder Extensions</strong>: Vendor-specific updates like drivers and firmware.</li>
</ul>

<p>To stay supported, make sure your system is updated within six months of the latest baseline. Falling behind could leave your system out of compliance.</p>

<h4 id="how-i-applied-the-updates">How I Applied the Updates</h4>

<p>Personally, I used the <strong>Azure portal</strong> to manage the updates. The Azure Update Manager made the process straightforward, with clear steps and a simple interface.</p>

<p><img src="/assets/img/post/2025-01-25-azure-local-lifecycle/01.png" alt="Update Step 01" style="border: 2px solid grey;" />
<img src="/assets/img/post/2025-01-25-azure-local-lifecycle/02.png" alt="Update Step 02" style="border: 2px solid grey;" />
<img src="/assets/img/post/2025-01-25-azure-local-lifecycle/03.png" alt="Update Step 03" style="border: 2px solid grey;" />
<img src="/assets/img/post/2025-01-25-azure-local-lifecycle/04.png" alt="Update Step 04" style="border: 2px solid grey;" />
<img src="/assets/img/post/2025-01-25-azure-local-lifecycle/05.png" alt="Update Step 05" style="border: 2px solid grey;" /></p>

<p>That said, it’s also possible to apply updates using <a href="https://learn.microsoft.com/en-us/azure/azure-local/update/update-via-powershell-23h2">PowerShell</a>, which works well for both single-node and multi-node systems. If you prefer a command-line approach, PowerShell is an excellent alternative. Just avoid unsupported tools like Windows Admin Center, SConfig, or third-party tools, as they will cause issues and might even impact billing (at least as far as support tickets are concerned 😅).</p>

<h3 id="update-phases">Update Phases</h3>

<p>Updating Azure Local to version 23H2 introduces a phased process designed to ensure smooth updates with minimal disruption. Below, I’ll guide you through the phases of the update process based on <a href="https://learn.microsoft.com/en-us/azure/azure-local/update/update-phases-23h2">Microsoft’s documentation</a> and my own experience.</p>

<h4 id="about-update-phases">About Update Phases</h4>

<p>The update process in Azure Local focuses on keeping the system available while applying updates to operating systems, agents, services and solution extensions. Updates are automated and designed to handle workloads dynamically to maintain uptime. They fall into two categories:</p>
<ul>
  <li><strong>Updates not requiring reboots</strong>: Applied without restarting the system.</li>
  <li><strong>Updates requiring reboots</strong>: Use Cluster-Aware Updating to restart machines one by one, ensuring availability.</li>
</ul>

<p>Updates proceed in the following phases: <strong>Discovery and acquisition</strong>, <strong>Readiness checks and staging</strong>, and <strong>Installation progress and monitoring</strong>. Each phase involves specific steps that may or may not require manual input.</p>

<p><img src="/assets/img/post/2025-01-25-azure-local-lifecycle/update-phases.png" alt="Update Phase Timeline" style="border: 2px solid grey;" /></p>

<h4 id="phase-1-discovery-and-acquisition">Phase 1: Discovery and Acquisition</h4>

<p>Before an update is released, Microsoft validates it as a package of components. Once validated, release notes are published detailing:</p>
<ul>
  <li>Update contents</li>
  <li>Changes introduced</li>
  <li>Known issues</li>
  <li>Links to external downloads (e.g., drivers or firmware)</li>
</ul>

<p>Your Azure Local update platform will automatically detect new updates, but you’ll need to visit the <strong>Updates</strong> page in your management interface to view details. Depending on your hardware and the scope of the update bundle, additional content (e.g., OEM-specific drivers) might need to be downloaded (SBE Updates). If extra steps are required, the system will prompt you.</p>

<h4 id="phase-2-readiness-checks-and-staging">Phase 2: Readiness Checks and Staging</h4>

<p>Before installing an update, Azure Local performs a series of prechecks to ensure the system is safe to update. These checks cover:</p>
<ul>
  <li>Storage systems</li>
  <li>Failover cluster requirements</li>
  <li>Remote management</li>
  <li>Solution extensions</li>
</ul>

<p>These checks identify potential issues that could block or delay updates:</p>
<ul>
  <li><strong>Blocking conditions</strong>: Must be resolved before proceeding with the update.</li>
  <li><strong>Warnings</strong>: Could lead to longer update times or workload impact. You may need to acknowledge these warnings before moving forward.</li>
</ul>

<p>New checks may be added with each update, so it’s critical to run readiness checks after downloading the update package. Note that in this release, updates cannot be scheduled, they must be installed immediately.</p>

<h4 id="phase-3-installation-progress-and-monitoring">Phase 3: Installation Progress and Monitoring</h4>

<p>During installation, you can monitor progress via your chosen interface. The update workflow is displayed hierarchically, showing each step as it occurs. Steps may dynamically adjust depending on the update flow.</p>

<p>The update solution includes retry and remediation logic, automatically addressing issues where possible. However, manual intervention may sometimes be required. If you encounter a blocking issue, you’ll need to fix it and rerun the readiness checks before continuing.</p>

<p>Updates are designed to be as seamless as possible, but the system will prompt you if any critical action is needed to keep the process moving forward.</p>

<p>By following these phases, Azure Local ensures that updates are applied smoothly and reliably, minimizing downtime and keeping your infrastructure up to date.</p>

<h3 id="sbe-updates">SBE Updates</h3>

<p>The <strong>Solution Builder Extension (SBE)</strong> is a critical part of managing and maintaining Azure Local, especially when it comes to ensuring your hardware is up to date. Based on <a href="https://learn.microsoft.com/en-us/azure/azure-local/update/solution-builder-extension">Microsoft’s documentation</a> and insights shared by Jaromir in his <a href="https://github.com/DellGEOS/AzureLocalHOLs/tree/main/lab-guides/05-LifecycleManagerDeepDive">Lifecycle Manager Deep Dive</a>, let’s explore what SBE updates bring to the table and how they improve the lifecycle management process.</p>

<h4 id="what-are-sbe-updates">What Are SBE Updates?</h4>

<p>The SBE, referred to as <strong>Solution Builder Extension</strong> in Azure CLI, allows you to apply updates from your hardware vendor to your Azure Local system. These updates are an integral part of Azure Local 23H2, where SBE updates are packaged into a unified solution update. They include:</p>
<ul>
  <li><strong>Drivers and firmware updates</strong>: Released by hardware vendors to enhance hardware compatibility and performance.</li>
  <li><strong>Hardware monitoring enhancements</strong>: Tools and diagnostics to maintain hardware health.</li>
  <li><strong>Advanced pre-update checks</strong>: Custom validation logic integrated into Azure Local’s health checks.</li>
</ul>

<p>With these features, SBE enables streamlined updates and introduces vendor-specific enhancements to your Azure Local system.</p>

<h4 id="how-sbe-updates-work">How SBE Updates Work</h4>

<p>Starting with Azure Local 23H2, SBE updates are integrated directly into the <strong>Lifecycle Manager</strong>. They can be applied as part of a combined solution update or as standalone updates. When an SBE update matching your system’s hardware is available, it appears in the Azure portal or can be retrieved using PowerShell.</p>

<p>SBE updates also include advanced capabilities, such as:</p>
<ul>
  <li><strong>Health service integration</strong>: Extending pre-update health checks to evaluate hardware issues (e.g., power supply failures, SSD wear, or software issues).</li>
  <li><strong>Download management</strong>: Allowing Azure Local to download and apply future updates automatically, reducing manual effort.</li>
  <li><strong>Customized updates</strong>: Vendor-specific steps before and after the solution update process, ensuring hardware compatibility.</li>
</ul>

<h4 id="key-considerations-for-sbe-updates">Key Considerations for SBE Updates</h4>

<ol>
  <li><strong>Integration with Lifecycle Manager</strong>: Azure Local’s orchestrator ensures that SBE updates are part of the same workflow as OS and service updates.</li>
  <li><strong>Manual intervention for older systems</strong>: For hardware not supporting the SBE update experience, updates may need to be applied separately using tools like Windows Admin Center.</li>
  <li><strong>Health checks before updates</strong>: SBE integrates into Azure Local’s readiness checks, ensuring any hardware-related issues are addressed before updates proceed.</li>
  <li><strong>Supported hardware</strong>: Newer integrated systems and Premier Solution hardware fully support SBE updates. For older hardware, updates might require manual handling.</li>
</ol>

<h4 id="additional-insights-from-jaromirs-deep-dive">Additional Insights from Jaromir’s Deep Dive</h4>

<p>Jaromir’s <a href="https://github.com/DellGEOS/AzureLocalHOLs/tree/main/lab-guides/05-LifecycleManagerDeepDive">Lifecycle Manager Deep Dive</a> provides an excellent breakdown of the SBE update process. While the implementation details are not included here, the guide discusses:</p>
<ul>
  <li>The structure and packaging of SBE updates.</li>
  <li>How to manage sideloading for environments with restricted connectivity.</li>
  <li>Troubleshooting issues like failed updates or health check prerequisites.</li>
</ul>

<p>For further guidance, I highly recommend checking out Jaromir’s work if you need more in-depth insights into handling SBE updates effectively.</p>

<h2 id="upgrade">Upgrade</h2>

<p>The <strong>Upgrade</strong> process in Azure Local encompasses several tasks that go beyond standard updates. While some actions, like upgrading extensions might feel routine, others, such as scaling up nodes or transitioning from Azure Stack HCI 22H2 to Azure Local 23H2, require more deliberate effort and planning.</p>

<p>Many of these processes aren’t strictly classified as updates but play a critical role in maintaining, scaling, and enhancing the functionality of your Azure Local infrastructure. In this section, I’ll introduce each upgrade process and set the stage for a deeper dive into the specifics in subsequent sections.</p>

<p>Here’s what we’ll cover:</p>
<ul>
  <li><strong>Extensions</strong>: Upgrades for both automatically installed extensions during cluster deployment and manually added ones.</li>
  <li><strong>Add a Node</strong>: Expanding cluster capacity by adding new nodes to increase CPU and RAM resources.</li>
  <li><strong>Add Storage</strong>: Scaling storage capacity by adding disks to nodes and expanding the storage pool.</li>
  <li><strong>Repair a Node &amp; Extensions</strong>: Replacing defective nodes and restoring critical extensions for Azure Local management.</li>
  <li><strong>Secret Rotation</strong>: Updating administrative passwords and the secret for Azure Arc Resource Bridge to maintain security.</li>
  <li><strong>Upgrade from Azure Stack HCI 22H2</strong>: A detailed and challenging process involving the transition to Azure Local 23H2 with careful dependency and compatibility analysis.</li>
</ul>

<p>Each of these upgrade steps serves a unique purpose in optimizing and evolving your Azure Local environment. In the following sections, we’ll explore them one by one, providing detailed instructions and insights for each process.</p>

<h3 id="extensions">Extensions</h3>

<p>Managing extensions in Azure Local is a crucial part of keeping your cluster up to date and ensuring it runs optimally. Azure Local supports both <strong>Azure-managed extensions</strong> and <strong>customer-managed extensions</strong>, and upgrading them is a seamless process thanks to Azure Arc integration. Below, I’ll break down how the update process works based on <a href="https://learn.microsoft.com/en-us/azure/azure-local/manage/arc-extension-management?tabs=azureportal">Azure’s documentation</a>.</p>

<h4 id="how-extensions-are-upgraded">How Extensions Are Upgraded</h4>

<p>Extensions in Azure Local can be updated automatically or manually, depending on the type of extension and its configuration. By default, <strong>automatic upgrades</strong> are enabled for most extensions, provided the extension publisher supports it. Let’s explore the two main types of extensions and their upgrade methods:</p>

<ol>
  <li><strong>Azure-Managed Extensions</strong>:
    <ul>
      <li>These are installed automatically when your Azure Local cluster is registered with Azure. They are essential for the platform’s functionality and include extensions like telemetry, diagnostics, and the Remote Support Arc extension.</li>
      <li><strong>Upgrade Process</strong>:
        <ul>
          <li>Azure-managed extensions are typically updated as part of the <strong>solution update process</strong>.</li>
          <li>If these extensions were missing when the cluster was registered, Azure will display a banner on the Extensions page guiding you to install them.</li>
        </ul>
      </li>
    </ul>
  </li>
  <li><strong>Customer-Managed Extensions</strong>:
    <ul>
      <li>These extensions, such as Azure Monitoring Agent, Azure Site Recovery, and Windows Admin Center, can be manually installed and managed.</li>
      <li><strong>Upgrade Process</strong>:
        <ul>
          <li>Automatic upgrades are enabled by default if supported by the extension publisher.</li>
          <li>Manual upgrades are performed via the Azure portal, allowing you to select the desired version and apply it across the cluster.</li>
        </ul>
      </li>
    </ul>
  </li>
</ol>

<h4 id="automatic-extension-upgrades">Automatic Extension Upgrades</h4>

<p>Automatic extension upgrades simplify maintenance by ensuring extensions are updated without manual intervention. Here’s how the process works:</p>
<ul>
  <li>When a new version of an extension is published, Azure deploys the update in batches across regions and subscriptions.</li>
  <li>If the extension fails to upgrade, Azure retries the process or rolls back to the previous version automatically.</li>
  <li>Extensions with multiple upgrades can be processed in batches, but each upgrade is applied individually to ensure consistency.</li>
</ul>

<h4 id="manual-extension-upgrades">Manual Extension Upgrades</h4>

<p>In scenarios where automatic upgrades are disabled or a specific version needs to be installed, you can perform a manual upgrade:</p>
<ol>
  <li>Navigate to the <strong>Extensions page</strong> in the Azure portal.</li>
  <li>Select the extension you want to upgrade and choose <strong>Settings</strong>.</li>
  <li>Choose the desired version and click <strong>Save</strong>.</li>
</ol>

<p>This approach is useful for:</p>
<ul>
  <li>Addressing version mismatches across nodes.</li>
  <li>Testing new extension versions before enabling them across the cluster.</li>
</ul>

<h4 id="key-considerations">Key Considerations</h4>

<ul>
  <li><strong>Cluster-Wide Operations</strong>: Upgrading an extension is a cluster-aware operation. Once updated, the extension is automatically applied to all nodes, including new nodes added to the system.</li>
  <li><strong>Rollback and Retry</strong>: Azure’s platform ensures failed upgrades are retried or rolled back to avoid disruptions.</li>
  <li><strong>Manual Intervention</strong>: If extensions repeatedly fail to upgrade, you can disable automatic upgrades to troubleshoot the issue before re-enabling them.</li>
</ul>

<p>Extensions are an integral part of Azure Local’s functionality, and their upgrade process, whether automatic or manual, ensures your cluster remains aligned with the latest features and updates.</p>

<h3 id="add-a-node">Add a Node</h3>

<p>Adding a node to your Azure Local cluster is one of the most straightforward ways to scale up resources like compute and storage. While I don’t currently have the infrastructure to reproduce this process step by step, I’ve successfully carried it out in the past, transitioning from a single-node to a two-node system without any issues. Based on my experience and <a href="https://learn.microsoft.com/en-us/azure/azure-local/manage/add-server">this article from Microsoft</a>, let me guide you through the process.</p>

<h4 id="overview">Overview</h4>

<p>Azure Local supports scaling from 1 to 16 nodes, allowing you to increase compute and storage dynamically. Adding a node involves preparing the new hardware, validating its compatibility, and integrating it into the existing system. The orchestrator, also known as the Lifecycle Manager, ensures that everything from network configurations to storage resiliency adjusts seamlessly during the process.</p>

<p>Here are some important highlights:</p>
<ul>
  <li><strong>Node Requirements</strong>: The new node must closely match the existing cluster in terms of CPU type, memory, number of drives, and drive specifications.</li>
  <li><strong>Scaling Limitations</strong>: In this release, nodes must be added one at a time. Multiple nodes can be added sequentially, but storage rebalancing is triggered only once at the end.</li>
</ul>

<p><img src="/assets/img/post/2025-01-25-azure-local-lifecycle/add-node-workflow.png" alt="Add node Workflow" /></p>

<h4 id="key-steps-to-add-a-node">Key Steps to Add a Node</h4>

<ol>
  <li><strong>Prepare the Node</strong>:
    <ul>
      <li>Install the operating system and required drivers on the new node. Follow the guidance for <a href="https://learn.microsoft.com/en-us/azure/azure-local/install-os">Installing the Azure Local Operating System, version 23H2</a>.</li>
      <li>Register the new node with Azure Arc. Ensure the same parameters (e.g., Resource Group, Region, Subscription, Tenant) as the existing nodes are used.</li>
      <li>Assign the following permissions:
        <ul>
          <li><strong>Azure Local Device Management Role</strong></li>
          <li><strong>Key Vault Secrets User</strong></li>
        </ul>
      </li>
    </ul>
  </li>
  <li><strong>Add the Node Using PowerShell</strong>:
    <ul>
      <li>
        <p>Sign in to the existing node with <code class="language-plaintext highlighter-rouge">AzureStackLCMUser</code> credentials (or another user with equivalent permissions).</p>
      </li>
      <li>(Optional) Update the authentication token for the orchestrator:
        <div class="language-powershell highlighter-rouge"><div class="highlight"><pre class="highlight"><code><span class="n">Update-AuthenticationToken</span><span class="w">
</span></code></pre></div>        </div>
      </li>
      <li>For systems running a version prior to <strong>2405.3</strong>, clean up conflicting files on the new node:
        <div class="language-powershell highlighter-rouge"><div class="highlight"><pre class="highlight"><code><span class="n">Get-ChildItem</span><span class="w"> </span><span class="nt">-Path</span><span class="w"> </span><span class="s2">"</span><span class="nv">$</span><span class="nn">env</span><span class="p">:</span><span class="nv">SystemDrive</span><span class="s2">\NugetStore"</span><span class="w"> </span><span class="nt">-Exclude</span><span class="w"> </span><span class="nx">Microsoft.AzureStack.Solution.LCMControllerWinService</span><span class="o">*</span><span class="p">,</span><span class="nx">Microsoft.AzureStack.Role.Deployment.Service</span><span class="o">*</span><span class="w"> </span><span class="o">|</span><span class="w"> </span><span class="n">Remove-Item</span><span class="w"> </span><span class="nt">-Recurse</span><span class="w"> </span><span class="nt">-Force</span><span class="w">
</span></code></pre></div>        </div>
      </li>
      <li>Run the following command to add the node to the cluster. Replace <code class="language-plaintext highlighter-rouge">&lt;IPv4&gt;</code> with the new node’s IP address and <code class="language-plaintext highlighter-rouge">&lt;Name&gt;</code> with the node’s hostname:
        <div class="language-powershell highlighter-rouge"><div class="highlight"><pre class="highlight"><code><span class="bp">$Host</span><span class="n">Ipv4</span><span class="w"> </span><span class="o">=</span><span class="w"> </span><span class="s2">"&lt;IPv4 for the new node&gt;"</span><span class="w">
</span><span class="nv">$Cred</span><span class="w"> </span><span class="o">=</span><span class="w"> </span><span class="n">Get-Credential</span><span class="w">
</span><span class="nx">Add-Server</span><span class="w"> </span><span class="nt">-Name</span><span class="w"> </span><span class="s2">"&lt;Name of the new node&gt;"</span><span class="w"> </span><span class="nt">-HostIpv4</span><span class="w"> </span><span class="bp">$Host</span><span class="nx">Ipv4</span><span class="w"> </span><span class="nt">-LocalAdminCredential</span><span class="w"> </span><span class="nv">$Cred</span><span class="w">
</span></code></pre></div>        </div>
      </li>
      <li>Make a note of the <strong>operation ID</strong> provided as output. This ID will be used to monitor the progress of the operation.</li>
    </ul>
  </li>
  <li><strong>Validate the System</strong>:
    <ul>
      <li>Use the operation ID to track the status of the process:
        <div class="language-powershell highlighter-rouge"><div class="highlight"><pre class="highlight"><code><span class="nv">$ID</span><span class="w"> </span><span class="o">=</span><span class="w"> </span><span class="s2">"&lt;Operation ID&gt;"</span><span class="w">
</span><span class="n">Start-MonitoringActionplanInstanceToComplete</span><span class="w"> </span><span class="nt">-actionPlanInstanceID</span><span class="w"> </span><span class="nv">$ID</span><span class="w">
</span></code></pre></div>        </div>
      </li>
      <li>Once the node has been added, the orchestrator begins rebalancing the storage pool. You can monitor the progress of this process using:
        <div class="language-powershell highlighter-rouge"><div class="highlight"><pre class="highlight"><code><span class="n">Get-VirtualDisk</span><span class="w"> </span><span class="o">|</span><span class="w"> </span><span class="n">Get-StorageJob</span><span class="w">
</span></code></pre></div>        </div>
      </li>
      <li>If the rebalancing is complete, the above command will return no output.</li>
    </ul>
  </li>
  <li><strong>Sync the Node with Azure</strong>:
    <ul>
      <li>The new node will appear in the Azure portal within a few hours. To expedite this, you can manually sync:
        <div class="language-powershell highlighter-rouge"><div class="highlight"><pre class="highlight"><code><span class="n">Sync-AzureStackHCI</span><span class="w">
</span></code></pre></div>        </div>
      </li>
    </ul>
  </li>
</ol>

<h4 id="supported-scenarios">Supported Scenarios</h4>

<p>Azure Local supports adding nodes across various scenarios:</p>
<ul>
  <li><strong>Single-node to two-node</strong>: Transitioning from a single-node to a two-node system requires configuring a witness for resiliency.</li>
  <li><strong>Two-node to three-node</strong>: In this scenario, storage resiliency shifts from a two-way mirror to a three-way mirror.</li>
  <li><strong>Three-node to N-node</strong>: Supports scaling up to 16 nodes while maintaining a three-way mirror resiliency.</li>
</ul>

<h4 id="important-considerations">Important Considerations</h4>

<ul>
  <li><strong>Manual Adjustments</strong>: If custom storage IPs are used, these must be assigned manually to the new node’s network adapters after it’s added.</li>
  <li><strong>Recovery Scenarios</strong>: If the operation partially succeeds or fails, you can use the orchestrator to rerun the operation or repair the node if needed.</li>
  <li><strong>Hardware Validation</strong>: The system will block the operation if the new node doesn’t meet storage requirements, but CPU and memory discrepancies will only generate warnings.</li>
</ul>

<h3 id="add-storage">Add Storage</h3>

<p>Expanding your storage capacity in Azure Local is an essential step to accommodate growing workloads. This process, often called <strong>scaling up</strong>, involves adding drives to your nodes to increase storage capacity and, in some cases, improve performance. Azure Local relies on <strong>Storage Spaces Direct (S2D)</strong> for storage management, which simplifies the process by automatically detecting and integrating new drives. Based on <a href="https://learn.microsoft.com/en-us/windows-server/storage/storage-spaces/add-nodes#adding-drives">Microsoft’s documentation</a>, here’s how to add storage drives to your Azure Local cluster.</p>

<h4 id="overview-of-adding-drives">Overview of Adding Drives</h4>

<p>Adding drives enables you to scale your Azure Local instance without adding new servers. Here’s what to keep in mind:</p>
<ul>
  <li><strong>Uniformity</strong>: It’s highly recommended that all nodes have identical storage configurations to ensure consistency and performance.</li>
  <li><strong>Dynamic Integration</strong>: Once new drives are connected and discovered by Windows, they are automatically pooled by S2D and the data is rebalanced across the storage pool.</li>
</ul>

<h4 id="key-steps-to-add-storage">Key Steps to Add Storage</h4>

<ol>
  <li><strong>Physically Install Drives</strong>:
    <ul>
      <li>Insert the new drives into the available slots in each server.</li>
      <li>Ensure that the drives are securely connected and meet the system’s hardware requirements.</li>
    </ul>
  </li>
  <li><strong>Verify Drive Detection</strong>:
    <ul>
      <li>Use the following PowerShell command to ensure that the new drives are detected and available for pooling:
        <div class="language-powershell highlighter-rouge"><div class="highlight"><pre class="highlight"><code><span class="n">Get-PhysicalDisk</span><span class="w"> </span><span class="o">|</span><span class="w"> </span><span class="n">Select</span><span class="w"> </span><span class="nx">SerialNumber</span><span class="p">,</span><span class="w"> </span><span class="nx">CanPool</span><span class="p">,</span><span class="w"> </span><span class="nx">CannotPoolReason</span><span class="w">
</span></code></pre></div>        </div>
      </li>
      <li>Look for drives where <code class="language-plaintext highlighter-rouge">CanPool = True</code>. If <code class="language-plaintext highlighter-rouge">CanPool = False</code>, check the <code class="language-plaintext highlighter-rouge">CannotPoolReason</code> property to identify the issue.</li>
    </ul>
  </li>
  <li><strong>Automatic Pooling</strong>:
    <ul>
      <li>If your system has only one storage pool, S2D will automatically claim eligible drives, add them to the storage pool, and begin redistributing volumes across the drives.</li>
      <li>If the drives are not automatically claimed, ensure that the system has detected them by manually scanning for hardware changes in <strong>Device Manager</strong> or using the following PowerShell command:
        <div class="language-powershell highlighter-rouge"><div class="highlight"><pre class="highlight"><code><span class="n">Get-Disk</span><span class="w"> </span><span class="o">|</span><span class="w"> </span><span class="n">Where-Object</span><span class="w"> </span><span class="nx">IsOffline</span><span class="w"> </span><span class="o">-eq</span><span class="w"> </span><span class="bp">$true</span><span class="w"> </span><span class="o">|</span><span class="w"> </span><span class="n">Set-Disk</span><span class="w"> </span><span class="nt">-IsOffline</span><span class="w"> </span><span class="bp">$false</span><span class="w">
</span></code></pre></div>        </div>
      </li>
    </ul>
  </li>
  <li><strong>Reset Drives with Old Metadata</strong>:
    <ul>
      <li>If the new drives contain old data or metadata, reset them using the <code class="language-plaintext highlighter-rouge">Reset-PhysicalDisk</code> cmdlet:
        <div class="language-powershell highlighter-rouge"><div class="highlight"><pre class="highlight"><code><span class="n">Reset-PhysicalDisk</span><span class="w"> </span><span class="nt">-FriendlyName</span><span class="w"> </span><span class="s2">"&lt;DriveFriendlyName&gt;"</span><span class="w">
</span></code></pre></div>        </div>
      </li>
    </ul>
  </li>
  <li><strong>Manual Pooling for Multiple Pools</strong>:
    <ul>
      <li>If you’ve configured multiple pools, manually add the drives to the desired pool using the <code class="language-plaintext highlighter-rouge">Add-PhysicalDisk</code> cmdlet:
        <div class="language-powershell highlighter-rouge"><div class="highlight"><pre class="highlight"><code><span class="n">Get-PhysicalDisk</span><span class="w"> </span><span class="o">|</span><span class="w"> </span><span class="n">Where-Object</span><span class="w"> </span><span class="nx">CanPool</span><span class="w"> </span><span class="o">-eq</span><span class="w"> </span><span class="bp">$true</span><span class="w"> </span><span class="o">|</span><span class="w"> </span><span class="n">Add-PhysicalDisk</span><span class="w"> </span><span class="nt">-StoragePoolFriendlyName</span><span class="w"> </span><span class="s2">"&lt;PoolName&gt;"</span><span class="w">
</span></code></pre></div>        </div>
      </li>
    </ul>
  </li>
</ol>

<h4 id="drive-optimization">Drive Optimization</h4>

<p>After adding drives, data redistribution may become uneven across the pool. S2D automatically optimizes drive usage 15 minutes after new drives are added, using background operations to rebalance the data. This ensures even distribution and prevents certain drives from filling up while others remain underutilized.</p>

<ul>
  <li><strong>Monitor Optimization Progress</strong>: Use the following command to monitor the progress of optimization jobs:
    <div class="language-powershell highlighter-rouge"><div class="highlight"><pre class="highlight"><code><span class="n">Get-StorageJob</span><span class="w">
</span></code></pre></div>    </div>
  </li>
  <li><strong>Manually Trigger Optimization</strong>: If needed, you can manually optimize the storage pool using:
    <div class="language-powershell highlighter-rouge"><div class="highlight"><pre class="highlight"><code><span class="n">Get-StoragePool</span><span class="w"> </span><span class="s2">"&lt;PoolName&gt;"</span><span class="w"> </span><span class="o">|</span><span class="w"> </span><span class="n">Optimize-StoragePool</span><span class="w">
</span></code></pre></div>    </div>
    <h4 id="important-considerations-1">Important Considerations</h4>
  </li>
  <li><strong>Storage Pool Resiliency</strong>: While new drives are integrated seamlessly, ensure the resiliency settings of your existing volumes align with your storage requirements. Adjustments to resiliency settings are outside the scope of this guide.</li>
  <li><strong>Background Operations</strong>: Rebalancing is a low-priority task that can take hours or even days to complete, depending on the size and number of drives in your cluster.</li>
</ul>

<h3 id="repair-a-node--extensions">Repair a Node &amp; Extensions</h3>

<p>In any Azure Local deployment, hardware failures or inconsistent extension states are inevitable over time. To avoid such scenarios, I will provide you with a detailed guide based on <a href="https://learn.microsoft.com/en-us/azure/azure-local/manage/repair-server">Microsoft’s documentation</a> and my personal experience.</p>

<h4 id="repair-a-node">Repair a Node</h4>

<p>Repairing a node involves bringing a faulty or damaged node back into the system with its original configuration and functionality. This can include hardware replacement, reimaging, or re-registering the node with Azure Arc.</p>

<p><img src="/assets/img/post/2025-01-25-azure-local-lifecycle/repair-node-workflow.png" alt="Repair node Workflow" /></p>

<h5 id="key-steps-to-repair-a-node">Key Steps to Repair a Node</h5>

<ol>
  <li><strong>Prepare the Node for Repair</strong>:
    <ul>
      <li>If possible, shut down the faulty node gracefully. Depending on the node’s state, this may not always be feasible.</li>
      <li>Reimage the node with the Azure Local Operating System (version 23H2) and ensure all required drivers are installed.</li>
      <li>If custom storage IPs were used during deployment, manually assign the appropriate IPs to the storage network adapters after reimaging.</li>
    </ul>
  </li>
  <li><strong>Register the Node with Azure Arc</strong>:
    <ul>
      <li>Use the same parameters (e.g., Resource Group name, Region, Subscription, Tenant) as the existing nodes.</li>
      <li>Assign the following permissions to the repaired node:
        <ul>
          <li><strong>Azure Local Device Management Role</strong></li>
          <li><strong>Key Vault Secrets User</strong></li>
        </ul>
      </li>
    </ul>
  </li>
  <li><strong>Run the Repair-Server Command</strong>:
    <ul>
      <li>On an existing cluster node, sign in with domain credentials (e.g., <code class="language-plaintext highlighter-rouge">AzureStackLCMUser</code>) and execute the following PowerShell commands:
        <ul>
          <li>(For versions prior to 2405.3) Clean up conflicting files:
            <div class="language-powershell highlighter-rouge"><div class="highlight"><pre class="highlight"><code><span class="n">Get-ChildItem</span><span class="w"> </span><span class="nt">-Path</span><span class="w"> </span><span class="s2">"</span><span class="nv">$</span><span class="nn">env</span><span class="p">:</span><span class="nv">SystemDrive</span><span class="s2">\NugetStore"</span><span class="w"> </span><span class="nt">-Exclude</span><span class="w"> </span><span class="nx">Microsoft.AzureStack.Solution.LCMControllerWinService</span><span class="o">*</span><span class="p">,</span><span class="nx">Microsoft.AzureStack.Role.Deployment.Service</span><span class="o">*</span><span class="w"> </span><span class="o">|</span><span class="w"> </span><span class="n">Remove-Item</span><span class="w"> </span><span class="nt">-Recurse</span><span class="w"> </span><span class="nt">-Force</span><span class="w">
</span></code></pre></div>            </div>
          </li>
          <li>Run the repair operation:
            <div class="language-powershell highlighter-rouge"><div class="highlight"><pre class="highlight"><code><span class="nv">$Cred</span><span class="w"> </span><span class="o">=</span><span class="w"> </span><span class="n">Get-Credential</span><span class="w">
</span><span class="nx">Repair-Server</span><span class="w"> </span><span class="nt">-Name</span><span class="w"> </span><span class="s2">"&lt;Name of the new node&gt;"</span><span class="w"> </span><span class="nt">-LocalAdminCredential</span><span class="w"> </span><span class="nv">$Cred</span><span class="w">
</span></code></pre></div>            </div>
            <p>Replace <code class="language-plaintext highlighter-rouge">&lt;Name of the new node&gt;</code> with the node’s NetBIOS name.</p>
          </li>
        </ul>
      </li>
      <li>Make a note of the <strong>Operation ID</strong> provided in the output for monitoring purposes.</li>
    </ul>
  </li>
  <li><strong>Monitor the Repair Progress</strong>:
    <ul>
      <li>Use the following command to monitor the operation’s progress:
        <div class="language-powershell highlighter-rouge"><div class="highlight"><pre class="highlight"><code><span class="nv">$ID</span><span class="w"> </span><span class="o">=</span><span class="w"> </span><span class="s2">"&lt;Operation ID&gt;"</span><span class="w">
</span><span class="n">Start-MonitoringActionplanInstanceToComplete</span><span class="w"> </span><span class="nt">-actionPlanInstanceID</span><span class="w"> </span><span class="nv">$ID</span><span class="w">
</span></code></pre></div>        </div>
      </li>
      <li>Once the repair is complete, storage rebalancing will occur automatically in the background. Monitor this using:
        <div class="language-powershell highlighter-rouge"><div class="highlight"><pre class="highlight"><code><span class="n">Get-VirtualDisk</span><span class="w"> </span><span class="o">|</span><span class="w"> </span><span class="n">Get-StorageJob</span><span class="w">
</span></code></pre></div>        </div>
      </li>
      <li>If no output is returned, the rebalancing process is complete.</li>
    </ul>
  </li>
  <li><strong>Recovery Scenarios</strong>:
    <ul>
      <li>If the repair operation fails, you can retry it using:
        <div class="language-powershell highlighter-rouge"><div class="highlight"><pre class="highlight"><code><span class="n">Repair-Server</span><span class="w"> </span><span class="nt">-Rerun</span><span class="w">
</span></code></pre></div>        </div>
      </li>
      <li>If the operation succeeds partially but a fresh operating system install is required, the orchestrator will handle the reconfiguration.</li>
    </ul>
  </li>
</ol>

<h4 id="repair-extensions">Repair Extensions</h4>

<p>In addition to repairing nodes, maintaining the health of extensions is equally critical.</p>

<p>To simplify the detection and repair of extensions, I created a PowerShell script that automates the process. This script:</p>
<ul>
  <li>Detects whether the necessary extensions for Azure Local are installed and functional.</li>
  <li>Repairs or reinstalls extensions that are in an inconsistent state.</li>
</ul>

<p>You can find the script on my GitHub repository: <a href="https://github.com/schmittnieto/AzSHCI/blob/main/scripts/01Lab/03_TroubleshootingExtensions.ps1">Troubleshooting Extensions Script</a>.</p>

<h3 id="secret-rotation">Secret Rotation</h3>

<p>Although <strong>secret rotation</strong> isn’t strictly part of an upgrade process, it is deeply tied to <strong>Lifecycle Management</strong>. Since we’ve already covered topics like node and extension repairs in this section, I’ve taken the liberty of including secret rotation as well. Ensuring that administrative credentials and service principal secrets are periodically updated is a critical security measure for any Azure Local deployment. Based on <a href="https://learn.microsoft.com/en-us/azure/azure-local/manage/manage-secrets-rotation">Microsoft’s documentation</a>, here’s how to manage secret rotation.</p>

<h4 id="rotating-the-deployment-user-password">Rotating the Deployment User Password</h4>

<p>The deployment user, commonly referred to as <code class="language-plaintext highlighter-rouge">AzureStackLCMUser</code>, is responsible for managing your Azure Local environment. Rotating this password can be done with the <code class="language-plaintext highlighter-rouge">Set-AzureStackLCMUserPassword</code> cmdlet.</p>

<p><strong>Steps to Change the Deployment User Password:</strong></p>

<ol>
  <li>Open a PowerShell session and set the old and new passwords:
    <div class="language-powershell highlighter-rouge"><div class="highlight"><pre class="highlight"><code><span class="nv">$old_pass</span><span class="w"> </span><span class="o">=</span><span class="w"> </span><span class="n">ConvertTo-SecureString</span><span class="w"> </span><span class="s2">"&lt;Old password&gt;"</span><span class="w"> </span><span class="nt">-AsPlainText</span><span class="w"> </span><span class="nt">-Force</span><span class="w">
</span><span class="nv">$new_pass</span><span class="w"> </span><span class="o">=</span><span class="w"> </span><span class="n">ConvertTo-SecureString</span><span class="w"> </span><span class="s2">"&lt;New password&gt;"</span><span class="w"> </span><span class="nt">-AsPlainText</span><span class="w"> </span><span class="nt">-Force</span><span class="w">
</span></code></pre></div>    </div>
  </li>
  <li>Run the <code class="language-plaintext highlighter-rouge">Set-AzureStackLCMUserPassword</code> cmdlet to update the password:
    <div class="language-powershell highlighter-rouge"><div class="highlight"><pre class="highlight"><code><span class="n">Set-AzureStackLCMUserPassword</span><span class="w"> </span><span class="nt">-Identity</span><span class="w"> </span><span class="nx">mgmt</span><span class="w"> </span><span class="nt">-OldPassword</span><span class="w"> </span><span class="nv">$old_pass</span><span class="w"> </span><span class="nt">-NewPassword</span><span class="w"> </span><span class="nv">$new_pass</span><span class="w"> </span><span class="nt">-UpdateAD</span><span class="w">
</span></code></pre></div>    </div>
  </li>
  <li>After executing the command, you’ll see the following warning:
    <blockquote>
      <p>“The current session will be unresponsive once this command completes. You will have to log in again with updated credentials.”</p>
    </blockquote>

    <p>Close the session and log in again with the updated password.</p>
  </li>
</ol>

<h4 id="updating-the-deployment-service-principal-if-you-upgrade-from-2306">Updating the Deployment Service Principal (if you upgrade from 2306)</h4>

<p>If you upgraded from Azure Local 2306 to 23H2, you may need to rotate the <strong>deployment service principal</strong> used during the initial deployment.</p>

<p><strong>Steps to Update the Service Principal:</strong></p>

<ol>
  <li>Log into <strong>Microsoft Entra ID</strong> (Azure AD) and locate the service principal used for the deployment.</li>
  <li>Create a new client secret for the service principal and make a note of:
    <ul>
      <li>The <strong>App ID</strong> for the existing service principal.</li>
      <li>The <strong>new client secret</strong>.</li>
    </ul>
  </li>
  <li>On one of your Azure Local machines, sign in to Azure using PowerShell:
    <div class="language-powershell highlighter-rouge"><div class="highlight"><pre class="highlight"><code><span class="n">Connect-AzAccount</span><span class="w">
</span><span class="nx">Set-AzContext</span><span class="w"> </span><span class="nt">-Subscription</span><span class="w"> </span><span class="err">&lt;</span><span class="nx">Subscription</span><span class="w"> </span><span class="nx">ID</span><span class="err">&gt;</span><span class="w">
</span></code></pre></div>    </div>
  </li>
  <li>Update the service principal name:
    <div class="language-powershell highlighter-rouge"><div class="highlight"><pre class="highlight"><code><span class="n">cd</span><span class="w"> </span><span class="s2">"C:\Program Files\WindowsPowerShell\Modules\Microsoft.AS.ArcIntegration"</span><span class="w">
</span><span class="n">Import-Module</span><span class="w"> </span><span class="nx">Microsoft.AS.ArcIntegration.psm1</span><span class="w"> </span><span class="nt">-Force</span><span class="w">
</span><span class="nv">$secretText</span><span class="w"> </span><span class="o">=</span><span class="w"> </span><span class="n">ConvertTo-SecureString</span><span class="w"> </span><span class="nt">-String</span><span class="w"> </span><span class="s2">"&lt;client secret&gt;"</span><span class="w"> </span><span class="nt">-AsPlainText</span><span class="w"> </span><span class="nt">-Force</span><span class="w">
</span><span class="n">Update-ServicePrincipalName</span><span class="w"> </span><span class="nt">-AppId</span><span class="w"> </span><span class="err">&lt;</span><span class="nx">AppID</span><span class="err">&gt;</span><span class="w"> </span><span class="nt">-SecureSecretText</span><span class="w"> </span><span class="nv">$secretText</span><span class="w">
</span></code></pre></div>    </div>
  </li>
</ol>

<h4 id="changing-the-azure-resource-bridge-arb-service-principal-secret">Changing the Azure Resource Bridge (ARB) Service Principal Secret</h4>

<p>The <strong>Azure Resource Bridge</strong> (ARB) uses a service principal to interact with Azure. Rotating its secret ensures secure connectivity between your on-premises infrastructure and Azure.</p>

<p><strong>Steps to Change the ARB Service Principal Secret:</strong></p>

<ol>
  <li>Log into <strong>Microsoft Entra ID</strong> and locate the ARB service principal. The name typically follows this format: <code class="language-plaintext highlighter-rouge">ClusterNameXX.arb</code>.</li>
  <li>Create a new client secret for the service principal and make a note of:
    <ul>
      <li>The <strong>App ID</strong>.</li>
      <li>The <strong>new client secret</strong>.</li>
    </ul>
  </li>
  <li>On one of your Azure Local machines, run the following PowerShell command:
    <div class="language-powershell highlighter-rouge"><div class="highlight"><pre class="highlight"><code><span class="nv">$SubscriptionId</span><span class="w"> </span><span class="o">=</span><span class="w"> </span><span class="s2">"&lt;Subscription ID&gt;"</span><span class="w">
</span><span class="nv">$TenantId</span><span class="w"> </span><span class="o">=</span><span class="w"> </span><span class="s2">"&lt;Tenant ID&gt;"</span><span class="w">
</span><span class="nv">$AppId</span><span class="w"> </span><span class="o">=</span><span class="w"> </span><span class="s2">"&lt;Application ID&gt;"</span><span class="w">
</span><span class="nv">$secretText</span><span class="w"> </span><span class="o">=</span><span class="w"> </span><span class="s2">"&lt;Client secret&gt;"</span><span class="w">
</span><span class="nv">$NewPassword</span><span class="w"> </span><span class="o">=</span><span class="w"> </span><span class="n">ConvertTo-SecureString</span><span class="w"> </span><span class="nt">-String</span><span class="w"> </span><span class="nv">$secretText</span><span class="w"> </span><span class="nt">-AsPlainText</span><span class="w"> </span><span class="nt">-Force</span><span class="w">
</span><span class="n">Set-AzureStackRPSpCredential</span><span class="w"> </span><span class="nt">-SubscriptionID</span><span class="w"> </span><span class="nv">$SubscriptionId</span><span class="w"> </span><span class="nt">-TenantID</span><span class="w"> </span><span class="nv">$TenantId</span><span class="w"> </span><span class="nt">-AppId</span><span class="w"> </span><span class="nv">$AppId</span><span class="w"> </span><span class="nt">-NewPassword</span><span class="w"> </span><span class="nv">$NewPassword</span><span class="w">
</span></code></pre></div>    </div>
  </li>
</ol>

<h3 id="upgrade-from-azure-stack-hci-22h2">Upgrade from Azure Stack HCI 22H2</h3>

<p>The transition from <strong>Azure Stack HCI 22H2</strong> to <strong>Azure Local 23H2</strong> is a significant upgrade that ensures your system remains secure, supported, and up to date with the latest features. Although I haven’t personally performed this upgrade yet (for better or worse), I’ve followed multiple discussions about this topic in the <a href="https://aka.ms/azurelocal-slack">Azure Local Slack channel</a>. Based on these threads and <a href="https://learn.microsoft.com/en-us/azure/azure-local/upgrade/about-upgrades-23h2">Microsoft’s documentation</a>, here’s a guide to the process.</p>

<p>It’s important to note that <strong>support for 22H2 ends in May 2025</strong>, so I highly recommend upgrading your system sooner rather than later.</p>

<h4 id="supported-workloads-and-configurations">Supported Workloads and Configurations</h4>

<p>Before beginning the upgrade, keep the following points in mind:</p>

<ul>
  <li>Consult your hardware OEM before you upgrade Azure Local. Validate that your OEM supports the version and the upgrade.</li>
  <li>Upgrading your Azure Local from version 22H2 is only supported for regions where Azure Local, version 23H2 is available. For more information, see <a href="https://learn.microsoft.com/en-us/azure/azure-local/concepts/system-requirements-23h2#azure-requirements">Azure Local region availability</a>.</li>
  <li>Use of 3rd party tools to install upgrades is not supported.</li>
</ul>

<p>Azure Local upgrade supports the following services and workloads:</p>

<table>
  <thead>
    <tr>
      <th>Workload/Configuration</th>
      <th>Currently Supported?</th>
      <th>Notes</th>
    </tr>
  </thead>
  <tbody>
    <tr>
      <td><strong>Azure Kubernetes Service (AKS)</strong></td>
      <td>See notes</td>
      <td>Kubernetes versions are incompatible between Azure Local, version 22H2, and version 23H2.<br /> Remove AKS and all Azure Arc-enabled settings before applying the solution upgrade.</td>
    </tr>
    <tr>
      <td><strong>Arc VMs</strong></td>
      <td>See notes</td>
      <td>Preview versions of Arc VMs cannot be upgraded.</td>
    </tr>
    <tr>
      <td><strong>Stretched Clusters</strong></td>
      <td>Yes</td>
      <td>You must upgrade to Azure Stack HCI OS 23H2 to maintain support for stretched clusters.<br /> <strong>The solution upgrade is not applicable for stretched clusters</strong>.</td>
    </tr>
    <tr>
      <td><strong>SCVMM (System Center)</strong></td>
      <td>Yes</td>
      <td>Supported for Azure Local instances managed by SCVMM 2025.</td>
    </tr>
    <tr>
      <td><strong>Azure Local 22H2SP</strong></td>
      <td>No</td>
      <td>Upgrades from 22H2 Supplemental Package clusters are not supported.</td>
    </tr>
  </tbody>
</table>

<h4 id="high-level-workflow-for-the-os-upgrade">High-Level Workflow for the OS Upgrade</h4>

<p>The upgrade process follows these major steps:</p>
<ol>
  <li><strong>Complete prerequisites</strong>.</li>
  <li><strong>Connect to Azure Local 22H2</strong>.</li>
  <li><strong>Install the new OS using PowerShell</strong>.</li>
  <li><strong>Check the status of updates</strong>.</li>
  <li><strong>Perform post-OS upgrade steps</strong>.</li>
  <li><strong>Validate readiness for the solution upgrade</strong>.</li>
  <li><strong>Install the solution upgrade</strong>.</li>
</ol>

<h4 id="step-1-complete-prerequisites">Step 1: Complete Prerequisites</h4>

<p>Before starting the upgrade:</p>
<ul>
  <li>Ensure your Azure Local instance is running <strong>version 22H2</strong>.</li>
  <li>Verify that the system is registered in Azure and all machines are healthy and online.</li>
  <li>Obtain the Azure Local 23H2 OS update. This is available via:
    <ul>
      <li><strong>Windows Update</strong>, or</li>
      <li>A downloadable ISO from the Azure portal (required if the system lacks internet connectivity).</li>
    </ul>
  </li>
  <li>Confirm that the client used for the upgrade has <strong>PowerShell 5.0 or later</strong> installed.</li>
</ul>

<h4 id="step-2-connect-to-azure-local">Step 2: Connect to Azure Local</h4>

<ol>
  <li>Open a PowerShell session on your client machine as Administrator.</li>
  <li>Establish a remote session to one of the machines in your Azure Local instance:
    <div class="language-powershell highlighter-rouge"><div class="highlight"><pre class="highlight"><code><span class="nv">$cred</span><span class="w"> </span><span class="o">=</span><span class="w"> </span><span class="n">Get-Credential</span><span class="w">
</span><span class="nx">Enter-PSSession</span><span class="w"> </span><span class="nt">-ComputerName</span><span class="w"> </span><span class="s2">"&lt;Computer IP&gt;"</span><span class="w"> </span><span class="nt">-Credential</span><span class="w"> </span><span class="nv">$cred</span><span class="w">
</span></code></pre></div>    </div>
  </li>
</ol>

<p>Example output:</p>
<div class="language-plaintext highlighter-rouge"><div class="highlight"><pre class="highlight"><code>PS C:\Users\Administrator&gt; $cred = Get-Credential
cmdlet Get-Credential at command pipeline position 1
Supply values for the following parameters:
Credential
PS C:\Users\Administrator&gt; Enter-PSSession -ComputerName "100.100.100.10" -Credential $cred
[100.100.100.10]: PS C:\Users\Administrator\Documents&gt;
</code></pre></div></div>

<h4 id="step-3-install-the-new-os-using-powershell">Step 3: Install the New OS Using PowerShell</h4>

<p>To perform the upgrade, follow these steps:</p>

<ol>
  <li><strong>Prepare the system</strong>:
    <ul>
      <li>Enable PowerShell remoting:
        <div class="language-powershell highlighter-rouge"><div class="highlight"><pre class="highlight"><code><span class="n">Set-WSManQuickConfig</span><span class="w">
</span><span class="nx">Enable-PSRemoting</span><span class="w">
</span></code></pre></div>        </div>
      </li>
      <li>Verify that the Cluster-Aware Updating (CAU) role is installed:
        <div class="language-powershell highlighter-rouge"><div class="highlight"><pre class="highlight"><code><span class="n">Test-CauSetup</span><span class="w"> </span><span class="nt">-ClusterName</span><span class="w"> </span><span class="err">&lt;</span><span class="nx">SystemName</span><span class="err">&gt;</span><span class="w">
</span></code></pre></div>        </div>
      </li>
      <li>Validate cluster health:
        <div class="language-powershell highlighter-rouge"><div class="highlight"><pre class="highlight"><code><span class="n">Test-Cluster</span><span class="w">
</span></code></pre></div>        </div>
      </li>
    </ul>
  </li>
  <li><strong>Check for available updates</strong>:
    <div class="language-powershell highlighter-rouge"><div class="highlight"><pre class="highlight"><code><span class="n">Invoke-CauScan</span><span class="w"> </span><span class="nt">-ClusterName</span><span class="w"> </span><span class="err">&lt;</span><span class="nx">SystemName</span><span class="err">&gt;</span><span class="w"> </span><span class="nt">-CauPluginName</span><span class="w"> </span><span class="s2">"Microsoft.RollingUpgradePlugin"</span><span class="w"> </span><span class="nt">-CauPluginArguments</span><span class="w"> </span><span class="p">@{</span><span class="s1">'WuConnected'</span><span class="o">=</span><span class="s1">'true'</span><span class="p">;}</span><span class="w"> </span><span class="nt">-Verbose</span><span class="w"> </span><span class="o">|</span><span class="w"> </span><span class="n">fl</span><span class="w"> </span><span class="o">*</span><span class="w">
</span></code></pre></div>    </div>

    <p>Ensure that all machines in the system are offered the same feature update.</p>
  </li>
  <li><strong>Install updates</strong>:
    <ul>
      <li>Run the upgrade using Cluster-Aware Updating:
        <div class="language-powershell highlighter-rouge"><div class="highlight"><pre class="highlight"><code><span class="n">Invoke-CauRun</span><span class="w"> </span><span class="nt">-ClusterName</span><span class="w"> </span><span class="err">&lt;</span><span class="nx">SystemName</span><span class="err">&gt;</span><span class="w"> </span><span class="nt">-CauPluginName</span><span class="w"> </span><span class="s2">"Microsoft.RollingUpgradePlugin"</span><span class="w"> </span><span class="nt">-CauPluginArguments</span><span class="w"> </span><span class="p">@{</span><span class="s1">'WuConnected'</span><span class="o">=</span><span class="s1">'true'</span><span class="p">;}</span><span class="w"> </span><span class="nt">-Verbose</span><span class="w"> </span><span class="nt">-EnableFirewallRules</span><span class="w"> </span><span class="nt">-Force</span><span class="w">
</span></code></pre></div>        </div>
      </li>
      <li>If using local media (ISO):
        <div class="language-powershell highlighter-rouge"><div class="highlight"><pre class="highlight"><code><span class="n">Invoke-CauRun</span><span class="w"> </span><span class="nt">-ClusterName</span><span class="w"> </span><span class="err">&lt;</span><span class="nx">SystemName</span><span class="err">&gt;</span><span class="w"> </span><span class="nt">-CauPluginName</span><span class="w"> </span><span class="s2">"Microsoft.RollingUpgradePlugin"</span><span class="w"> </span><span class="nt">-CauPluginArguments</span><span class="w"> </span><span class="p">@{</span><span class="w"> </span><span class="s1">'WuConnected'</span><span class="o">=</span><span class="s1">'false'</span><span class="p">;</span><span class="w"> </span><span class="s1">'PathToSetupMedia'</span><span class="o">=</span><span class="s1">'\\some\path\'</span><span class="p">;</span><span class="w"> </span><span class="s1">'UpdateClusterFunctionalLevel'</span><span class="o">=</span><span class="s1">'true'</span><span class="p">;</span><span class="w"> </span><span class="p">}</span><span class="w"> </span><span class="nt">-Force</span><span class="w">
</span></code></pre></div>        </div>
      </li>
    </ul>
  </li>
</ol>

<h4 id="step-4-check-the-status-of-the-update">Step 4: Check the Status of the Update</h4>

<p>You can monitor the progress of the update using:</p>
<div class="language-powershell highlighter-rouge"><div class="highlight"><pre class="highlight"><code><span class="n">Get-CauRun</span><span class="w"> </span><span class="nt">-ClusterName</span><span class="w"> </span><span class="err">&lt;</span><span class="nx">SystemName</span><span class="err">&gt;</span><span class="w">
</span></code></pre></div></div>

<p>Example output:</p>
<div class="language-plaintext highlighter-rouge"><div class="highlight"><pre class="highlight"><code>RunId                   : &lt;Run ID&gt;
RunStartTime            : 10/13/2024 1:35:39 PM
CurrentOrchestrator     : NODE1
NodeStatusNotifications : {
Node      : NODE1
Status    : Waiting
Timestamp : 10/13/2024 1:35:49 PM
}
NodeResults             : {
Node                     : NODE2
Status                   : Succeeded
ErrorRecordData          :
NumberOfSucceededUpdates : 0
NumberOfFailedUpdates    : 0
InstallResults           : Microsoft.ClusterAwareUpdating.UpdateInstallResult[]
}
</code></pre></div></div>

<h4 id="post-os-upgrade-steps">Post-OS Upgrade Steps</h4>

<p>Once the OS upgrade to version 23H2 is complete, you need to perform critical post-upgrade tasks to stabilize the system and enable new features.</p>

<ol>
  <li><strong>Upgrade Cluster Functional Level</strong>:
Upgrade the cluster functional level to enable new capabilities. Note that this step is irreversible:
    <div class="language-powershell highlighter-rouge"><div class="highlight"><pre class="highlight"><code><span class="n">Update-ClusterFunctionalLevel</span><span class="w">
</span></code></pre></div>    </div>
  </li>
  <li><strong>Upgrade Storage Pool</strong>:
Identify the storage pool and upgrade it:
    <div class="language-powershell highlighter-rouge"><div class="highlight"><pre class="highlight"><code><span class="n">Get-StoragePool</span><span class="w">
</span><span class="nx">Update-StoragePool</span><span class="w"> </span><span class="nt">-FriendlyName</span><span class="w"> </span><span class="s2">"S2D on hci-cluster1"</span><span class="w">
</span></code></pre></div>    </div>
  </li>
  <li><strong>Upgrade VM Configuration Levels</strong> (optional):
Stop each VM and update its configuration:
    <div class="language-powershell highlighter-rouge"><div class="highlight"><pre class="highlight"><code><span class="n">Update-VMVersion</span><span class="w"> </span><span class="nt">-Name</span><span class="w"> </span><span class="s2">"&lt;VMName&gt;"</span><span class="w">
</span></code></pre></div>    </div>
  </li>
  <li><strong>Validate the System</strong>:
Validate the cluster and check roles, VMs, and live migrations:
    <div class="language-powershell highlighter-rouge"><div class="highlight"><pre class="highlight"><code><span class="n">Test-Cluster</span><span class="w">
</span></code></pre></div>    </div>
  </li>
</ol>

<h4 id="install-and-enable-network-atc">Install and Enable Network ATC</h4>

<p><strong>Network ATC</strong> simplifies host networking by automating best practices and ensuring consistency. Follow these steps:</p>

<ol>
  <li><strong>Install Network ATC</strong>:
    <div class="language-powershell highlighter-rouge"><div class="highlight"><pre class="highlight"><code><span class="n">Install-WindowsFeature</span><span class="w"> </span><span class="nt">-Name</span><span class="w"> </span><span class="nx">NetworkATC</span><span class="w">
</span></code></pre></div>    </div>
  </li>
  <li><strong>Pause and Prepare a Node</strong>:
Suspend the node and remove any conflicting configurations, such as existing VMSwitch or NetQos policies:
    <div class="language-powershell highlighter-rouge"><div class="highlight"><pre class="highlight"><code><span class="n">Suspend-ClusterNode</span><span class="w">
</span><span class="nx">Get-VMSwitch</span><span class="w"> </span><span class="nt">-Name</span><span class="w"> </span><span class="s2">"&lt;VMSwitchName&gt;"</span><span class="w"> </span><span class="o">|</span><span class="w"> </span><span class="n">Remove-VMSwitch</span><span class="w"> </span><span class="nt">-Force</span><span class="w">
</span></code></pre></div>    </div>
  </li>
  <li><strong>Enable and Configure Intents</strong>:
Add intents for management, compute, and storage:
    <div class="language-powershell highlighter-rouge"><div class="highlight"><pre class="highlight"><code><span class="n">Add-NetIntent</span><span class="w"> </span><span class="nt">-Name</span><span class="w"> </span><span class="nx">MgmtComputeStorage</span><span class="w"> </span><span class="nt">-Management</span><span class="w"> </span><span class="nt">-Compute</span><span class="w"> </span><span class="nt">-Storage</span><span class="w"> </span><span class="nt">-AdapterName</span><span class="w"> </span><span class="nx">pNIC1</span><span class="p">,</span><span class="w"> </span><span class="nx">pNIC2</span><span class="w">
</span></code></pre></div>    </div>
  </li>
  <li><strong>Resume the Node</strong>:
After configuring the intents, resume the node:
    <div class="language-powershell highlighter-rouge"><div class="highlight"><pre class="highlight"><code><span class="n">Resume-ClusterNode</span><span class="w">
</span></code></pre></div>    </div>
  </li>
</ol>

<p>Repeat for all nodes in the system.</p>

<h4 id="validate-solution-upgrade-readiness">Validate Solution Upgrade Readiness</h4>

<p>Before proceeding with the solution upgrade, validate readiness using the Environment Checker:</p>

<ol>
  <li><strong>Install the Environment Checker</strong>:
    <div class="language-powershell highlighter-rouge"><div class="highlight"><pre class="highlight"><code><span class="n">Install-Module</span><span class="w"> </span><span class="nt">-Name</span><span class="w"> </span><span class="nx">AzStackHci.EnvironmentChecker</span><span class="w"> </span><span class="nt">-AllowClobber</span><span class="w">
</span></code></pre></div>    </div>
  </li>
  <li><strong>Run Validation</strong>:
    <div class="language-powershell highlighter-rouge"><div class="highlight"><pre class="highlight"><code><span class="n">Invoke-AzStackHciUpgradeValidation</span><span class="w">
</span></code></pre></div>    </div>
  </li>
  <li><strong>Address Issues</strong>:
Review and address any blocking or warning issues, such as BitLocker suspension, language settings, or storage space.</li>
</ol>

<h4 id="install-the-solution-upgrade">Install the Solution Upgrade</h4>

<p>Once the environment is validated, install the solution upgrade:</p>

<ol>
  <li>
    <p><strong>Initiate the Upgrade</strong>:
In the Azure portal, select the upgrade option in the Azure Local resource page and provide the necessary details (e.g., key vault, deployment account, IP range).</p>
  </li>
  <li>
    <p><strong>Monitor Progress</strong>:
Track the upgrade status under <strong>Settings &gt; Deployment</strong> in the Azure portal.</p>
  </li>
  <li>
    <p><strong>Verify Upgrade Success</strong>:
Check the resource group for all expected resources, such as Azure Arc machines, Arc Resource Bridge, and Key Vault.</p>
  </li>
</ol>

<p>After the solution upgrade:</p>
<ul>
  <li>Validate the system’s health.</li>
  <li>Update security settings and enable RDP if needed.</li>
  <li>Create workloads and storage paths for each volume.</li>
</ul>

<h2 id="conclusion">Conclusion</h2>

<p>Lifecycle Management in <strong>Azure Local</strong> is a multidimensional topic that involves updates, upgrades, repairs, and ongoing maintenance. By following the guidelines in this article, whether you’re <strong>adding new nodes</strong>, <strong>expanding storage</strong>, <strong>repairing extensions</strong>, or <strong>rotating secrets</strong>, you can ensure that your environment remains secure, stable, and ready for future needs.</p>

<p>Before carrying out <strong>any</strong> updates or upgrades, it’s crucial to stay informed about the latest release information and known issues for Azure Local 23H2. Microsoft regularly publishes:</p>

<ul>
  <li><a href="https://learn.microsoft.com/en-us/azure/azure-local/release-information-23h2">Azure Local 23H2 release information</a> which highlights new features, improvements, and security updates in each release train.
 <img src="/assets/img/post/2025-01-25-azure-local-lifecycle/release-trains.png" alt="Release Train" style="border: 2px solid grey;" /></li>
  <li><a href="https://learn.microsoft.com/en-us/azure/azure-local/known-issues-2411-1">Known issues for Azure Local 23H2</a> which provides a running list of critical issues, workarounds, and advisories to be aware of for each version.</li>
</ul>

<p>Spending a little time reviewing these resources prior to an update can save you a lot of hassle, minimize downtime, and ensure your system remains in a <strong>fully supported state</strong>. With solid preparation and the processes outlined here, you’ll be well-equipped to navigate the complexities of Azure Local Lifecycle Management.</p>

<p><strong>Happy upgrading!</strong></p>

<h2 id="additional-resources-and-references">Additional Resources and References</h2>

<p>Below is a table of all the links referenced in this article, along with a brief description for each:</p>

<table>
  <thead>
    <tr>
      <th>Link</th>
      <th>Description</th>
    </tr>
  </thead>
  <tbody>
    <tr>
      <td><a href="/blog/azure-stack-hci-day2">Azure Stack HCI Day 2 Operations</a></td>
      <td>My earlier discussion on <strong>Day 2 Operations</strong> and how Lifecycle Management fits into that broader framework.</td>
    </tr>
    <tr>
      <td><a href="https://learn.microsoft.com/en-us/azure/azure-local/update/about-updates-23h2">About updates for Azure Local 23H2</a></td>
      <td>Official Microsoft documentation on updating Azure Local 23H2, including key features and update workflow.</td>
    </tr>
    <tr>
      <td><a href="https://learn.microsoft.com/en-us/azure/azure-local/update/update-via-powershell-23h2">Update Azure Local via PowerShell</a></td>
      <td>Step-by-step guide to applying updates with <strong>PowerShell</strong>, suitable for both single-node and multi-node setups.</td>
    </tr>
    <tr>
      <td><a href="https://learn.microsoft.com/en-us/azure/azure-local/update/update-phases-23h2">Phases of Azure Local Updates</a></td>
      <td>Detailed breakdown of the <strong>Discovery, Readiness, and Installation</strong> phases for Azure Local updates.</td>
    </tr>
    <tr>
      <td><a href="https://learn.microsoft.com/en-us/azure/azure-local/update/solution-builder-extension">Solution Builder Extension (SBE)</a></td>
      <td>Explanation of SBE updates, including drivers, firmware, and advanced capabilities for Azure Local hardware.</td>
    </tr>
    <tr>
      <td><a href="https://github.com/DellGEOS/AzureLocalHOLs/tree/main/lab-guides/05-LifecycleManagerDeepDive">Lifecycle Manager Deep Dive by Jaromir</a></td>
      <td>In-depth look at Lifecycle Manager internals, sideloading SBE packages, and troubleshooting tips.</td>
    </tr>
    <tr>
      <td><a href="https://learn.microsoft.com/en-us/azure/azure-local/manage/arc-extension-management?tabs=azureportal">Azure Arc Extension Management</a></td>
      <td>How to install, upgrade, and manage Arc extensions on Azure Local, including automatic and manual upgrades.</td>
    </tr>
    <tr>
      <td><a href="https://learn.microsoft.com/en-us/azure/azure-local/manage/add-server">Add a Node to Azure Local</a></td>
      <td>Guidance on scaling your cluster by adding additional servers (nodes) to Azure Local.</td>
    </tr>
    <tr>
      <td><a href="https://learn.microsoft.com/en-us/windows-server/storage/storage-spaces/add-nodes#adding-drives">Adding Drives (Windows Server Storage)</a></td>
      <td>Official documentation on expanding storage capacity in a cluster using <strong>Storage Spaces Direct (S2D)</strong>.</td>
    </tr>
    <tr>
      <td><a href="https://learn.microsoft.com/en-us/azure/azure-local/manage/repair-server">Repair a Node in Azure Local</a></td>
      <td>Instructions on repairing a faulty node, from reimaging to re-registering with Azure Arc.</td>
    </tr>
    <tr>
      <td><a href="https://github.com/schmittnieto/AzSHCI/blob/main/scripts/01Lab/03_TroubleshootingExtensions.ps1">Troubleshooting Extensions Script</a></td>
      <td>My custom PowerShell script for detecting and repairing inconsistent or broken Azure Local extensions.</td>
    </tr>
    <tr>
      <td><a href="https://learn.microsoft.com/en-us/azure/azure-local/manage/manage-secrets-rotation">Manage Secrets Rotation</a></td>
      <td>Steps to rotate credentials and service principal secrets for Azure Local, maintaining system security.</td>
    </tr>
    <tr>
      <td><a href="https://learn.microsoft.com/en-us/azure/azure-local/upgrade/about-upgrades-23h2">Upgrade from Azure Stack HCI 22H2</a></td>
      <td>Overview of the <strong>22H2 to 23H2</strong> upgrade process, including prerequisites, supported scenarios, and workflows.</td>
    </tr>
    <tr>
      <td><a href="https://learn.microsoft.com/en-us/azure/azure-local/concepts/system-requirements-23h2#azure-requirements">Azure Local region availability</a></td>
      <td>Regions where Azure Local 23H2 is fully supported for deployments and upgrades.</td>
    </tr>
    <tr>
      <td><a href="https://learn.microsoft.com/en-us/azure/azure-local/release-information-23h2">Azure Local 23H2 Release Information</a></td>
      <td>Microsoft’s official release notes and update trains for Azure Local 23H2, including features and baselines.</td>
    </tr>
    <tr>
      <td><a href="https://learn.microsoft.com/en-us/azure/azure-local/known-issues-2411-1">Known Issues for Azure Local 23H2</a></td>
      <td>Continuously updated list of known issues, workarounds, and advisories for the current Azure Local release.</td>
    </tr>
  </tbody>
</table>]]></content><author><name>Cristian Schmitt Nieto</name></author><category term="Blog" /><category term="Chronicloud Series" /><category term="Azure Stack HCI" /><category term="Azure Local" /><summary type="html"><![CDATA[Learn about Lifecycle Management in Azure Local, including updates, upgrades, and repair processes to streamline hybrid infrastructure operations.]]></summary></entry></feed>