This article was created before Azure Stack HCI was renamed to Azure Local (link) in November 2024, which is why some references or hardcoded URLs may still point to Azure Stack HCI. However, the content has been updated accordingly, and if you find any errors, I would greatly appreciate it if you could report them either through the comment function or by emailing blog@schmitt-nieto.com
Azure Virtual Desktop on Azure Local
Welcome back to the Chronicloud Series! Continuing our journey with Azure Local, today we’re diving into deploying Azure Virtual Desktop (AVD) on Azure Local. This article builds upon our previous ones, Azure Local DemoLab, Azure Local Day 2 Operations, and Azure Local VM Deployment. If you’ve followed those, you’re all set for what’s next!
In this installment, we’ll explore how to set up AVD on Azure Local. While we’ll touch on the essentials here, I’m planning a more in-depth series on AVD early next year, where we’ll unpack all the concepts and features extensively. Until now, I haven’t seen many blogs detailing the technical steps for provisioning AVD on Azure Local, which inspired me to document the process for you.
So, let’s get started!
Prerequisites, Limitations, and Licenses
Before we dive in, it’s important to understand some prerequisites and limitations of the solution as outlined here. I’ve combined them for clarity.
Active Directory
- Active Directory Domain Services Required: Currently, only Active Directory Domain Services (AD DS) can be used to join Session Hosts. This means Entra ID Only isn’t supported for this solution.
- Synchronization with Tenant: It’s recommended to use an Active Directory that’s synchronized with the Entra ID tenant where your Azure Local Cluster is registered.
- Separate Domains Possible: This doesn’t necessarily mean the cluster and AVD have to be in the same AD DS. You can have an isolated AD for the cluster and use your company’s usual AD for AVD, as long as they share the same Entra ID tenant.
License Requirements for AVD
To use AVD on Azure Local, you’ll need the same licenses required for AVD in Azure Public, as detailed here.
For AVD on Windows 10/11:
- Microsoft 365 E3, E5, A3, A5, F3, Business Premium, Student Use Benefit
- Windows Enterprise E3, E5
- Windows Education A3, A5
- Windows VDA per user
For Windows Server 2016/2019/2022/2025:
- Remote Desktop Services (RDS) Client Access License (CAL) with Software Assurance (per-user or per-device)
- RDS User Subscription Licenses
Additionally, there’s a cost of $0.01 per virtual core per hour for each AVD Session Host. This detail is somewhat hidden but can be found here under the “Pricing overview > Azure Virtual Desktop for Azure Local” section.
Host Pools
Each host pool must only contain session hosts on Azure or on Azure Local. You can’t mix session hosts on Azure and on Azure Local in the same host pool.
Architecture
Let’s take a look at the architecture that fits our DemoLab deployment.
AVD Architecture in DemoLab
In this architecture you can see on the left side the elements provided in the Host (my Dell XPS 15 9530 Laptop) and on the right side the elements that will be used/configured in Azure.
- VMs on the Host (Provisioned via AzSHCI DemoLab):
- DC: A Domain Controller (Windows Server 2025) for both Azure Local and AVD.
- CLUSTER: An Azure Local Cluster containing two VMs:
- VM1: Synchronizes the domain with Entra ID.
- AVD1: The Session Host, which we’ll provision from the Azure Portal.
I did not want to complicate the architecture too much because of the loss of functionality. I do not exclude in the future when I start the AVD saga, to share my complete architecture diagram which is based on the AVDAcelerator.
Connectivity
One of the advantages of AVD on Azure Local is the ability to make direct connections to Session Hosts. This reduces internet bandwidth usage and places Session Hosts closer to your on-premises applications, minimizing latency issues.
Referring back to the DemoLab architecture, client connectivity is achieved in two ways:
Client Connection Sequence
(Based on information from Microsoft Docs)
- The user subscribes to the Azure Virtual Desktop Workspace using a supported client.
- Entra ID authenticates the user and returns a token to enumerate available resources.
- The client passes the token to the Azure Virtual Desktop feed subscription service.
- The service validates the token.
- The service returns a list of available desktops and applications in the form of digitally signed connection configurations.
- The client stores these configurations as a set of
.rdpfiles. - When a user selects a resource, the client uses the associated
.rdpfile to establish a secure TLS 1.2 connection to an Azure Virtual Desktop gateway via Azure Front Door. - The gateway validates the request and asks the broker to orchestrate the connection.
- The broker identifies the Session Host and uses a persistent communication channel to initiate the connection.
- The Remote Desktop stack initiates a TLS 1.2 connection to the same gateway instance.
- Once both client and Session Host are connected to the gateway, it relays data between them, establishing a reverse connect transport for the RDP connection.
- The client then starts the RDP handshake.
RDP Shortpath Connection Sequence
(Based on information from Microsoft Docs)
- The Session Host sends its list of IPv4 (e.g., 172.19.19.101) and IPv6 addresses to the client.
- The client initiates a background thread to establish a parallel UDP-based transport directly to one of the Session Host’s IPs.
- While probing, the client continues establishing the initial connection over the reverse connect transport.
- If the client has a direct connection, it establishes a secure connection using TLS over reliable UDP.
- After establishing RDP Shortpath, all Dynamic Virtual Channels (DVCs), including graphics, input, and device redirection, move to the new transport.
- If direct UDP connectivity isn’t possible due to firewall or network topology, the client continues with reverse connect transport.
Deployment
As mentioned earlier, to proceed with the deployment, you should have:
- Provisioned the cluster (Azure Local DemoLab).
- Created logical networks and downloaded an image for AVD (Azure Local Day 2 Operations).
- Configured a VM (Azure Local VM Deployment) to act as Entra ID Connect to synchronize users for SSO.
Preparing Active Directory
I am going to ask you to check if the network configuration of the domain controller is correct, because I just realized that in my domain controller the network profile shown was public. To avoid this you can perform the following configuration:
- From a terminal as administrator run the following command:
sc config nlasvc depend=NSI/RpcSs/TcpIp/Dhcp/Eventlog/DNS/NTDS - Change the DNS settings of the network card to the local ip of the DC.
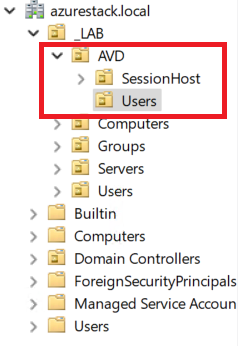
Then, we’ll create a new Organizational Unit (OU) specifically for AVD, where we’ll include both users and Session Hosts.
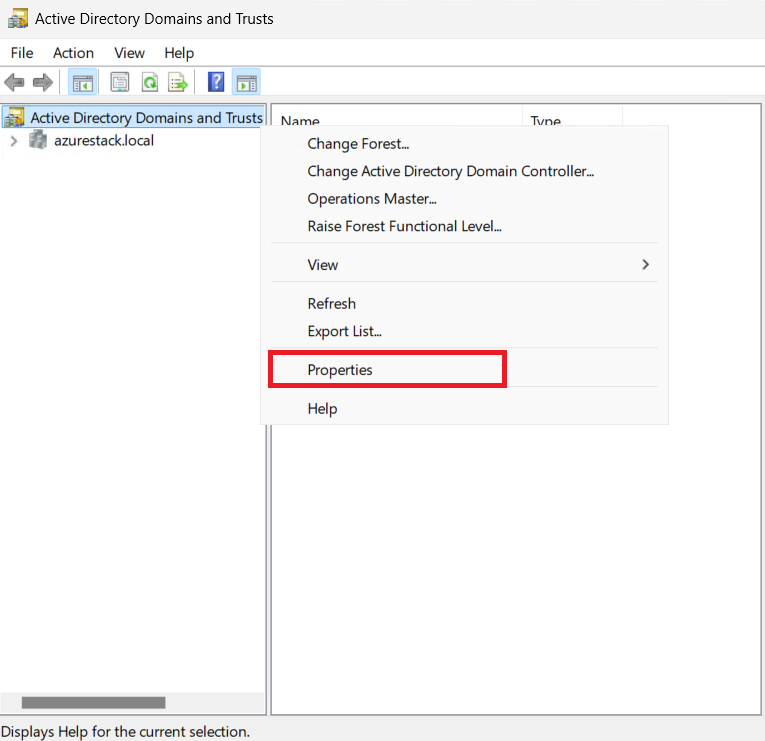
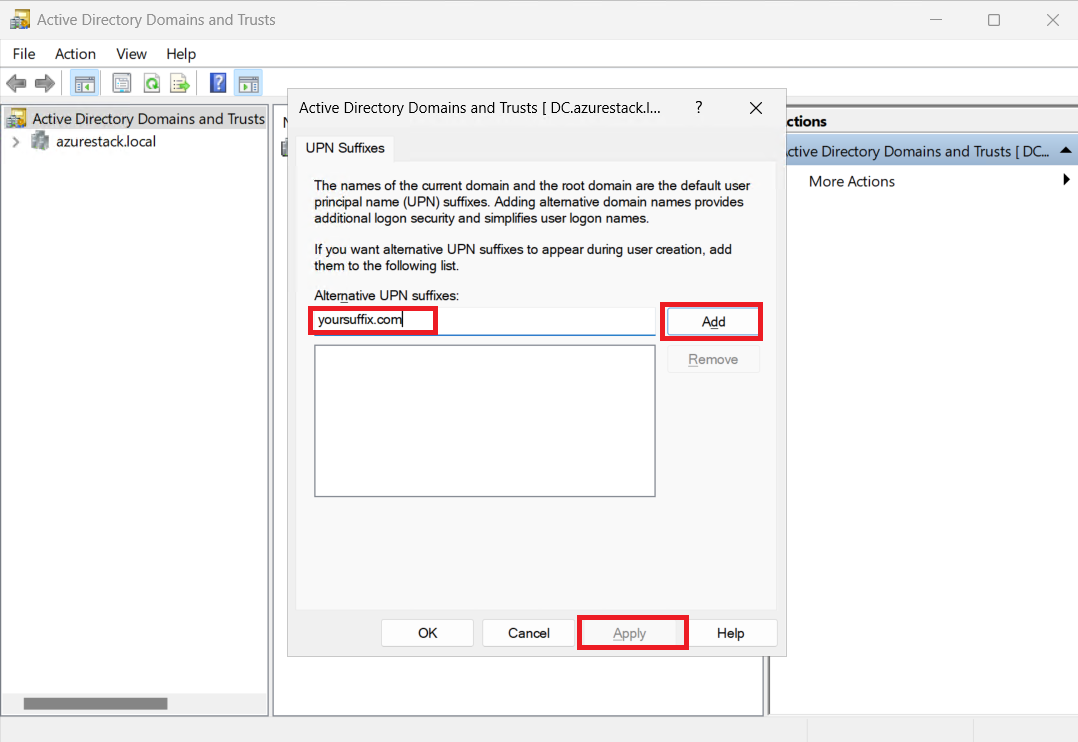
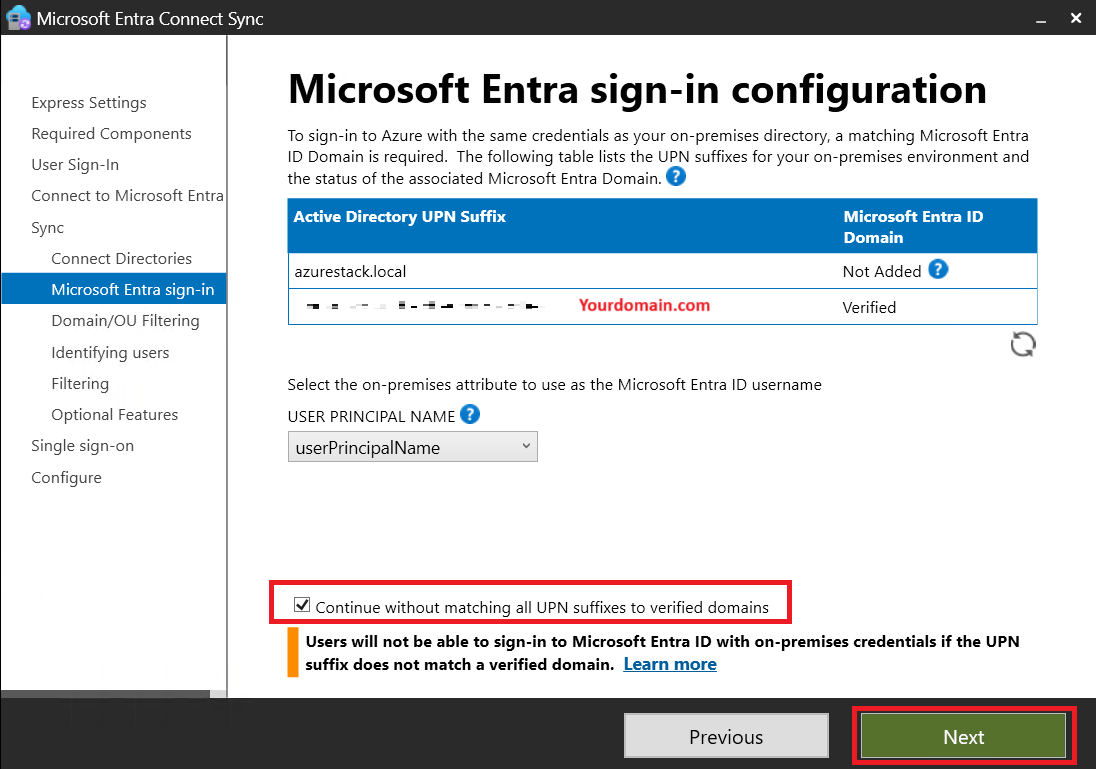
Next, we’ll configure a new UPN Suffix that matches the domain in your Entra ID tenant.
- Configuring UPN Suffix:
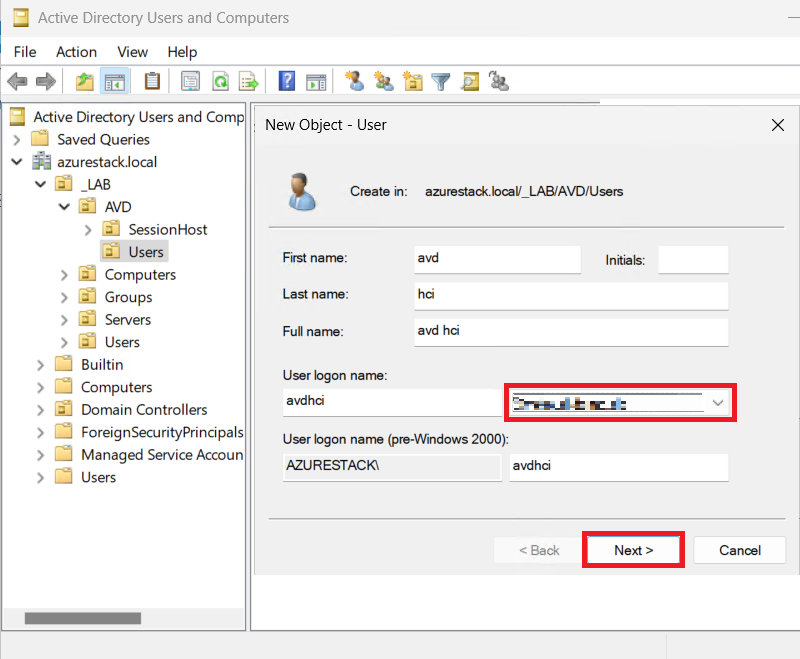
Finally, we’ll create the user to login in AVD with the right Suffix (e.g., avdhci@yourentraiddomain.com).
Configuring Entra ID Connect
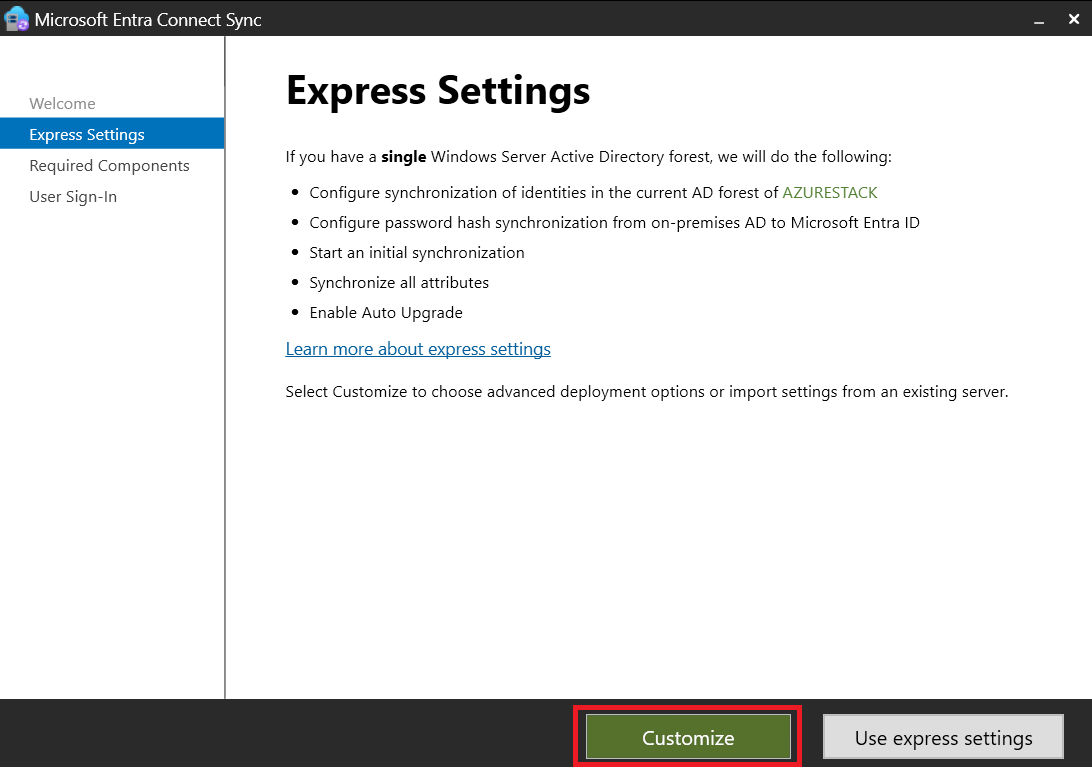
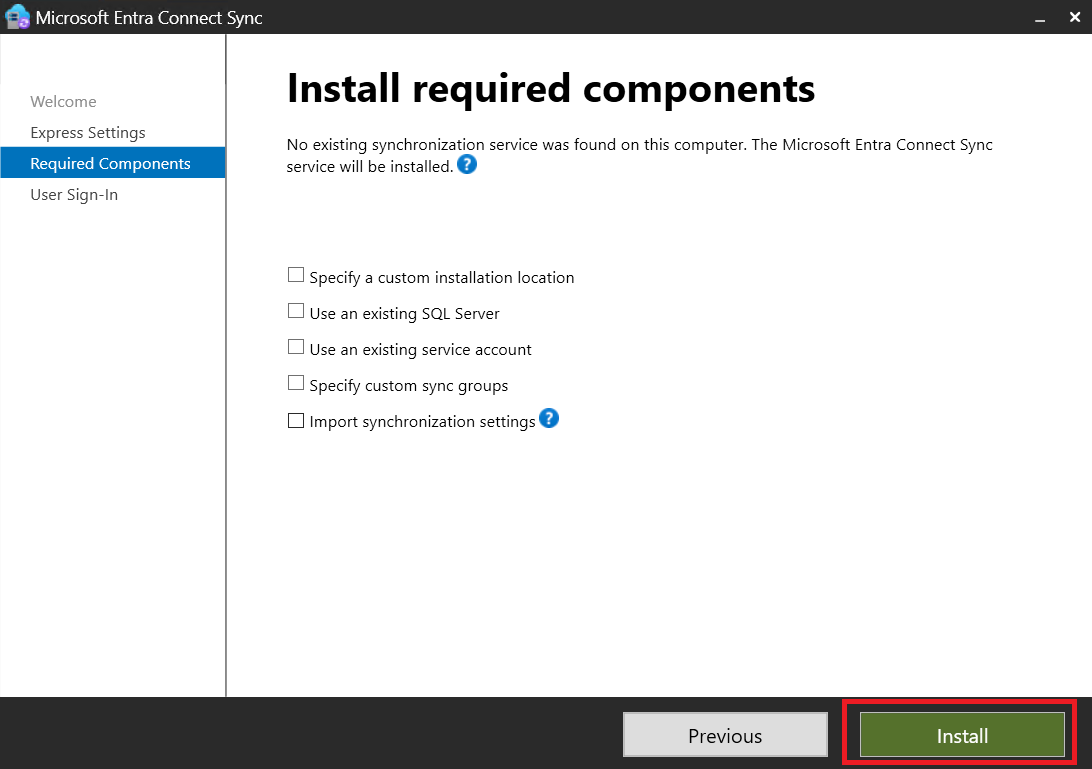
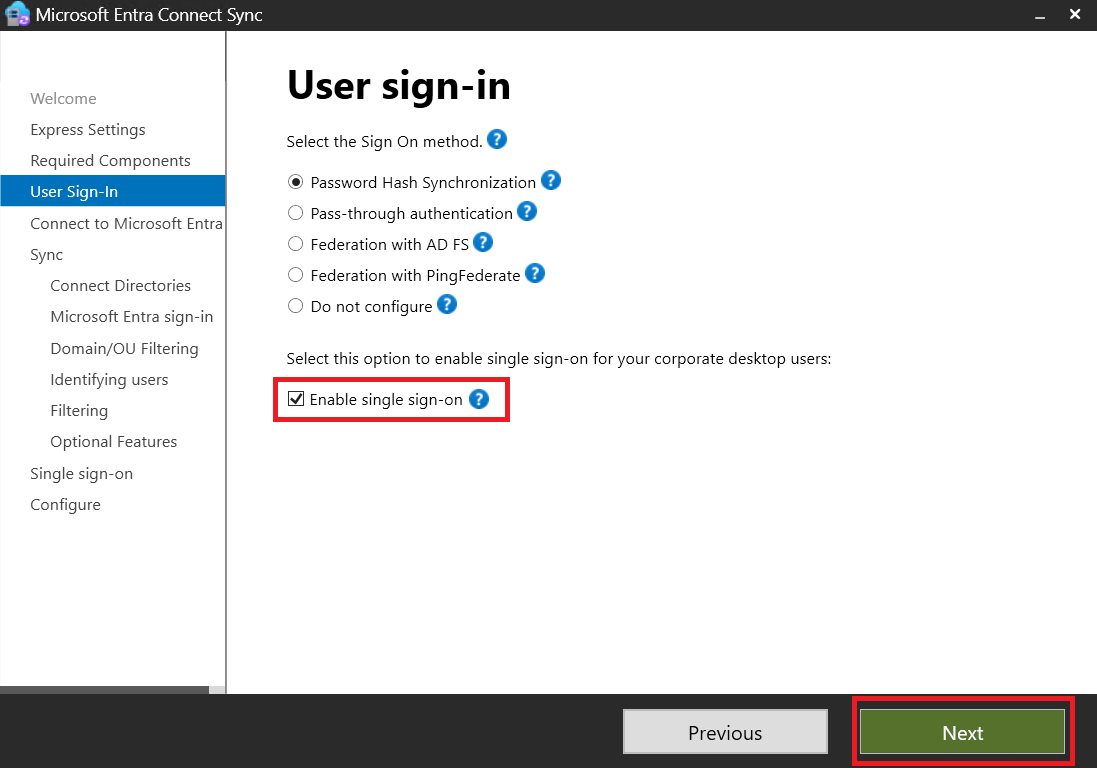
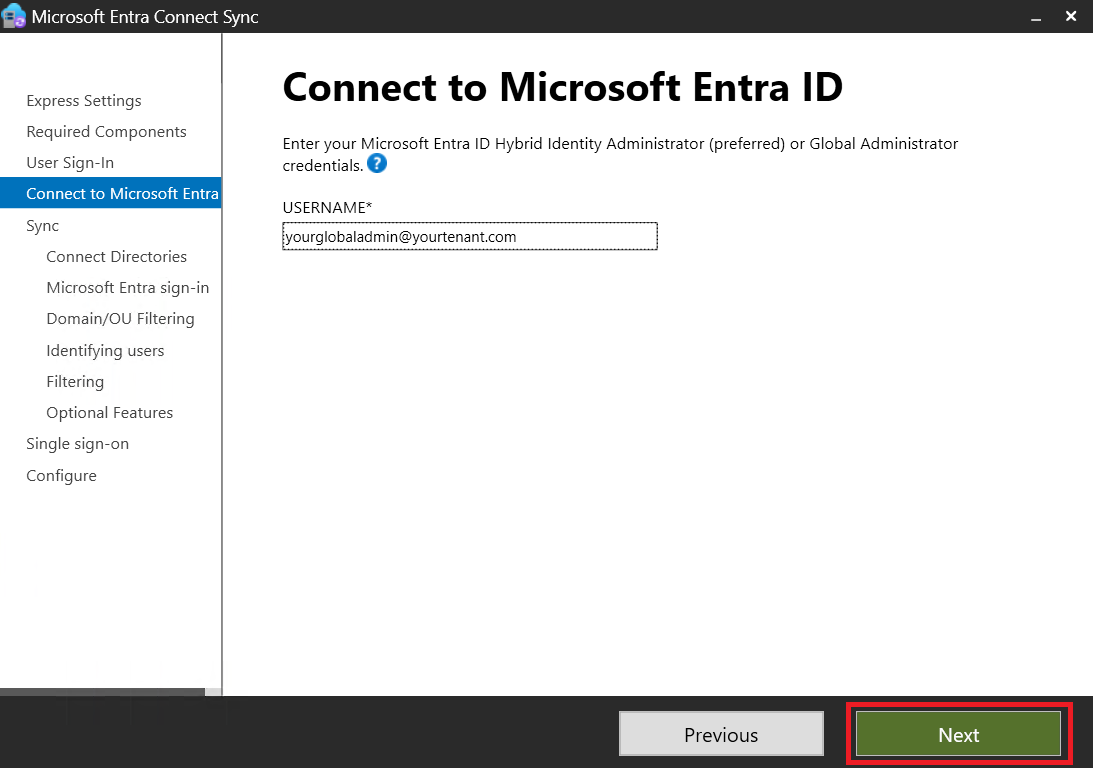
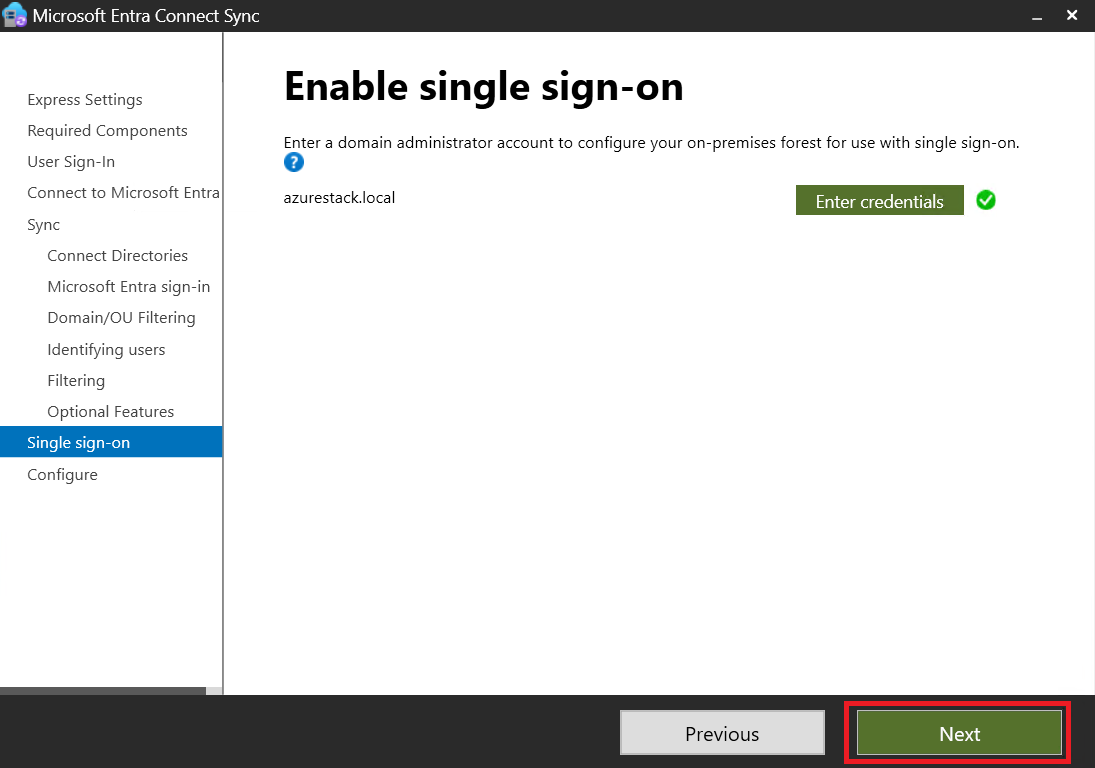
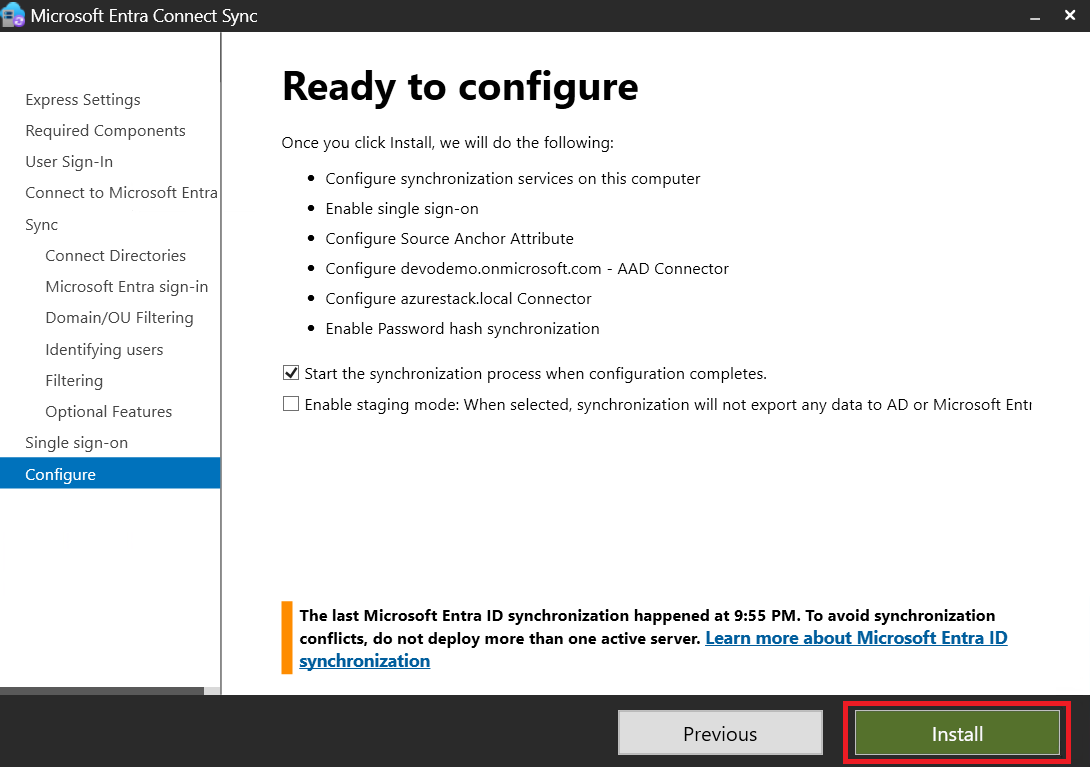
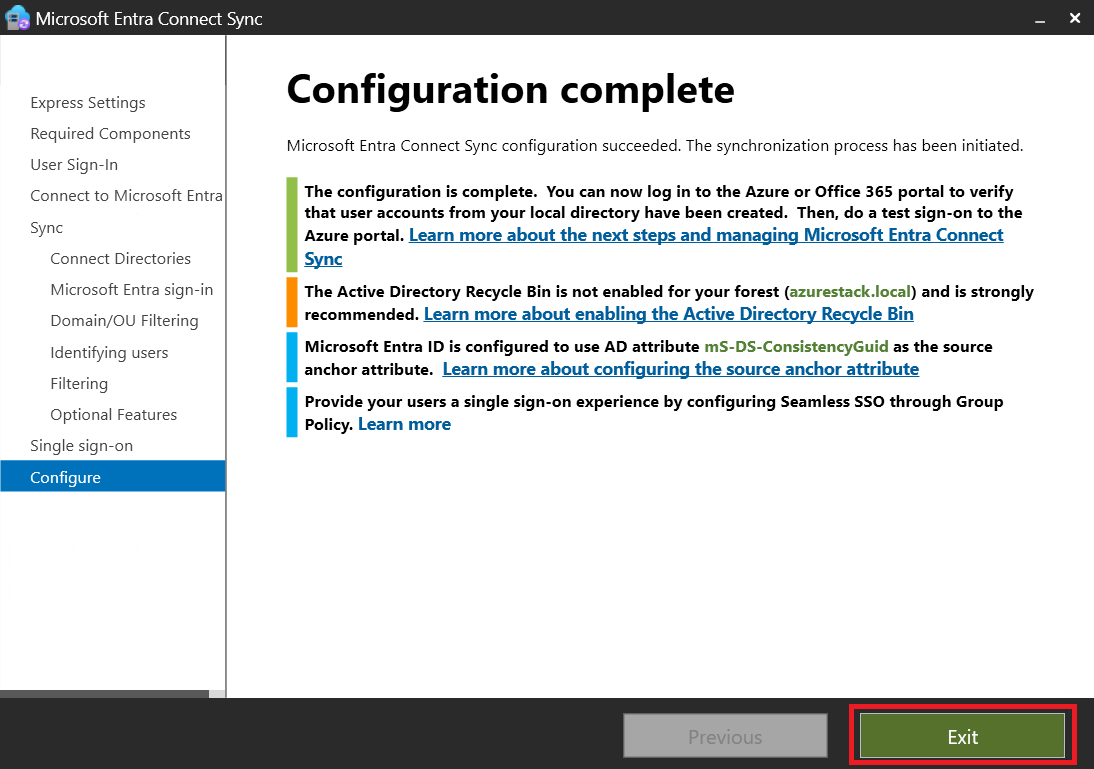
To ensure seamless AVD functionality, the Active Directory user and the Entra ID user must be the same. We’ll set up Entra ID Connect on our Windows Server 2022 VM.
-
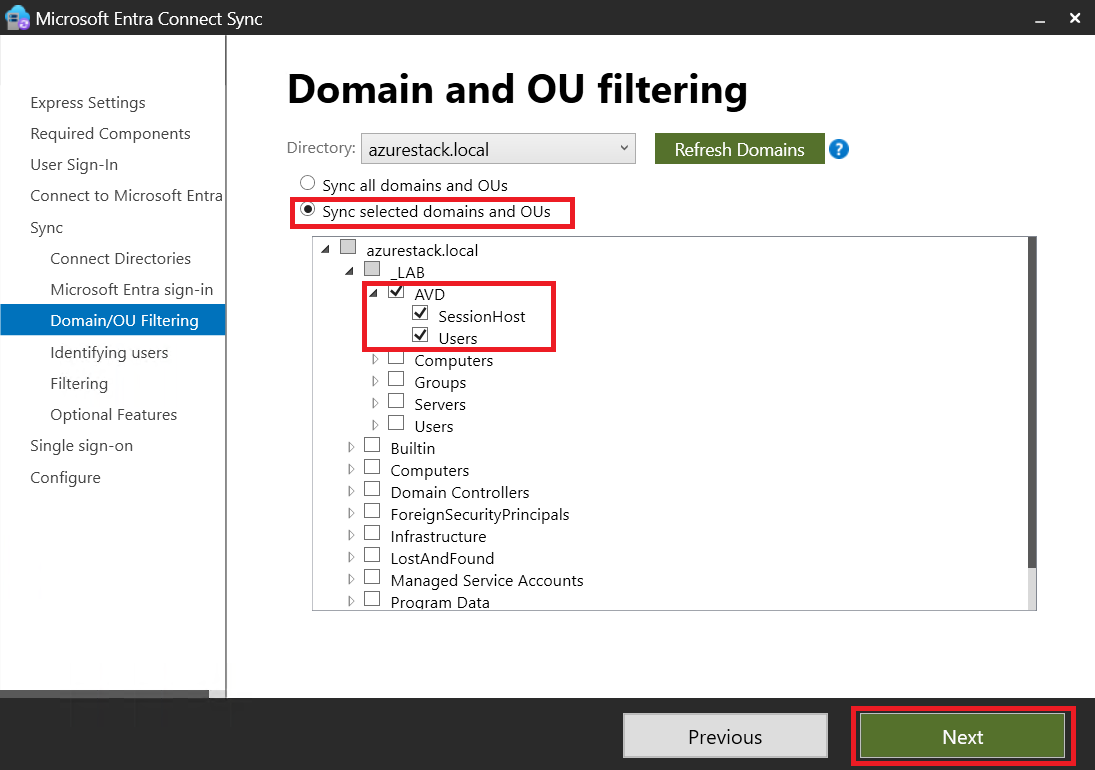
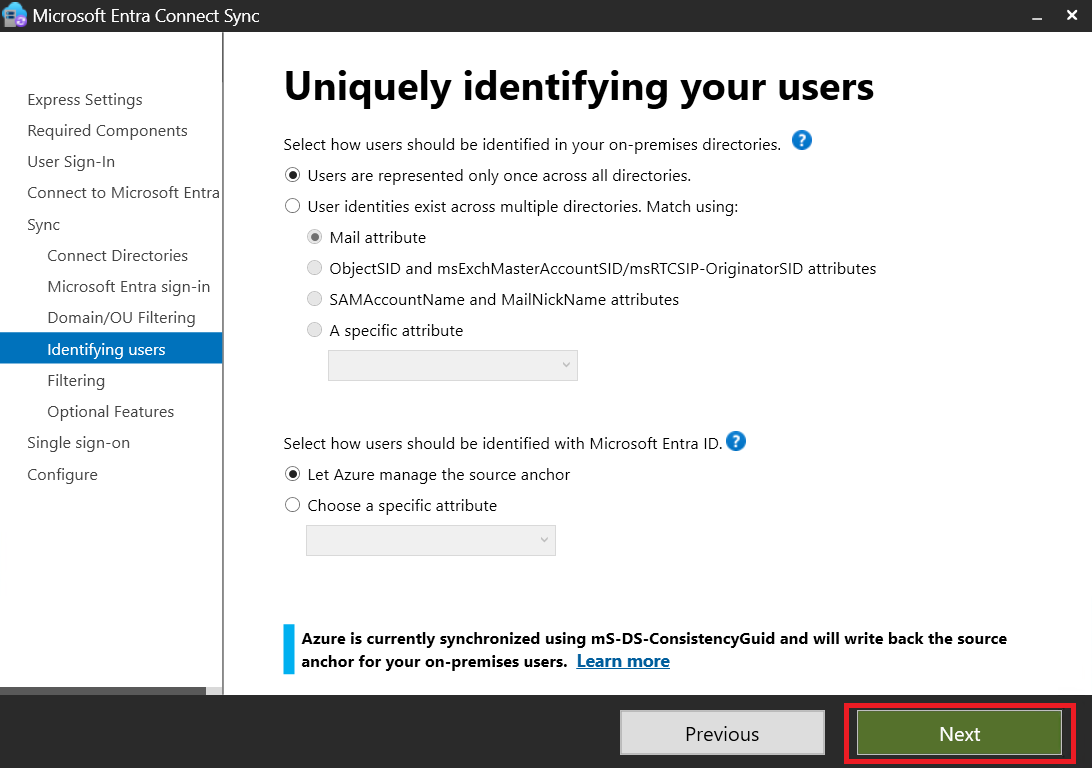
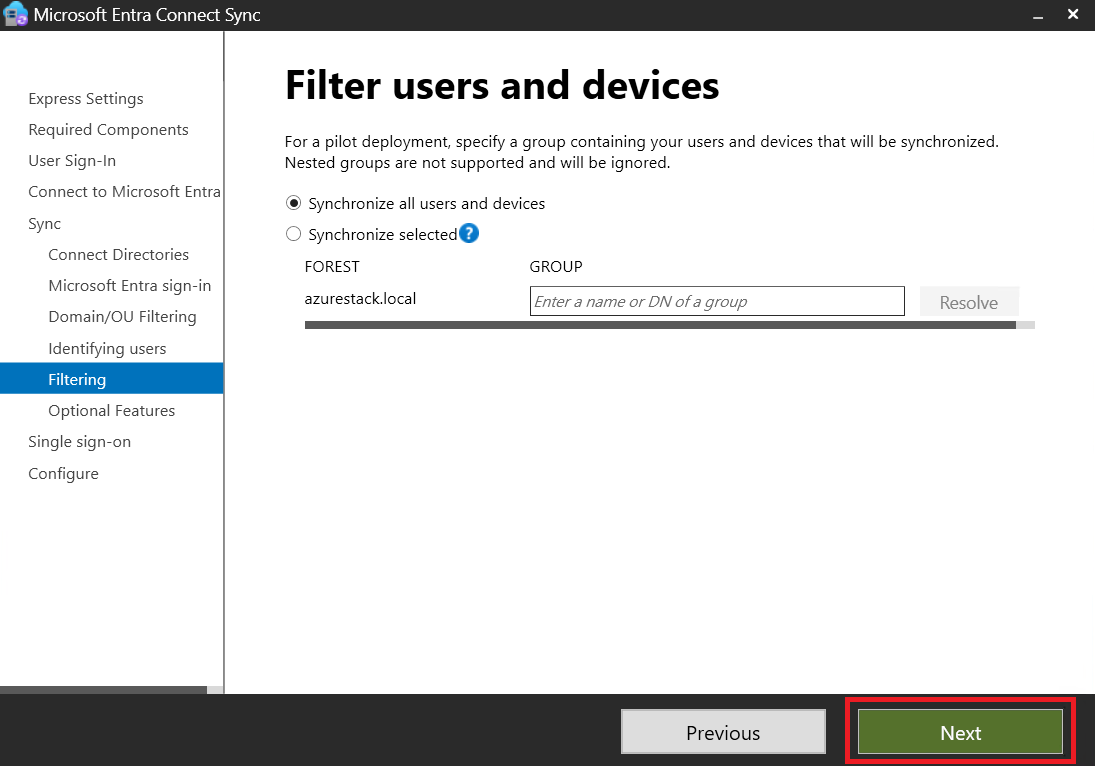
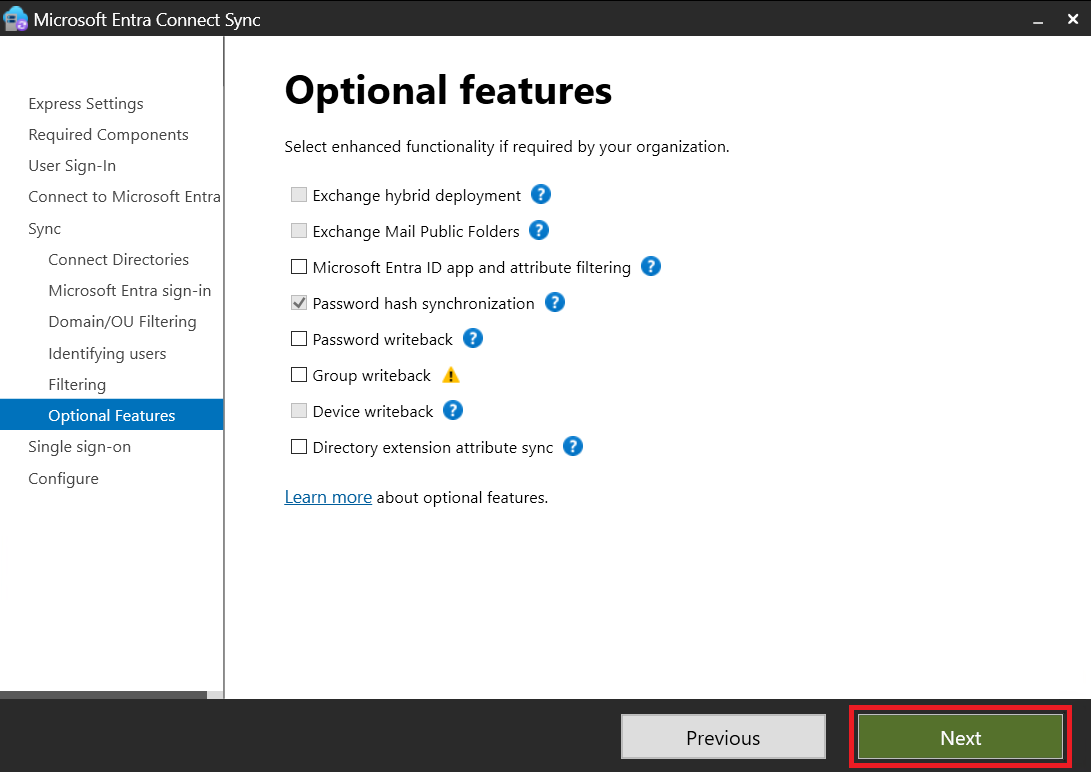
Disclaimer: I make use of a Demo tenant, which currently has another EntraID Connect synchronizing (with another AD Forest) but there is no problem because I am only going to synchronize one user and one Session Host from the azurestack.local domain, and these are not present in the other forests.
-
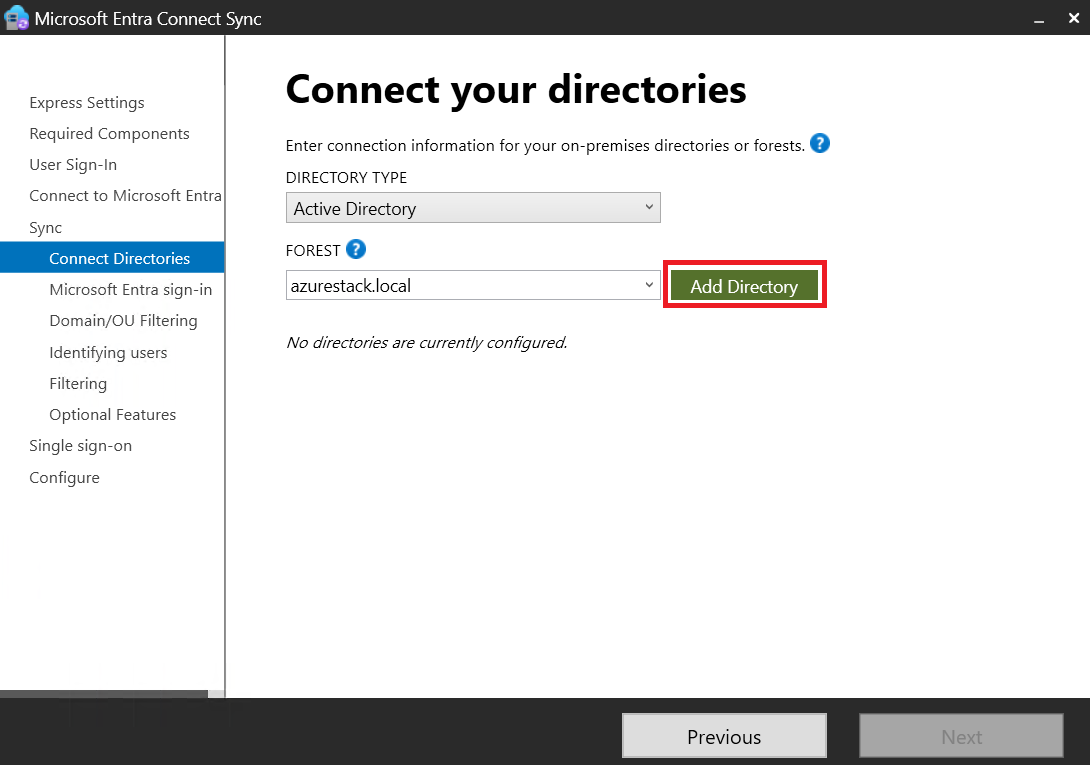
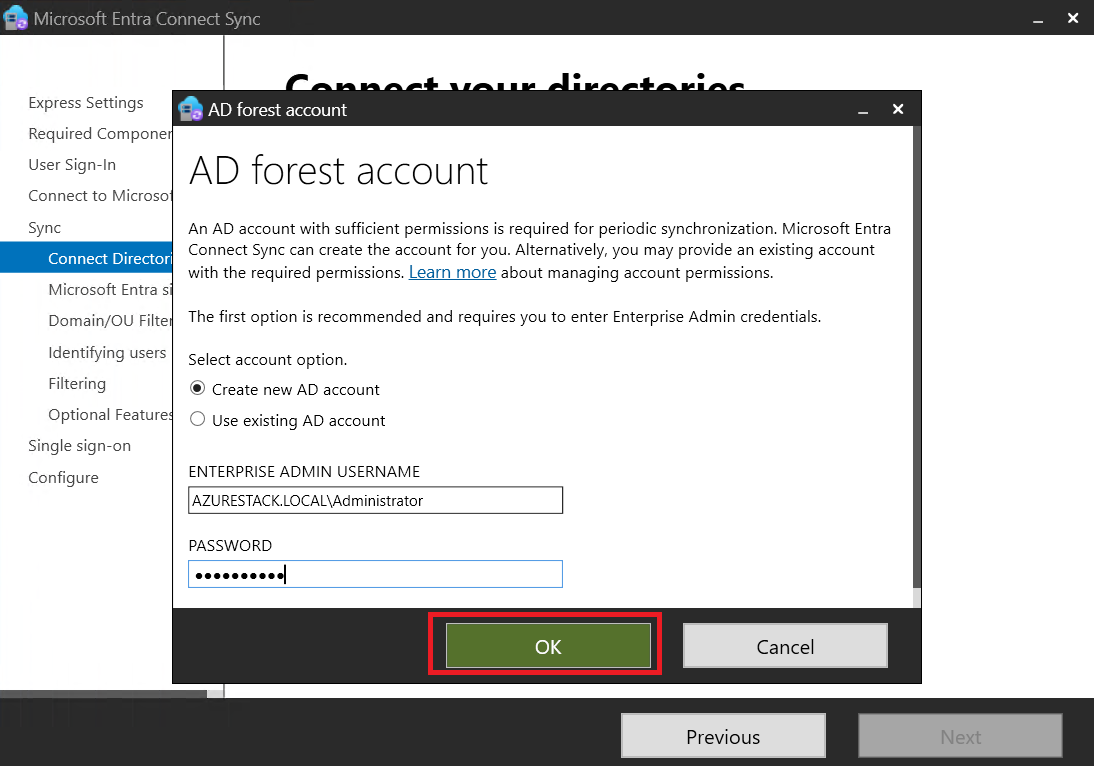
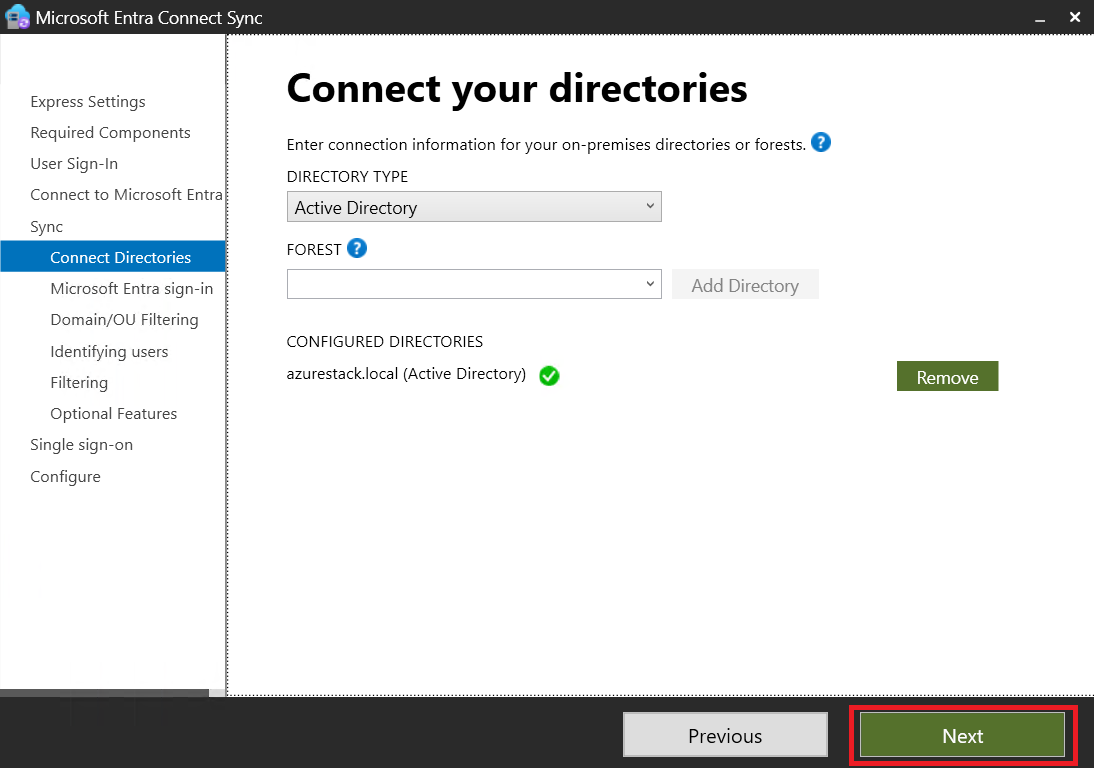
Installing Entra ID Connect:
- Step 1: Download and install Entra ID Connect from here.
- We will now proceed to configure the Hybrid Microsoft Entra ID Join
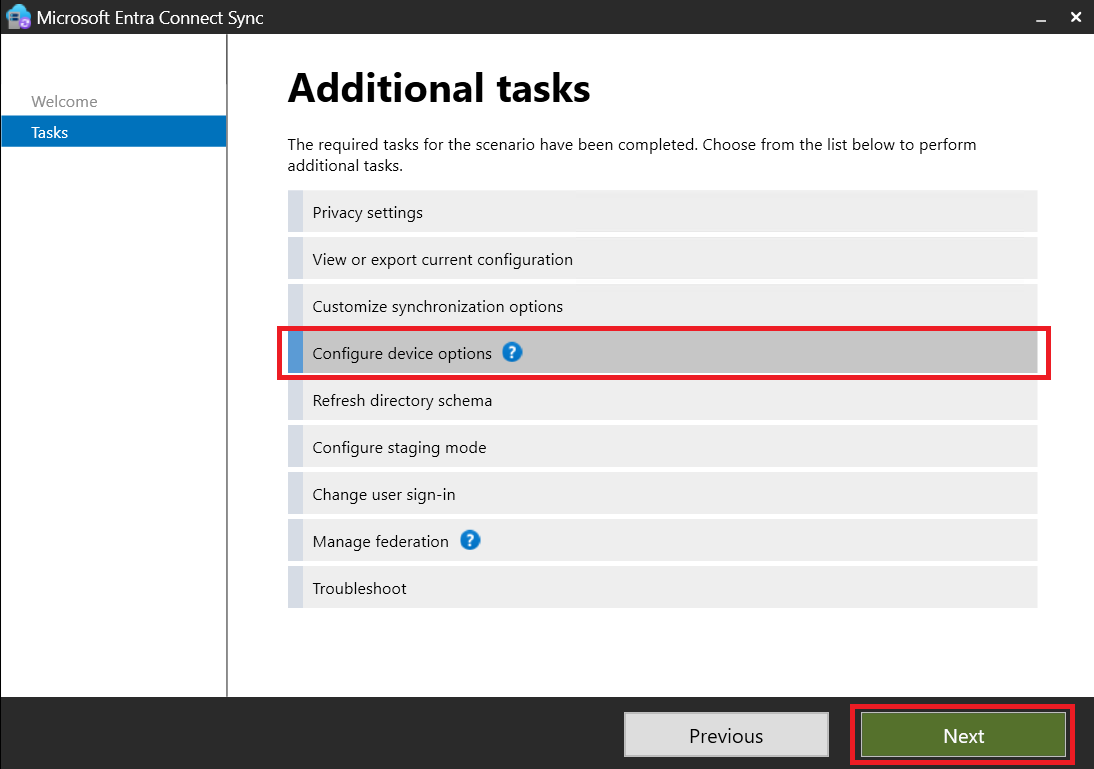
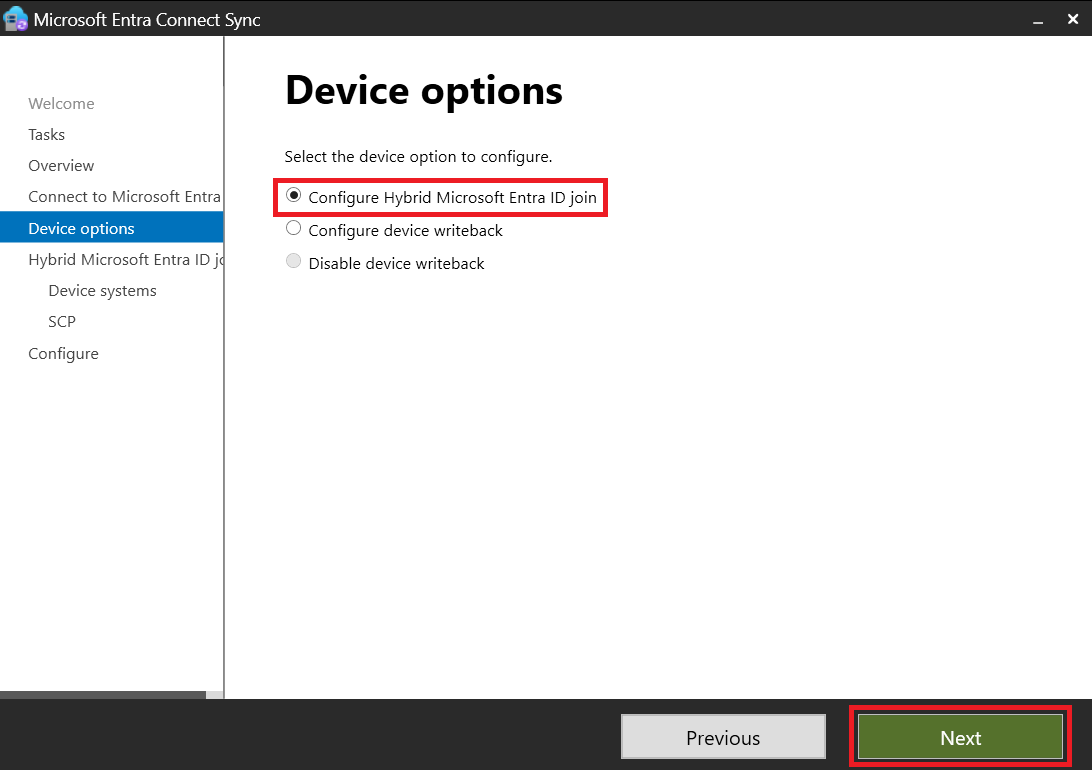
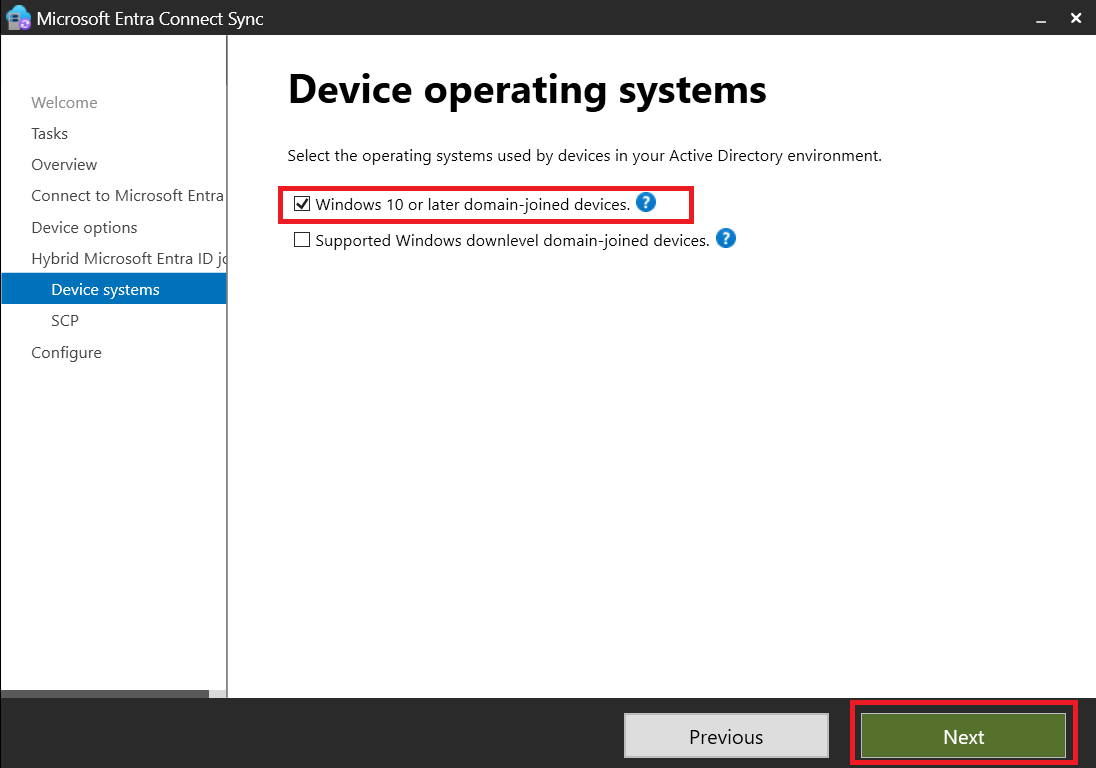
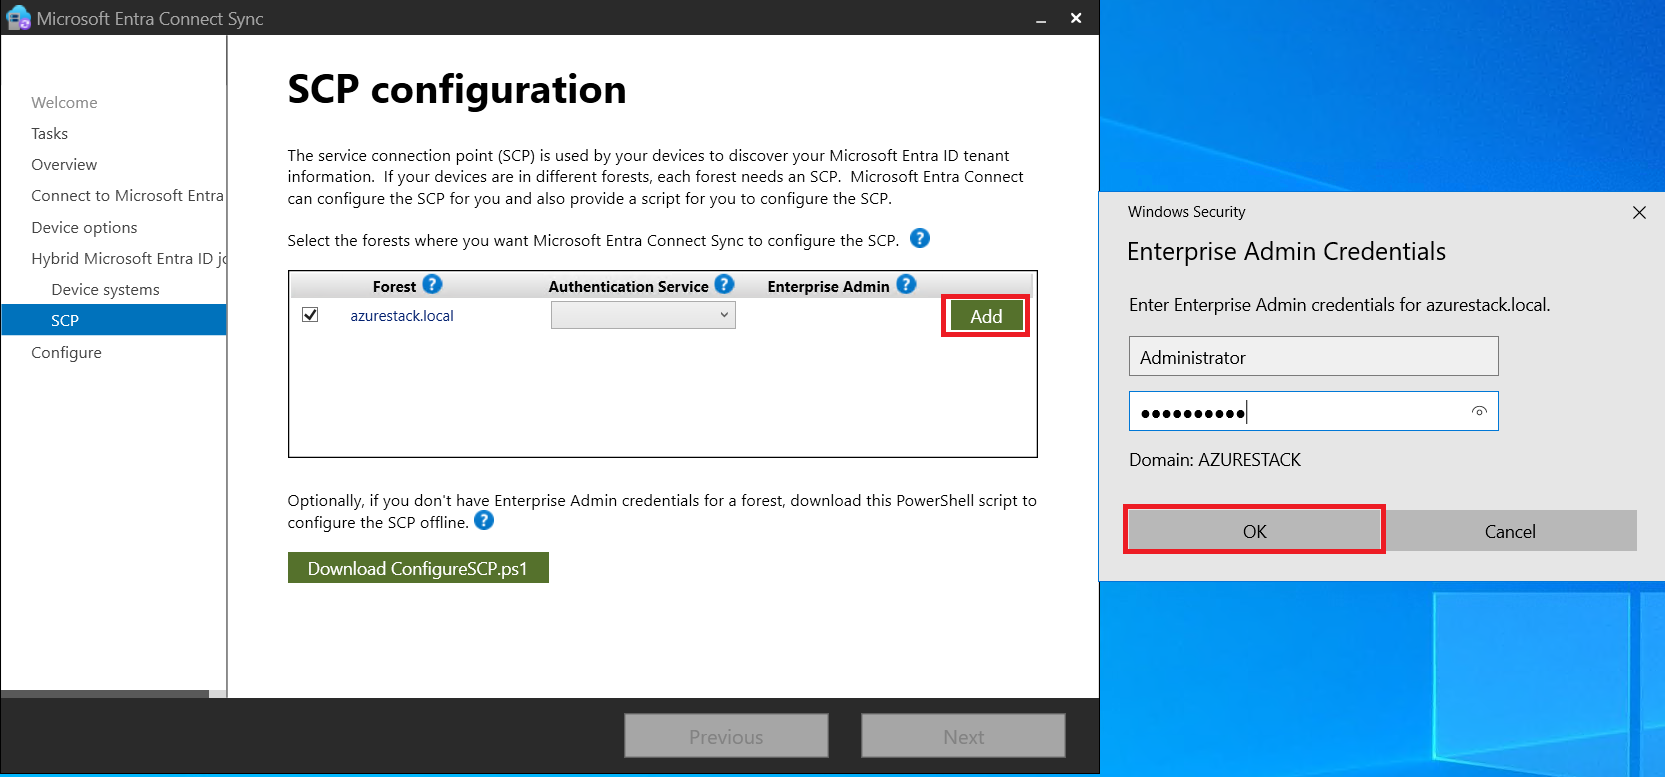
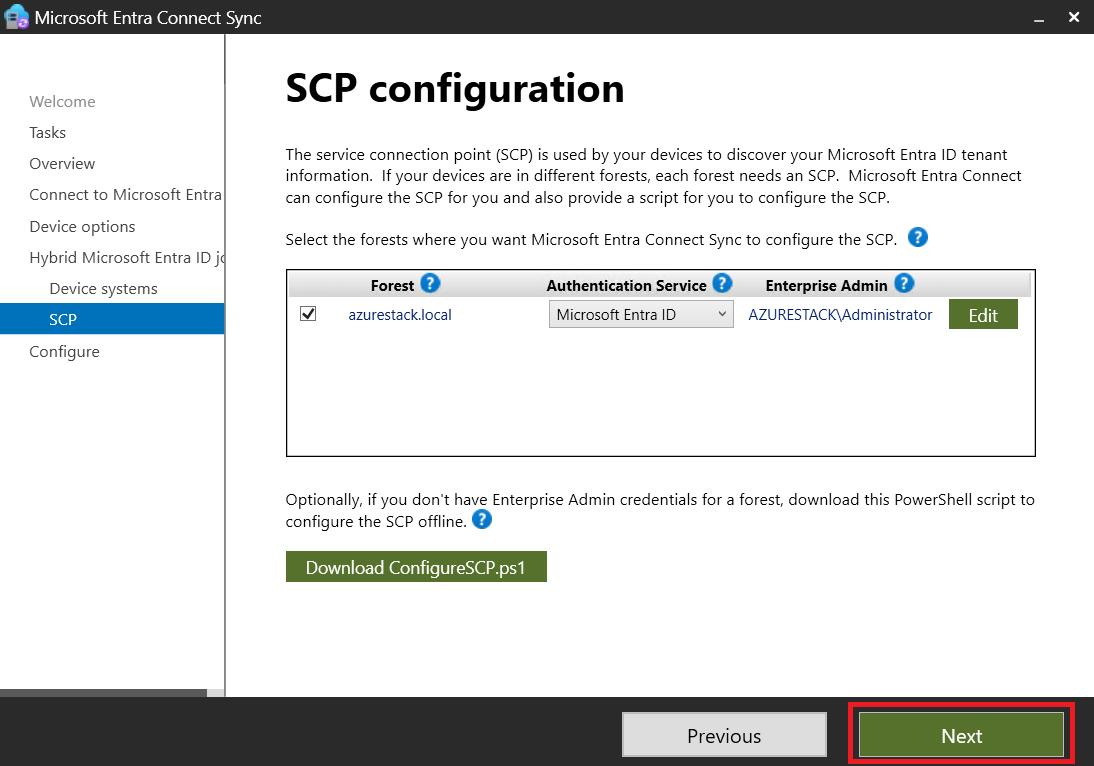
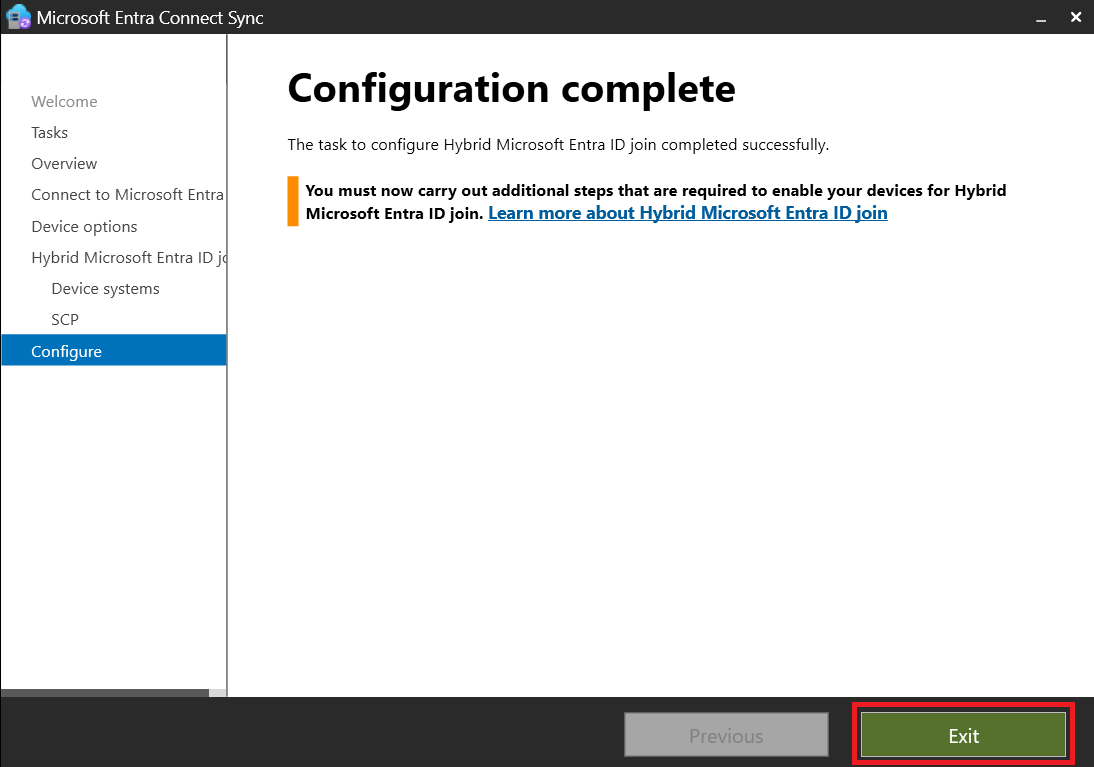
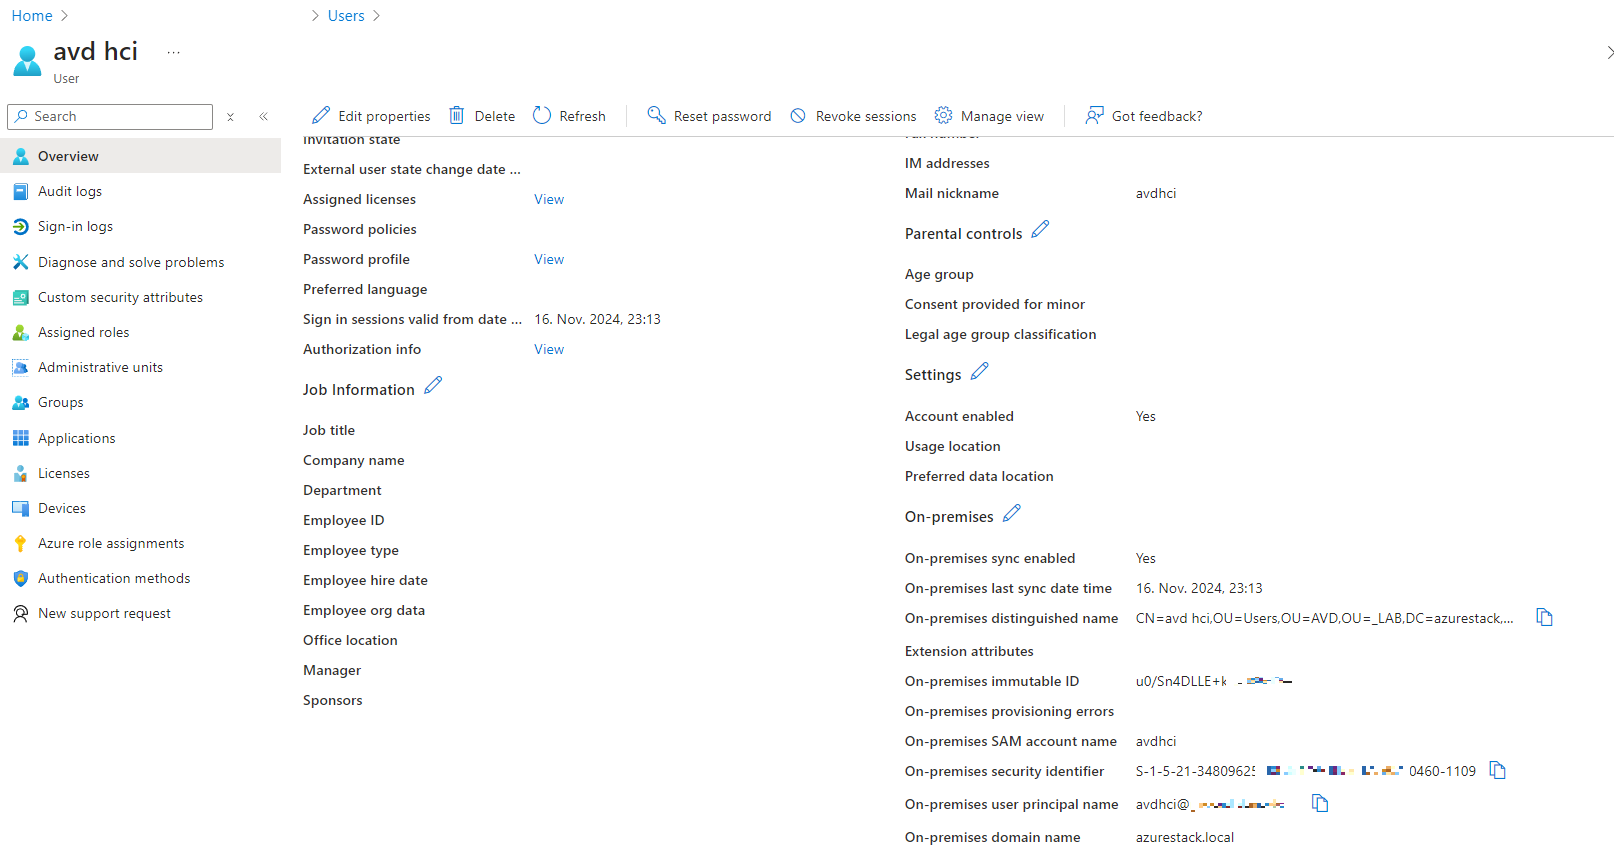
- Verifying User Synchronization:
- Assigning Licenses:
- Assign the necessary license to the user. While you might get by without one for testing, it’s like driving without insurance , not advisable 😜
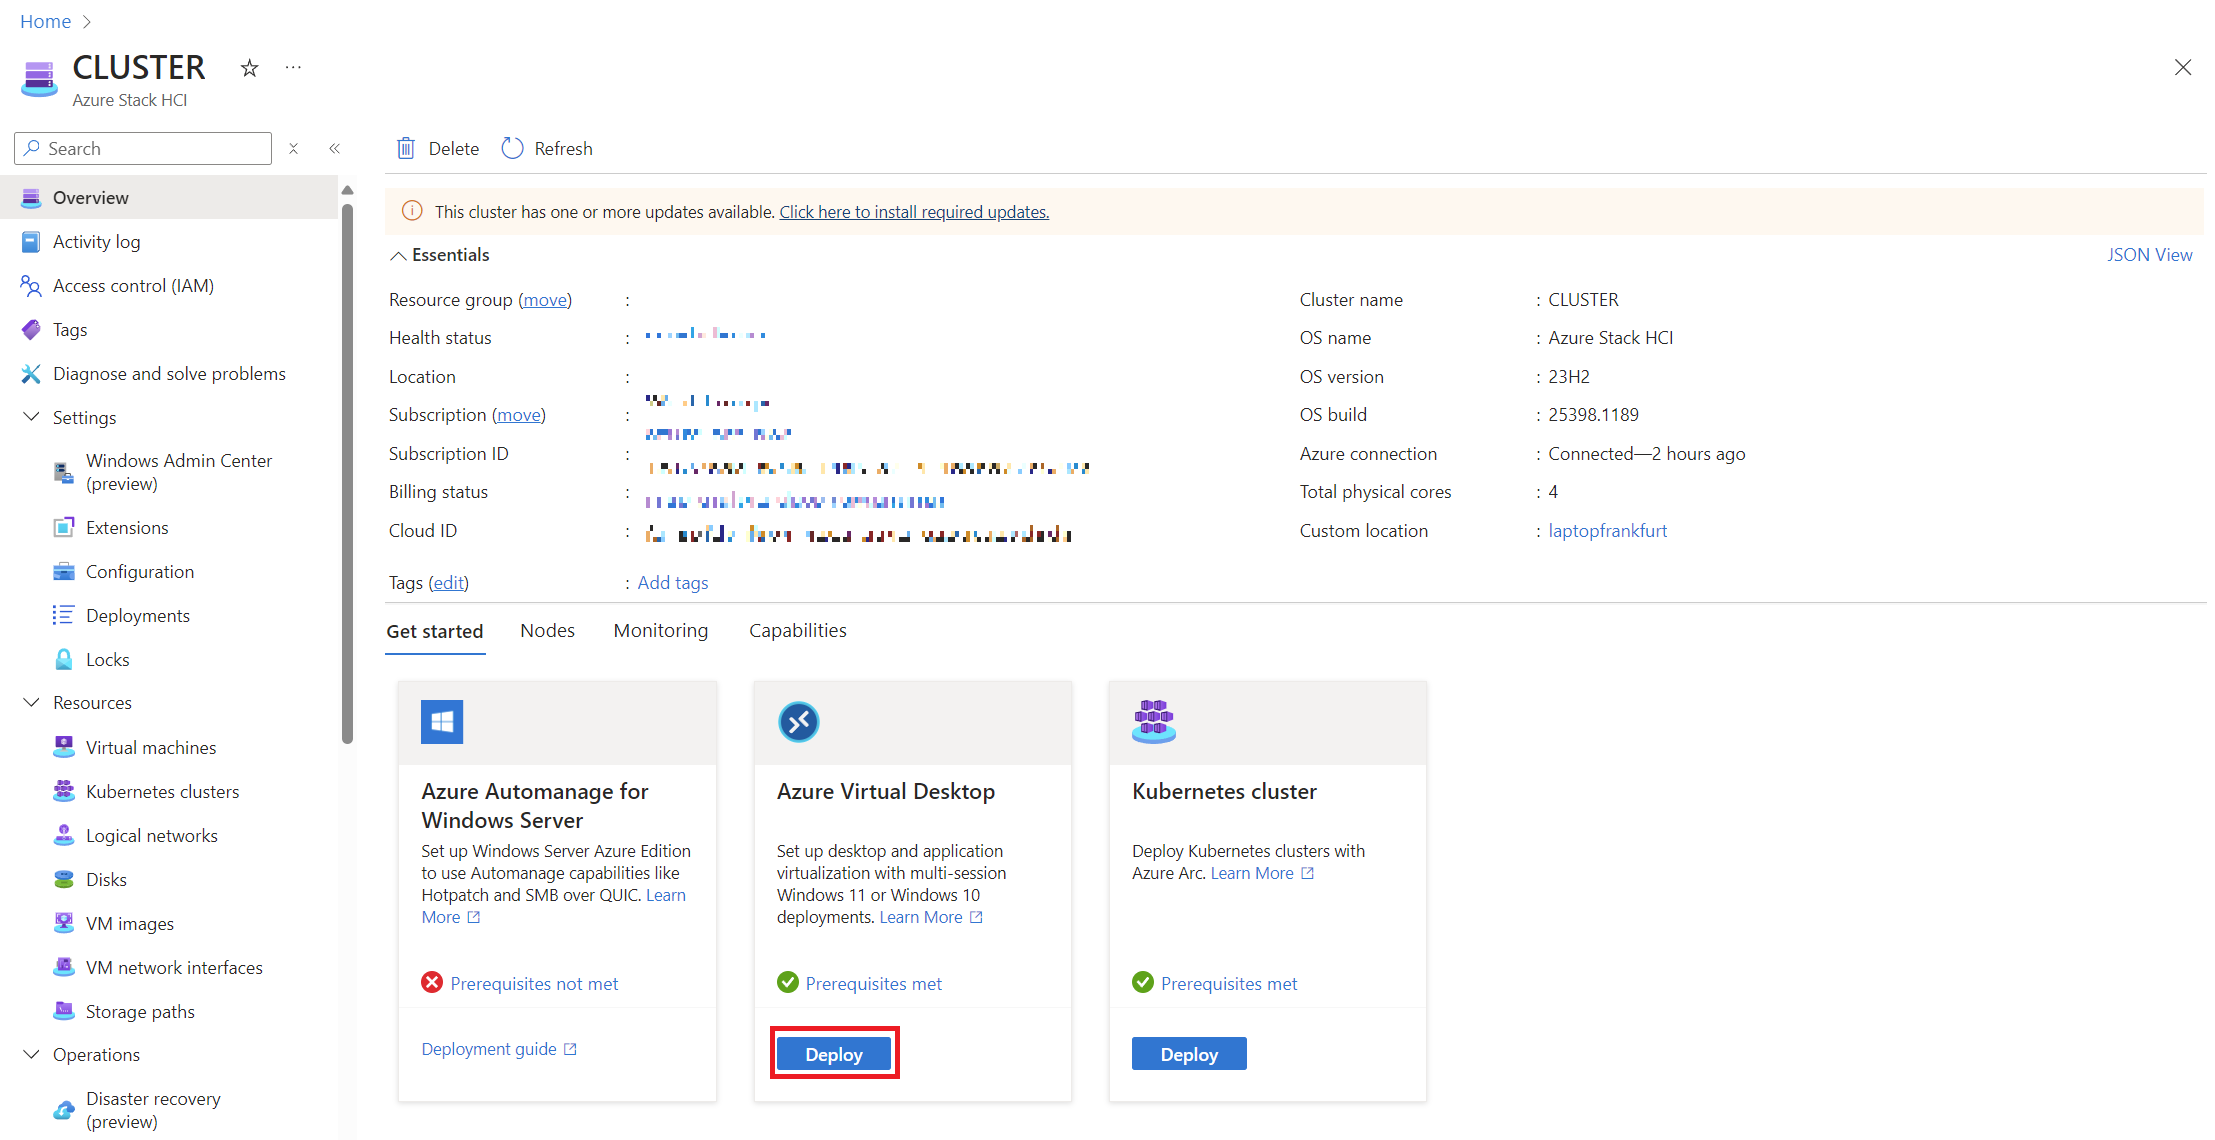
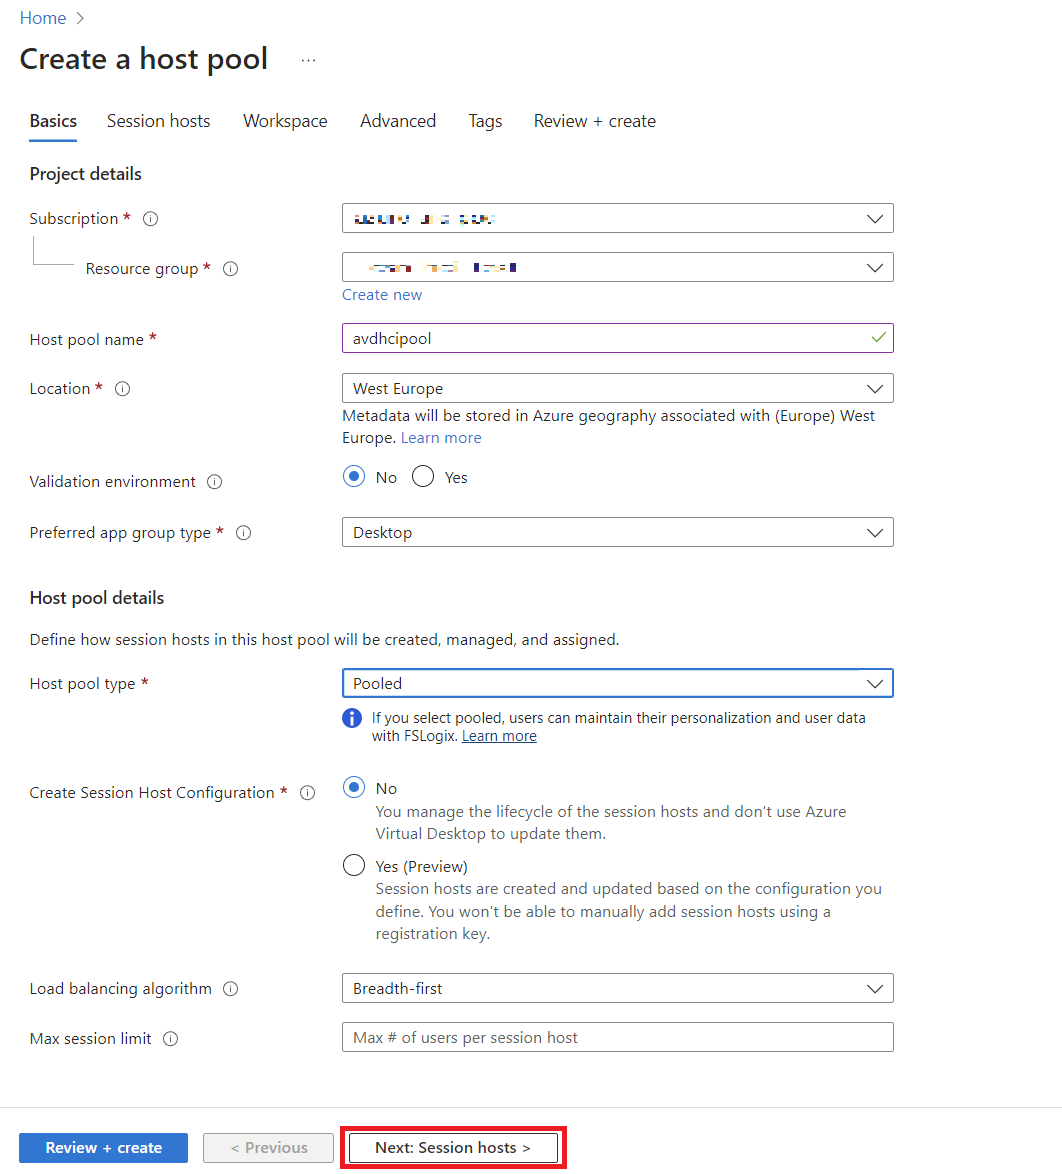
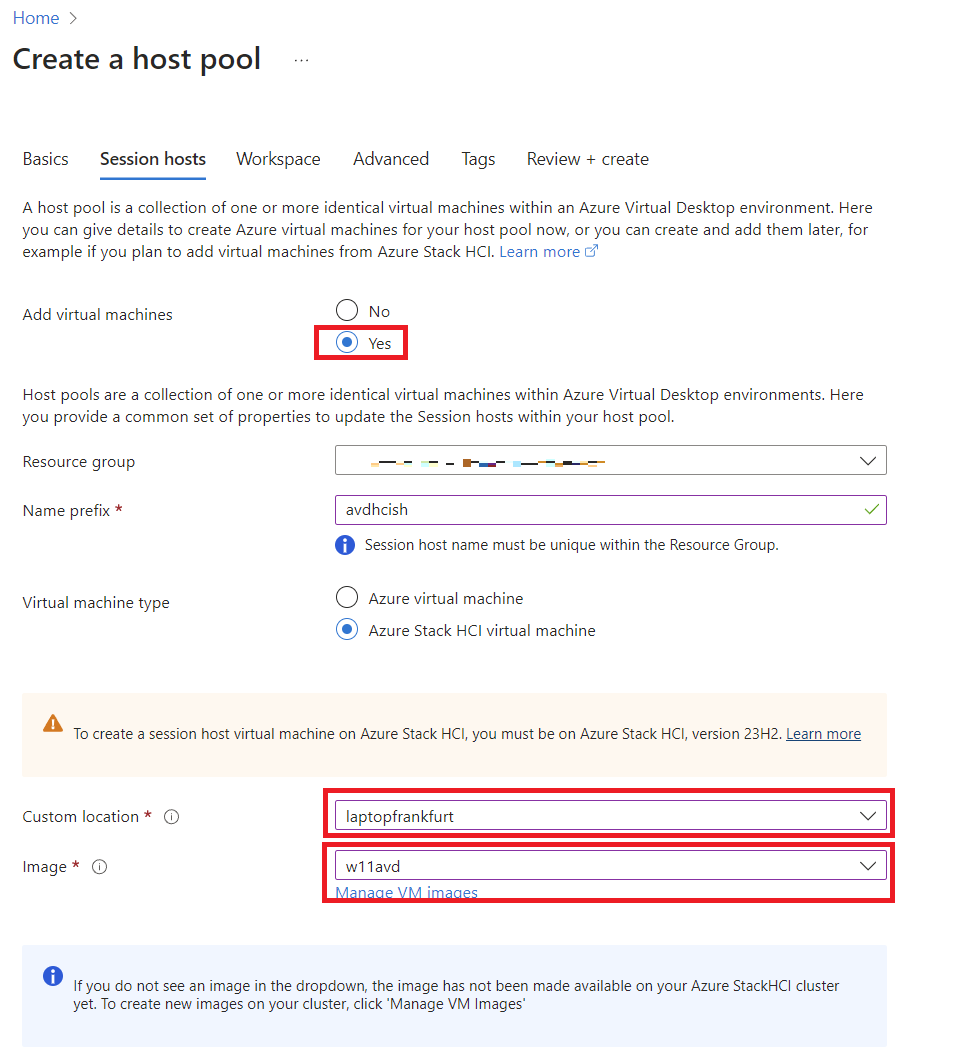
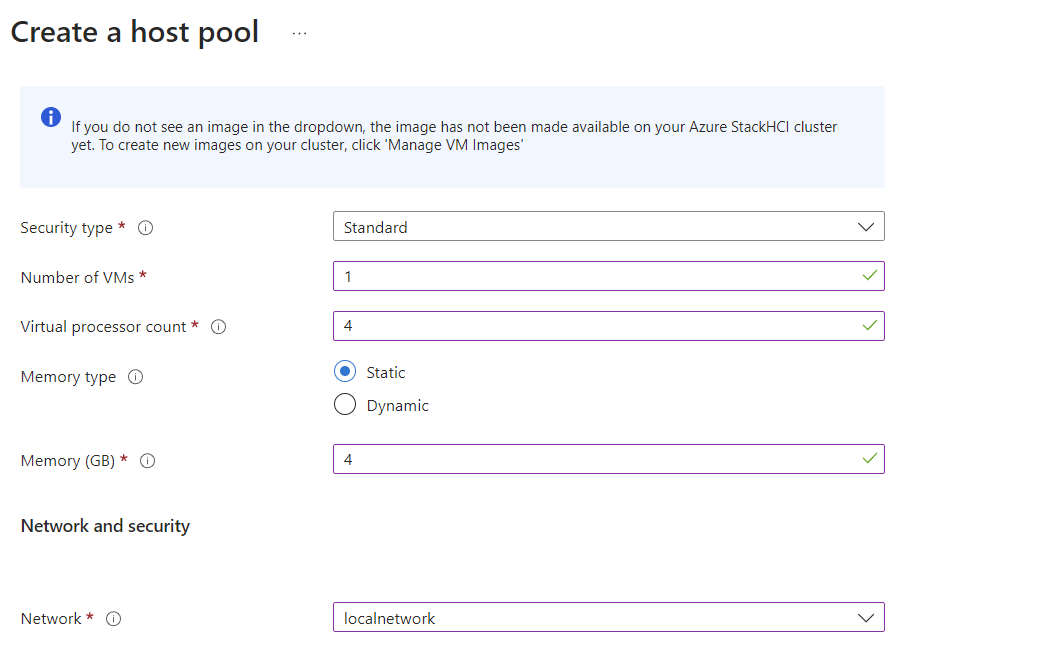
Deploying AVD on Azure Local via Azure Portal
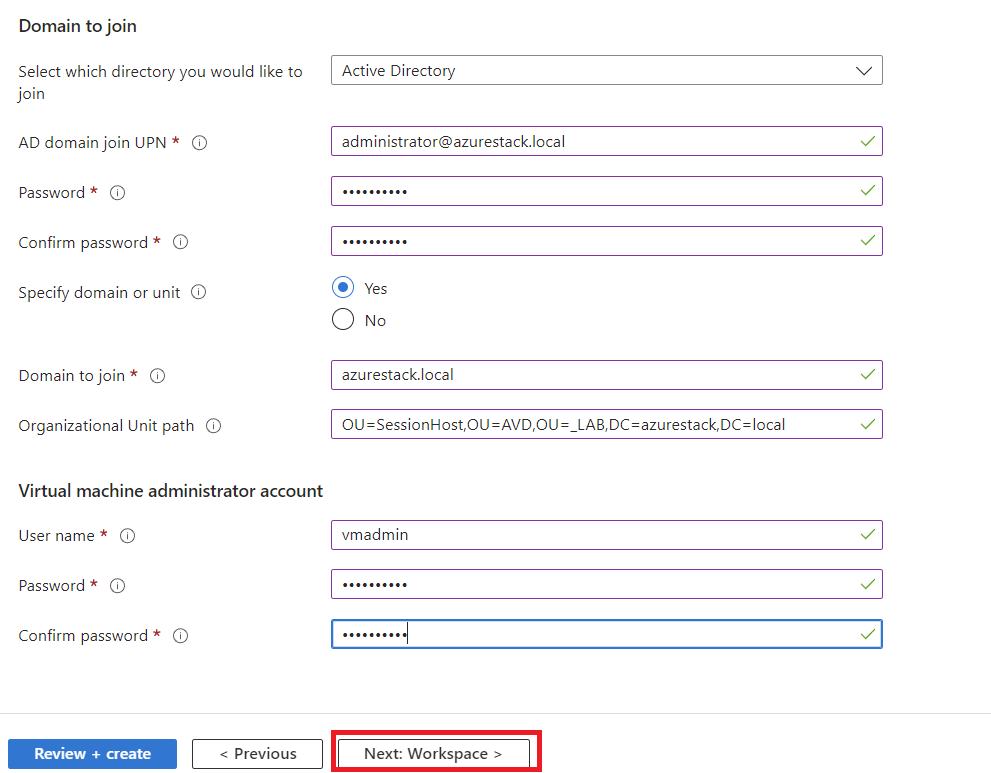
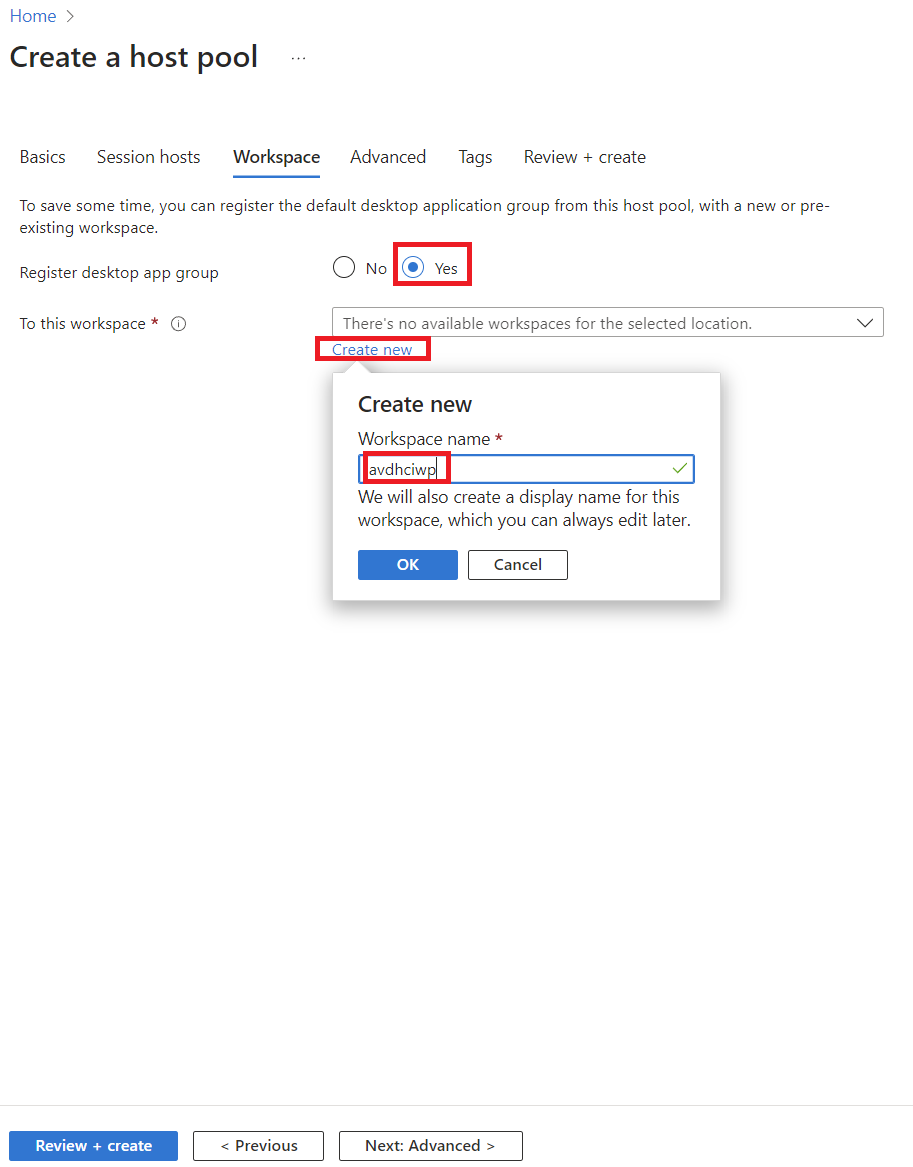
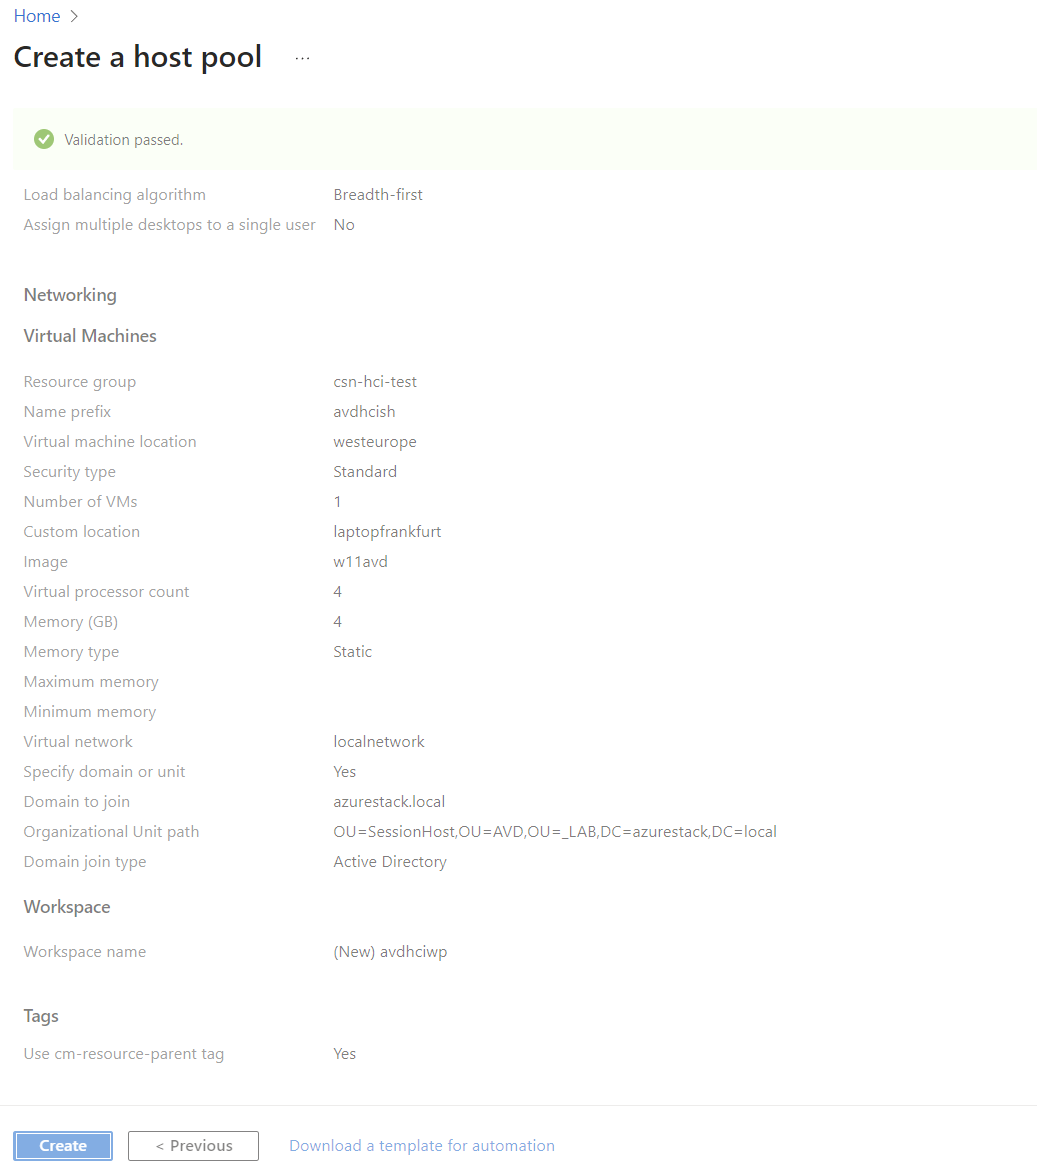
To keep things straightforward, we’ll use the Azure Portal wizard for deployment.
-
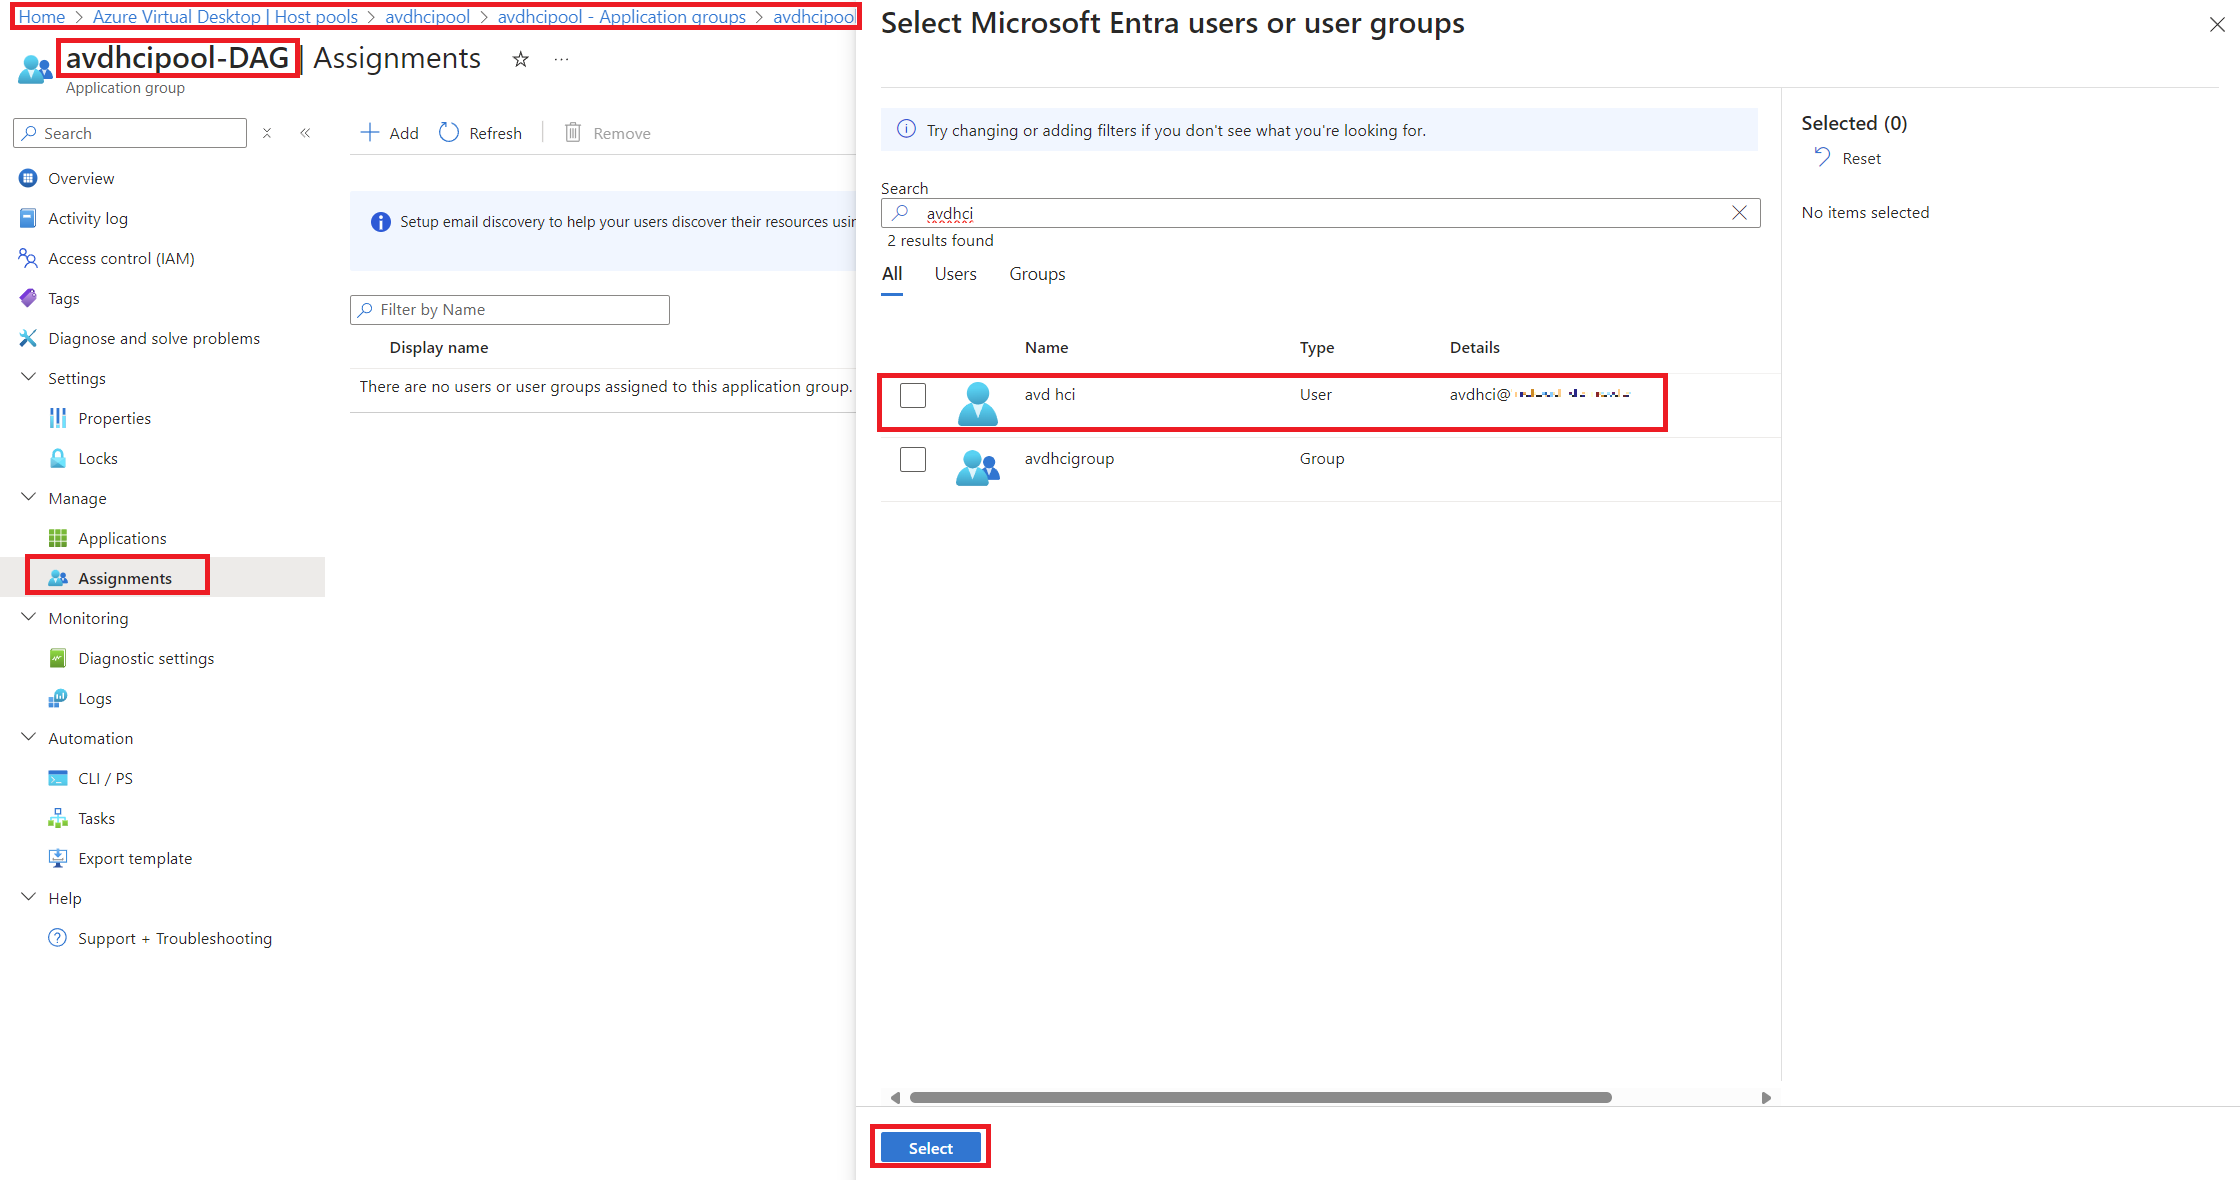
After approximately 15 minutes the Session Host will have been provisioned and will be accessible, but to access it with the user we configured we must assign the DAG (Desktop Application Group):
-
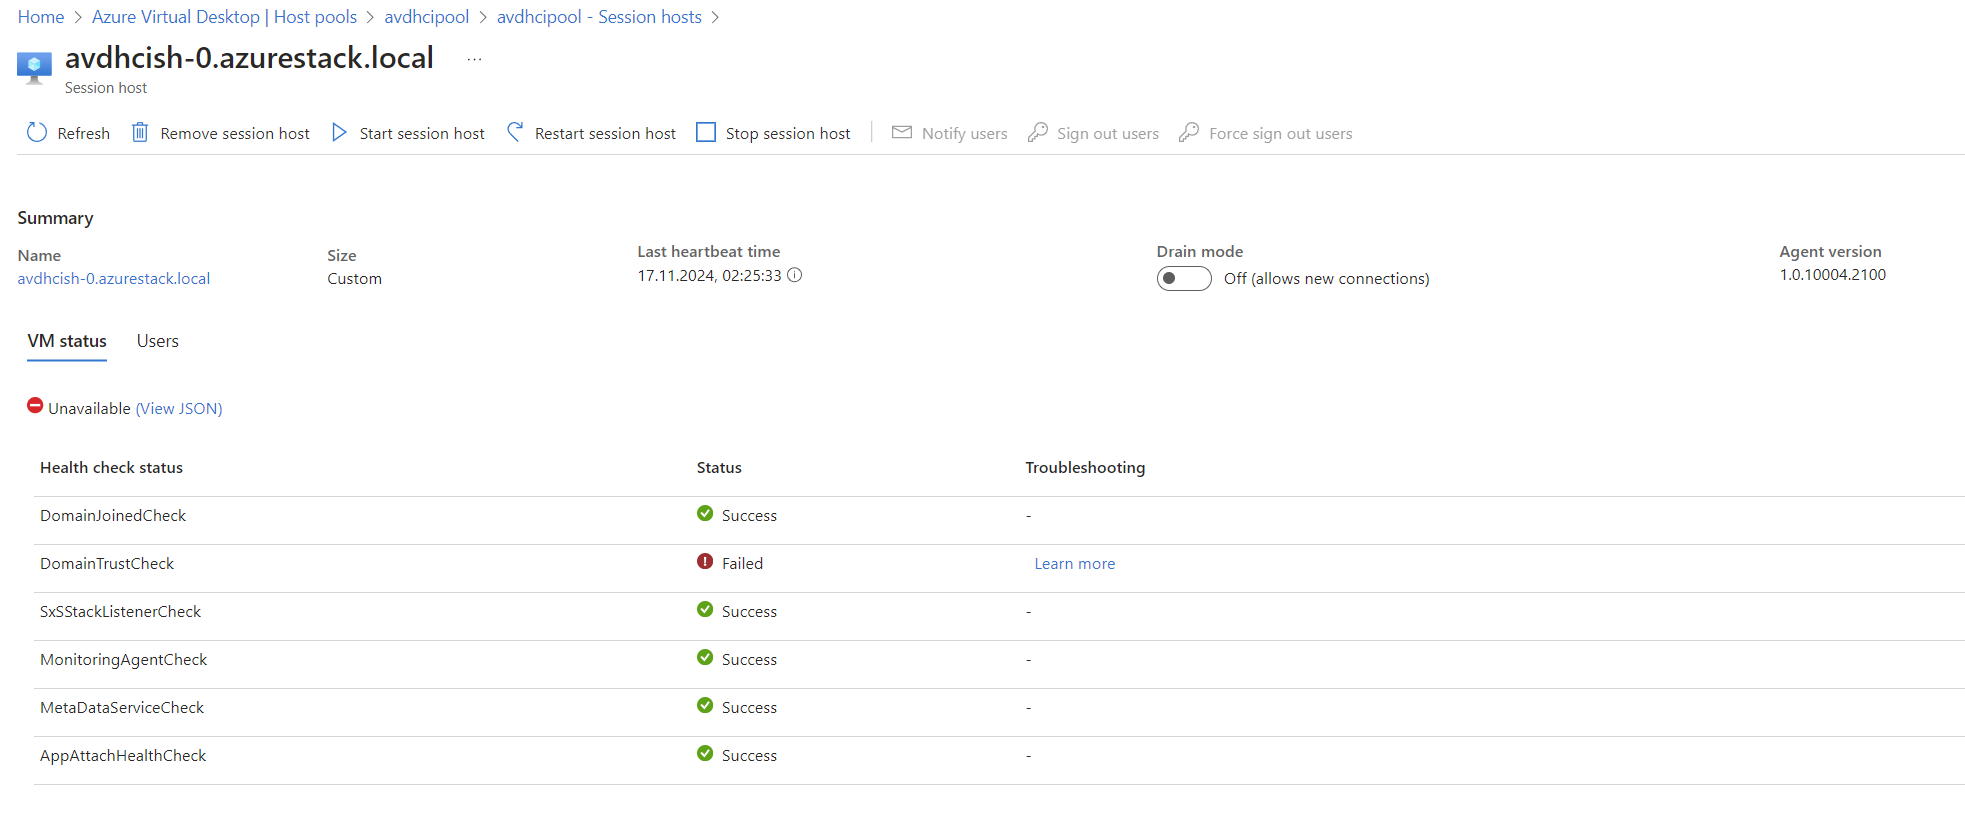
Even though the Session Host shows errors related to Domain Trust, you can safely ignore them. They’re likely due to the fact that I’m using an Active Directory on Windows Server 2025, which has repeatedly lost its network profile.
Connecting to AVD
There are several ways to connect to AVD; I’ll highlight two.
Connection via Web Browser
This is the easiest access method, but keep in mind that all traffic will be encapsulated by the Gateway, potentially making the connection less efficient.
- Accessing via Browser:
- Go to Azure Virtual Desktop Web Client.
- After logging in, everything should work as expected.

Connection via the AVD Client
Currently, there are two clients:
- Remote Desktop App:
- The classic client, downloadable here.
- Windows App:
- The newer, more polished client (my personal favorite), available here.
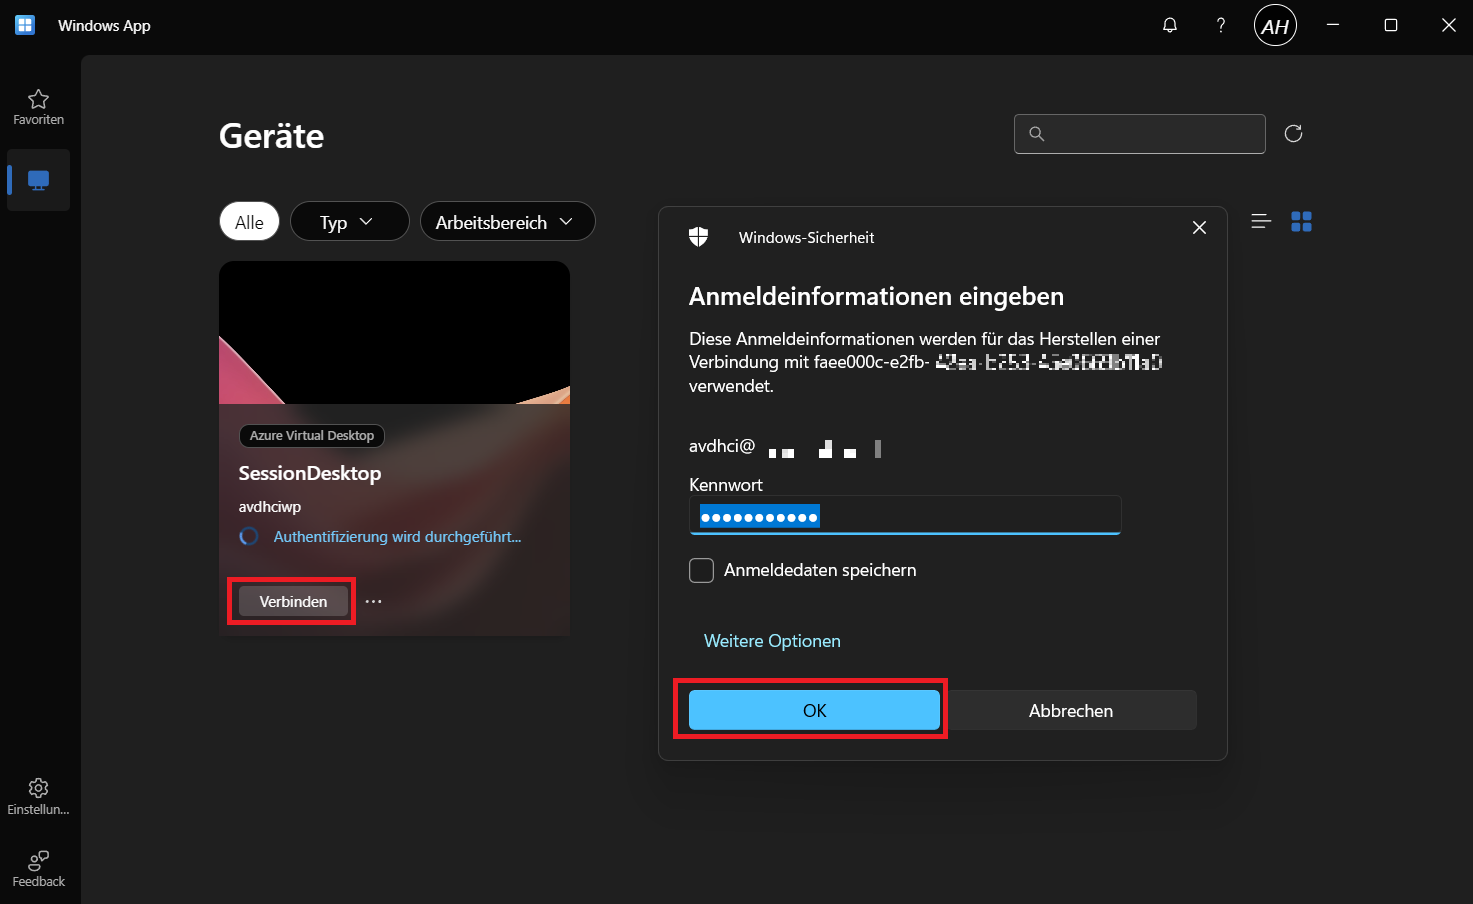
After downloading and logging in with the appropriate user, you’ll see the Session Host as configured.
-
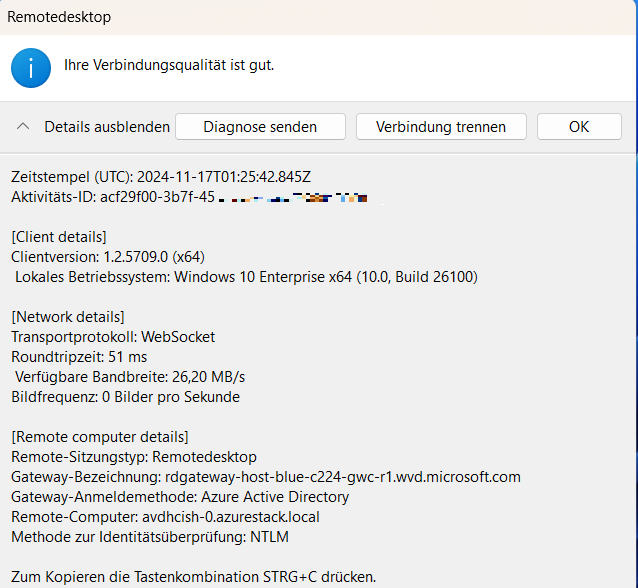
But when checking the status of the connection, you can see that it is using WebSocket, i.e. it is not using RDP Shortpath:
Configuring RDP Shortpath
In order for RDP Shortpath to function as desired, several modifications must be made:
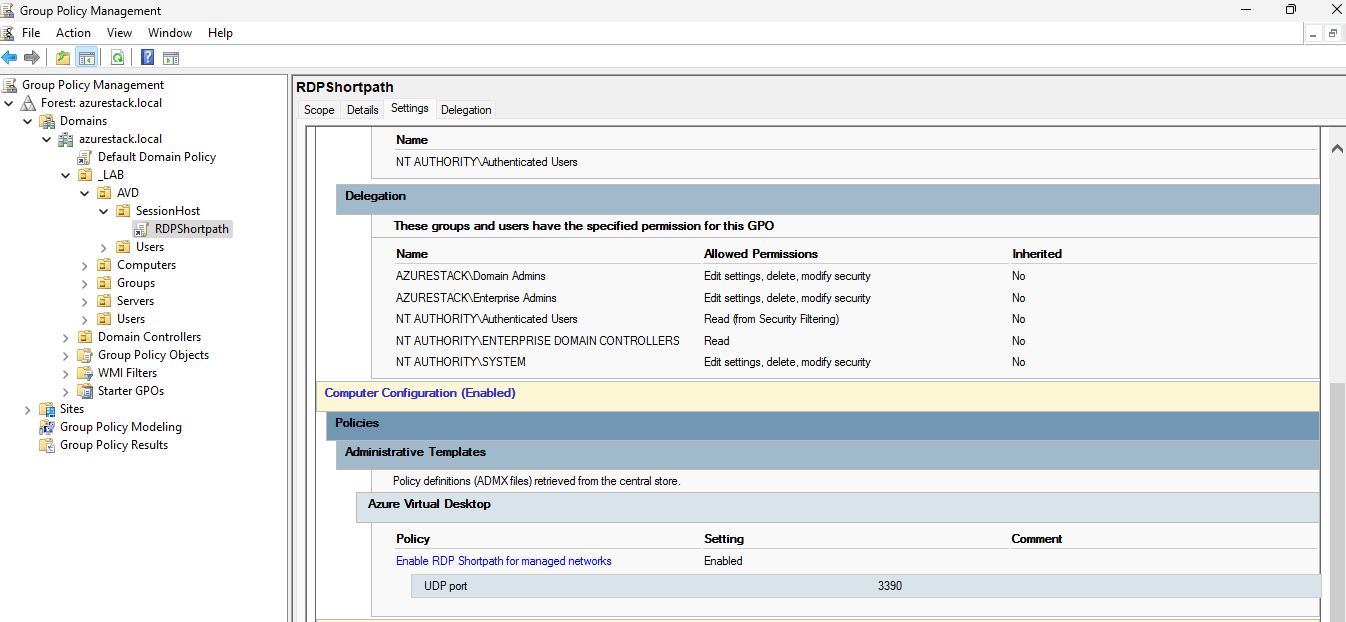
- We will download and configure the GPOs on the domain controller as shown in this guide (RDP Shortpath GPO guide).
- The direct download of the GPOs can be done from here
-
After assigning them as shown in the following image, the firewall must be opened with port 3390 UDP inbound on the Session Host.
-
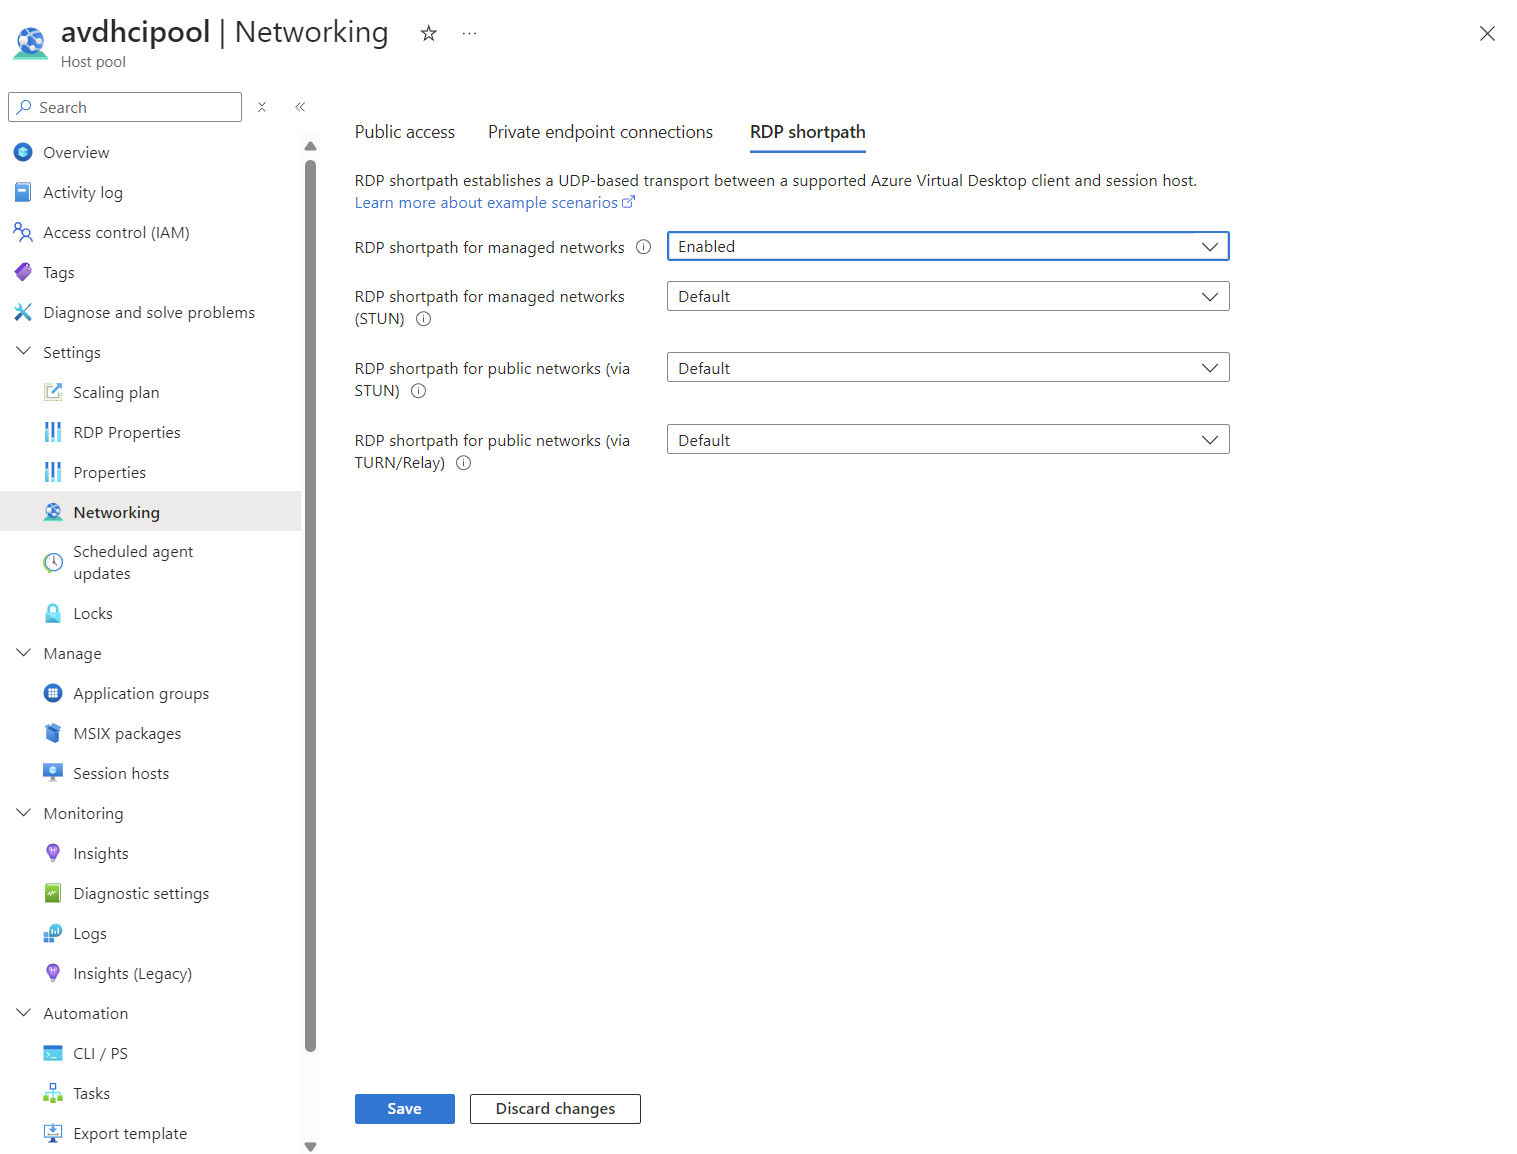
Once the firewall and GPO have been configured (and the Session Host has been restarted), you can “force” the use of RDP Shortpath through the Hostpool network settings, although the default setting is Enabled.
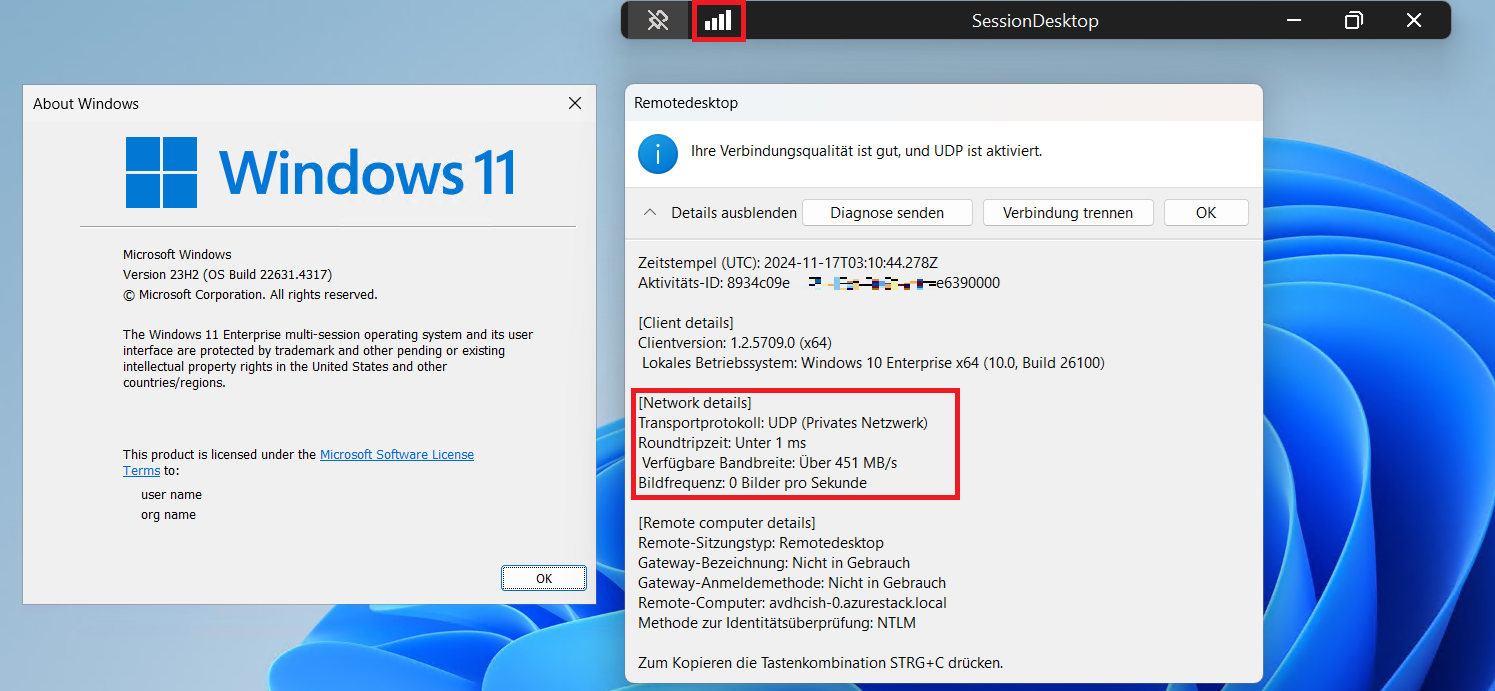
- When all the modifications have finally been carried out, you can see the considerable improvement in the connection:
This concludes our review of RDP Shortpath and the advantages it provides. An interesting comment from microsoft that goes unnoticed is that it is not recommended to use RDP Sortpath via TCP VPNs because it congests the TCP (link to the warning).
If you’re using other VPN types to connect to Azure, we recommend using a UDP-based VPN. While most TCP-based VPN solutions support nested UDP, they add inherited overhead of TCP congestion control, which slows down RDP performance.
Conclusion
Due to time constraints, I haven’t gone into as much depth as I might have liked, otherwise, this article would be excessively long!
There are many topics, like FSLogix for profile management and Multimedia Redirection, that I haven’t touched on but plan to expand upon in future articles when we delve deeper into AVD next year.
I also haven’t discussed third-party tools like Hydra or Nerdio, which significantly simplify and efficiently manage Golden Image versioning (something I didn’t cover here). I promise to thoroughly analyze each of these tools in future installments of the AVD series.
Because of the technical limitations of my DemoLab, I couldn’t demonstrate the solution’s fault tolerance. However, I can tell you that there is some downtime if a cluster node fails, and depending on your configuration, the default ResiliencyDefaultPeriod is 240 seconds (4 minutes).
All that said, I believe this article is both informative and comprehensive. If you need help with any of the points or topics discussed, feel free to reach out through the usual channels, LinkedIn, BlueSky, or right here on the blog.
Thank you all for your time, and happy computing!

Comments